
Table of Contents
Pacific EMIS Education Survey Tool Android App User Guide
The following sections describes how to work with the Education Survey Tool.
Opening the app
You open the app just like any other apps. From your tablet's list of apps screen locate the Education Survey Tool app as shown below and start it.

After a brief welcome screen you should be at the home page as shown below.
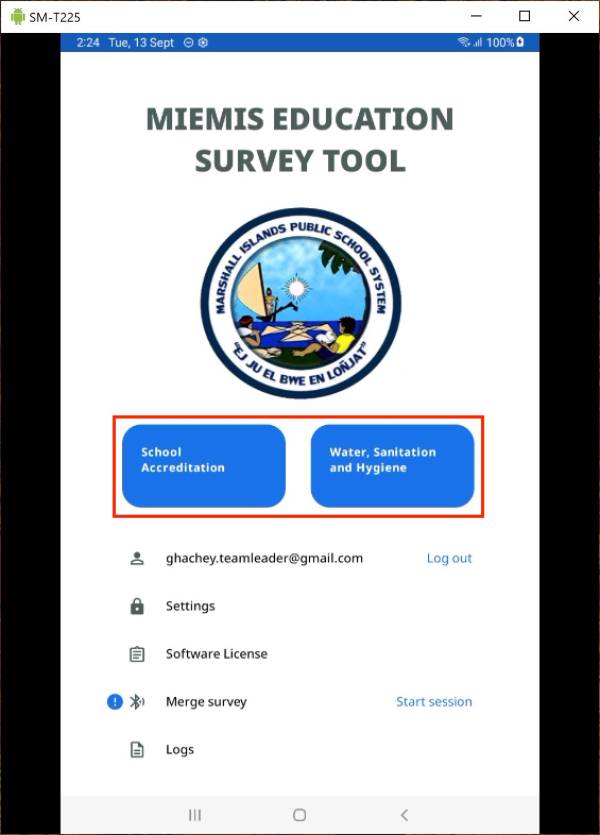
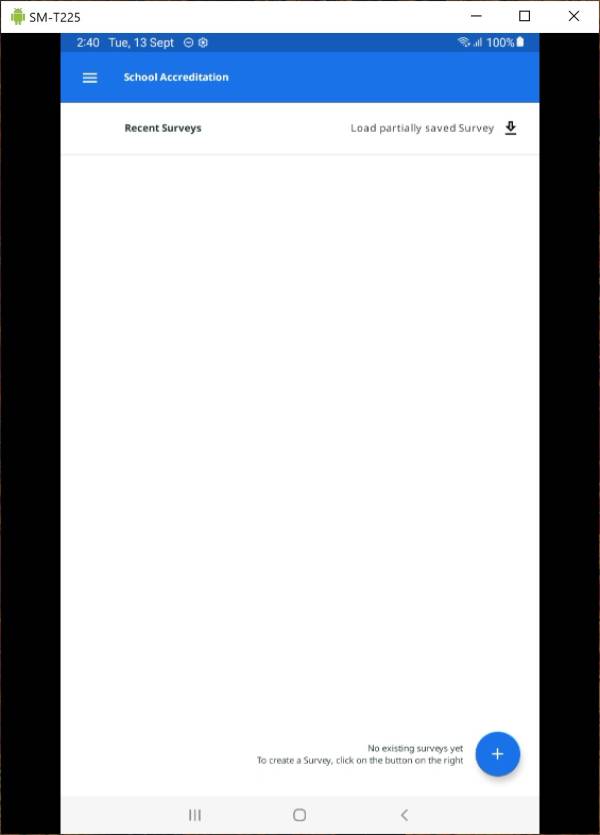
The list of available surveys as shown in red rectangle. If you click on one (School Accreditation for example) you will see the below if no surveys were ever created on the tablet yet.
Creating a survey
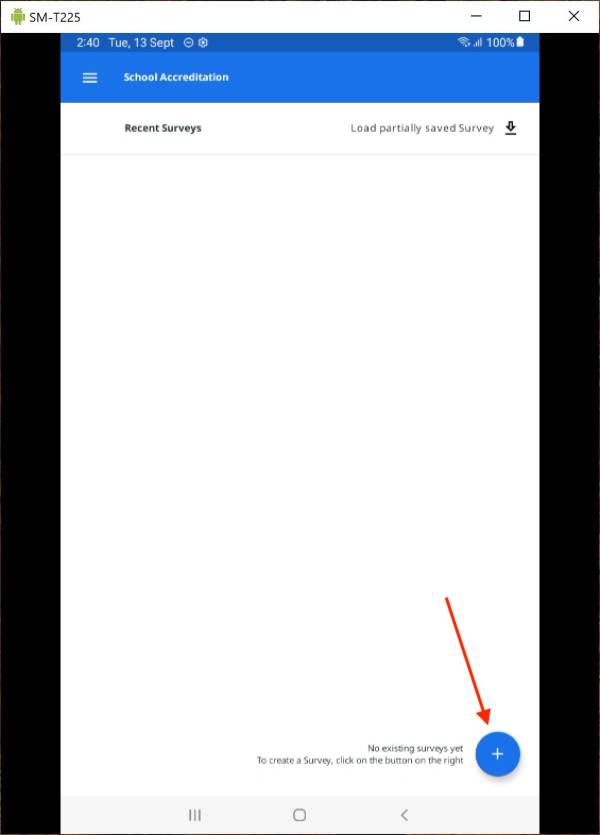
You create a new survey by clicking on the + icon.
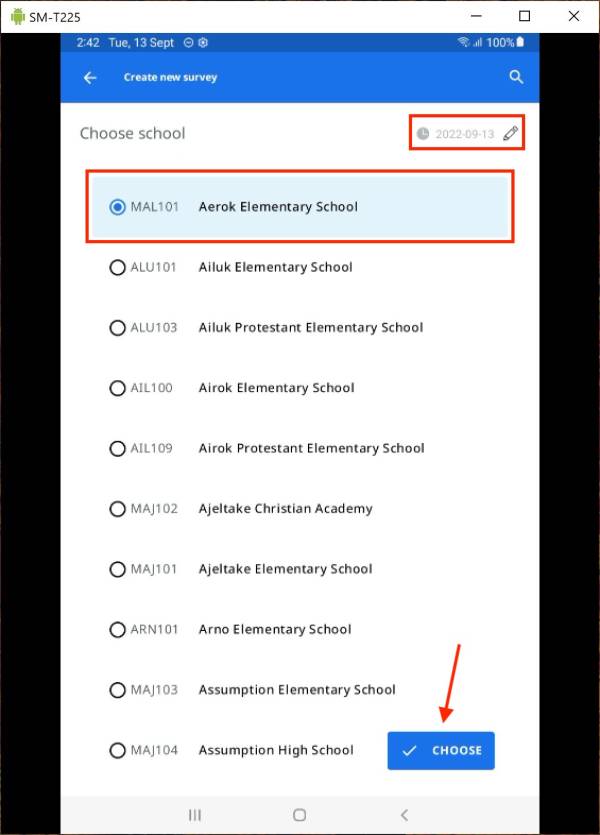
You will see the following. The list of schools in your country which you need to select from. And of interest is the date at the top right corner. Think of that date as a tag for that survey. It become important for advanced features such as offline merging of surveys between tablets. For most cases you can simply leave it unchanged. Then click on Choose when ready to create the new survey for your school.
Conducting a survey
Depending on the type of survey you should see something like the following. The School Accreditation survey used in some countries will be used as it is the most advanced survey. But they all work in nearly identical way.
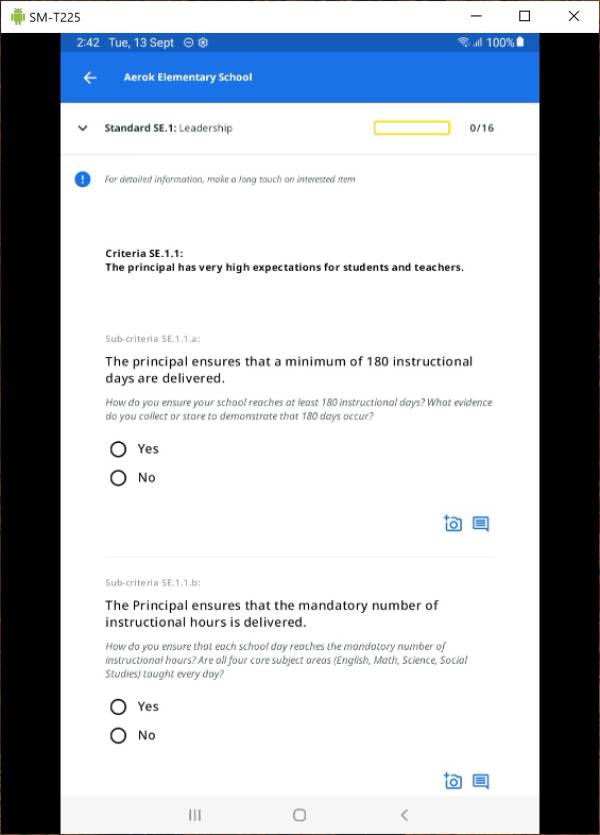
You can simply start answering questions (e.g. Yes/No in this case).
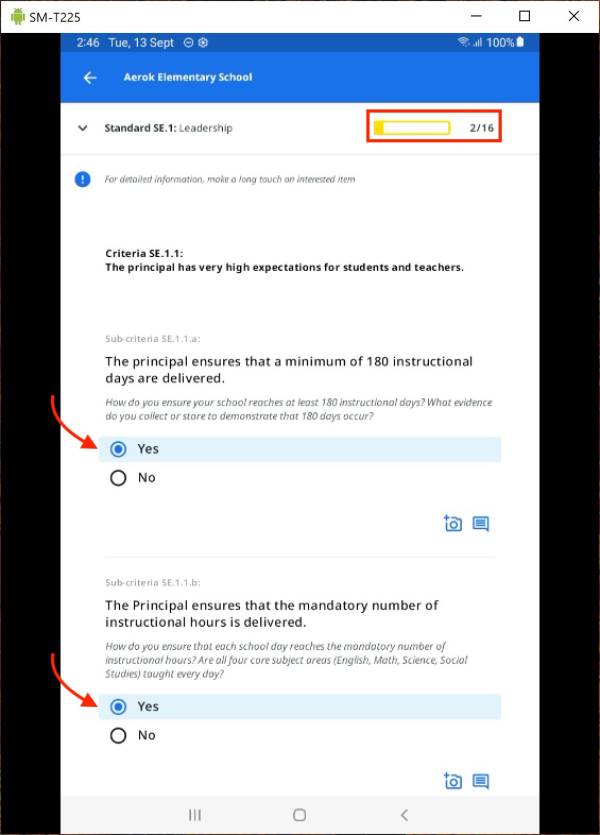
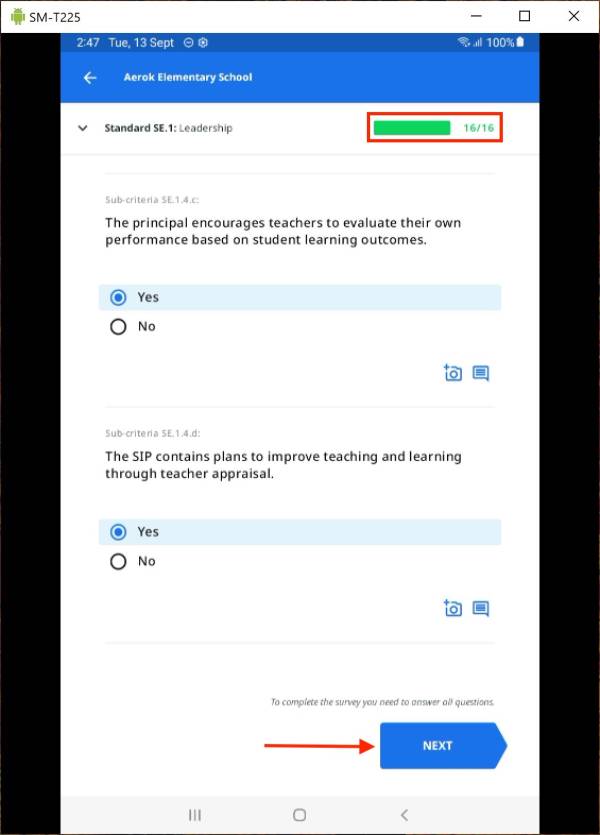
Note has you answer the questions there is a convenient progress bar at the top providing visual aid as to how many questions you have answered and how many left from your current section. At the end a section you can click Next to proceed to the following section.
Adding photos to a survey
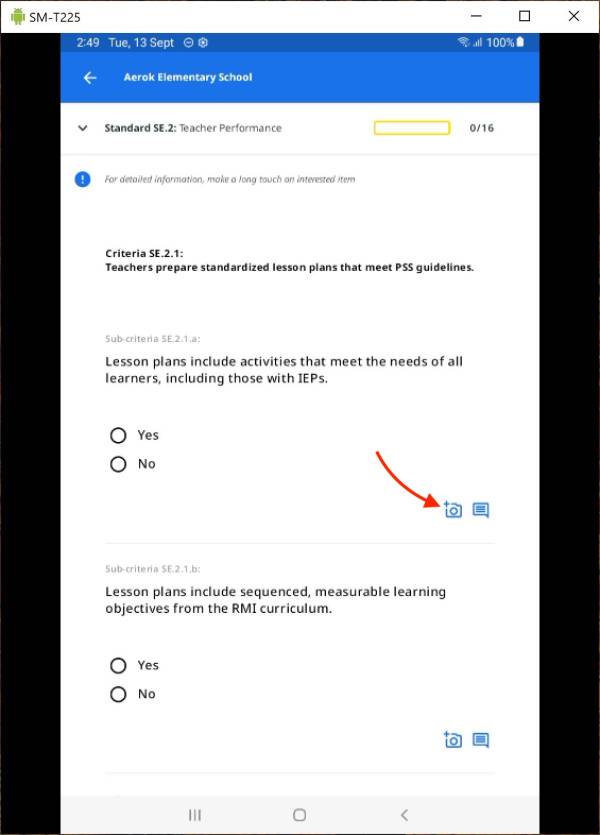
For any question in the survey you can optionally add photos. You simply click on the camera icon as shown below.
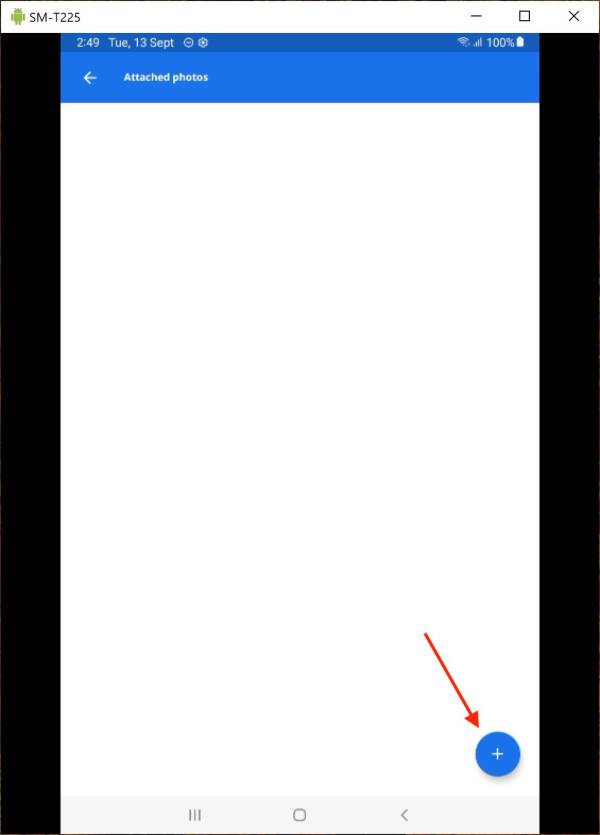
You will get into the following page where you can click on the + icon to open the camera and take a photo.
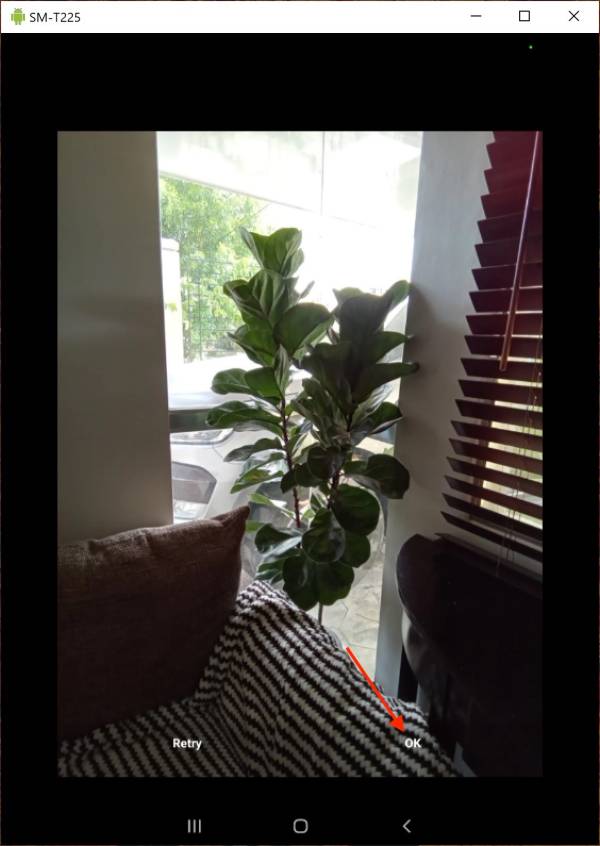
You can click on Ok to accept your photo or Retry to take another better one.
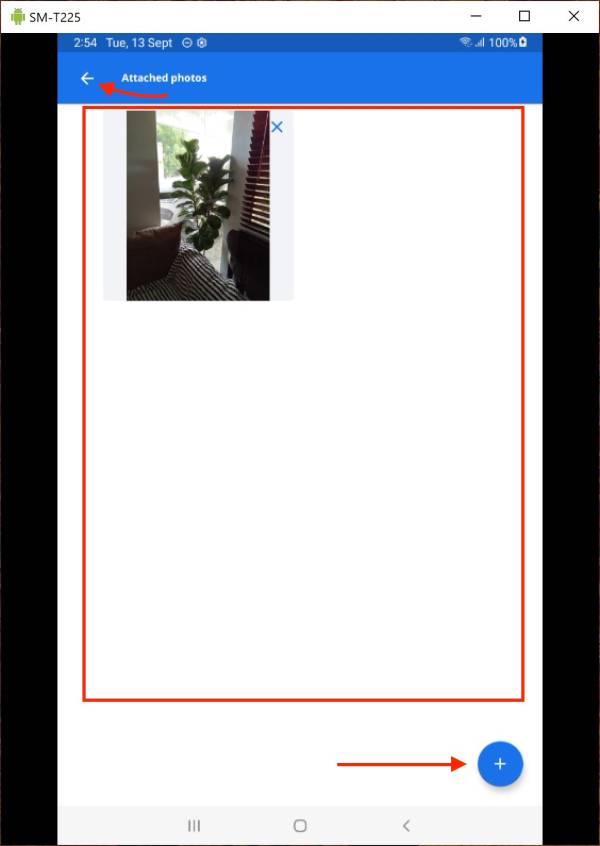
Once added it becauses available as shown below in the mini gallery of photos for that particular question. From there you can click again on the + icon to add more photos or on the back arrow ← icon to return to the survey.
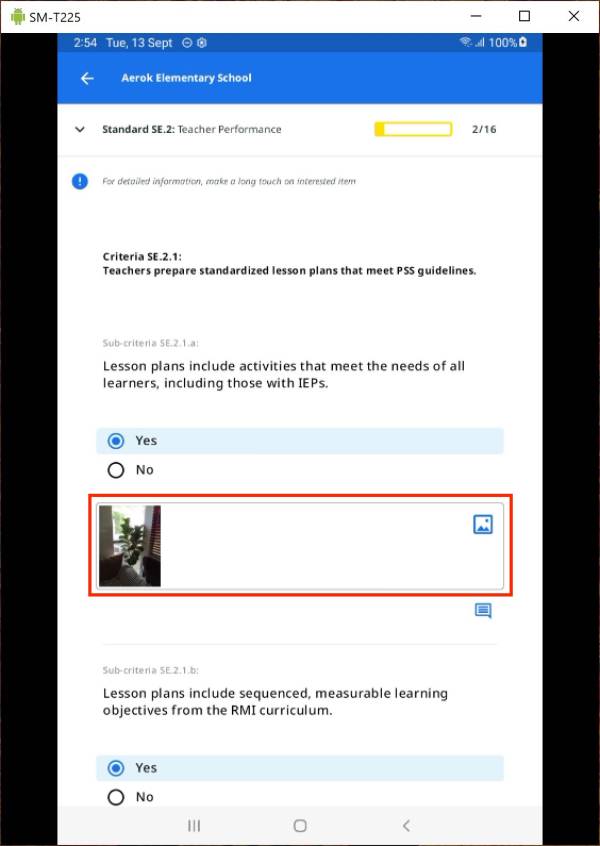
Returning to the survey will display thumbnails of your photos under their respective questions as shown below.
Adding comments to a survey
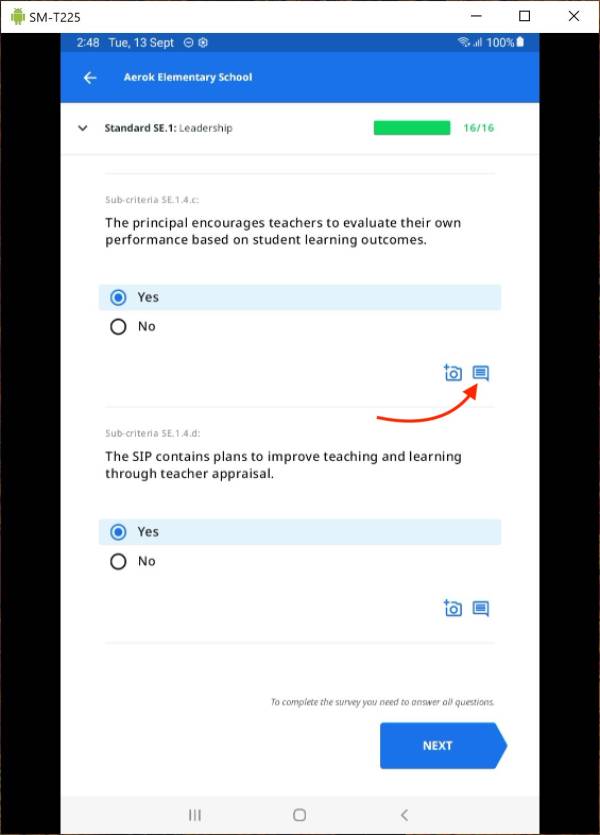
Adding comments to survey answers is similar to adding photos but simpler. Click on the comment icons as shown below.
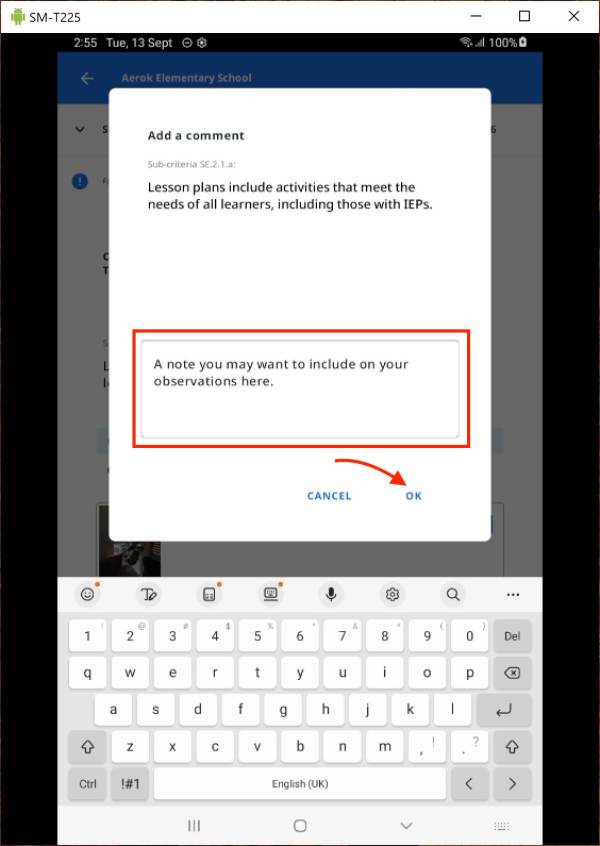
Enter your comment in the text box and click Ok.
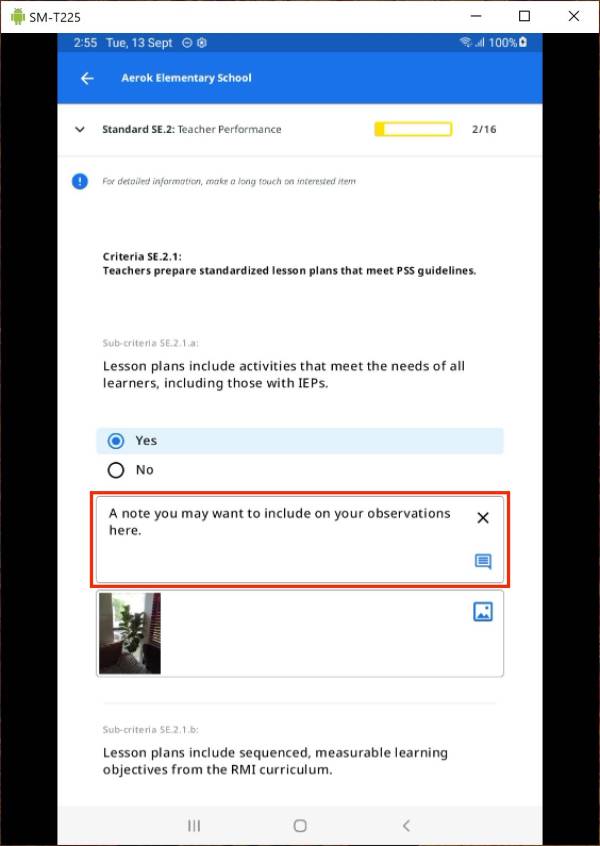
When returning to the survey you will then see the newly added comment as shown below.
Browsing a survey
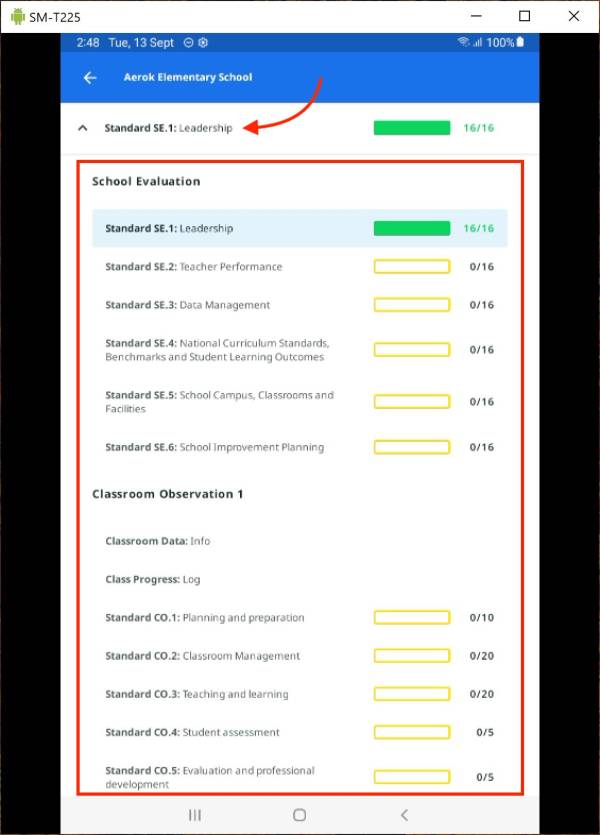
Surveys are often large containing several sections. The app offers a way to quickly browse through the survey. Anywhere in the survey you may be, you can click on the section name as shown below.

It will pull down the survey's categories and sections as shown below in the red rectangle. You can click on any of the sections and it will bring you directly to that section of the survey without having to go through section by section. Clicking back on the section at the top simply pulls back up the menu outline and returns you where you were.
You may also notice that the progress bars are showing there. Pulling down the category and section menu outline is also a way to quickly view progress of each sections for the whole survey at a glance.
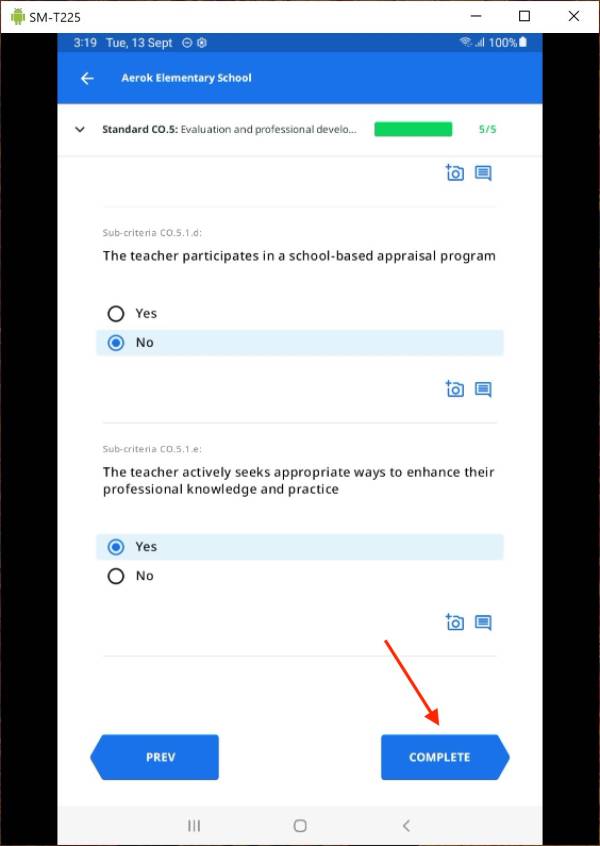
Completing the survey
As you proceed through the whole survey section by section, question by question you will eventually get to the end and instead of Next you will see Complete as shown below. Complete should only be enabled if you have answered all required questions on the survey.
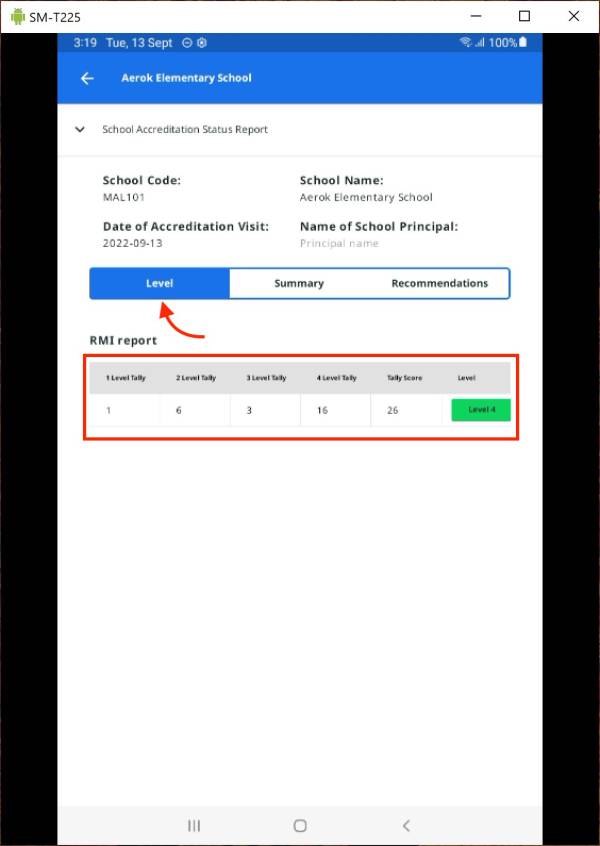
While this is not the case of all surveys the School Accreditation survey has a final report at the end that is automatically produced. The exact format will depend on your country. For example, it would look like the following shown in the next three illustrations.
The final tallies and Level.
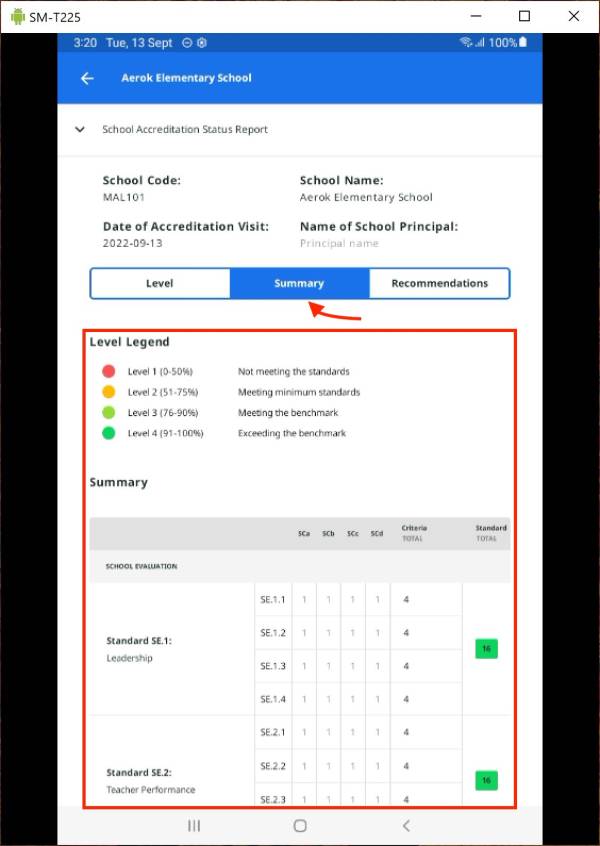
Summary of results by Standards.
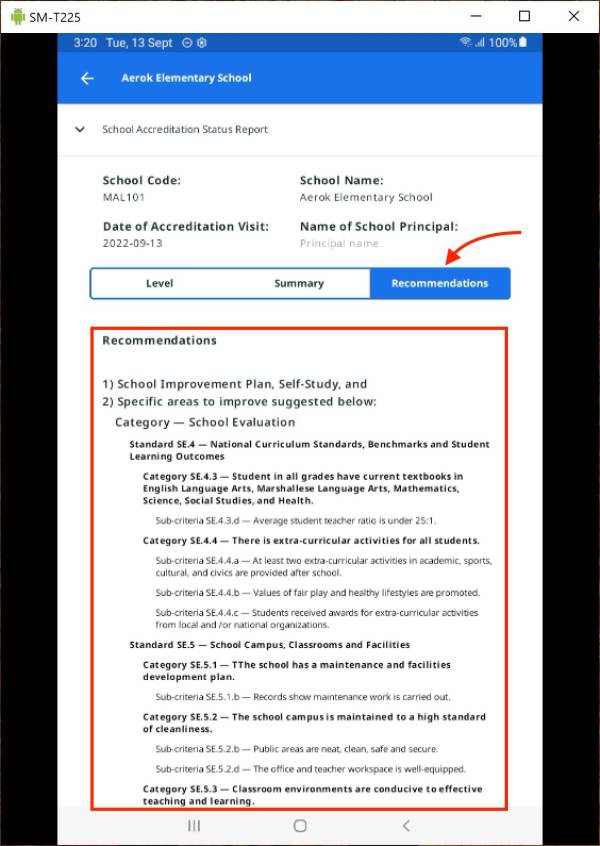
Recommendations.
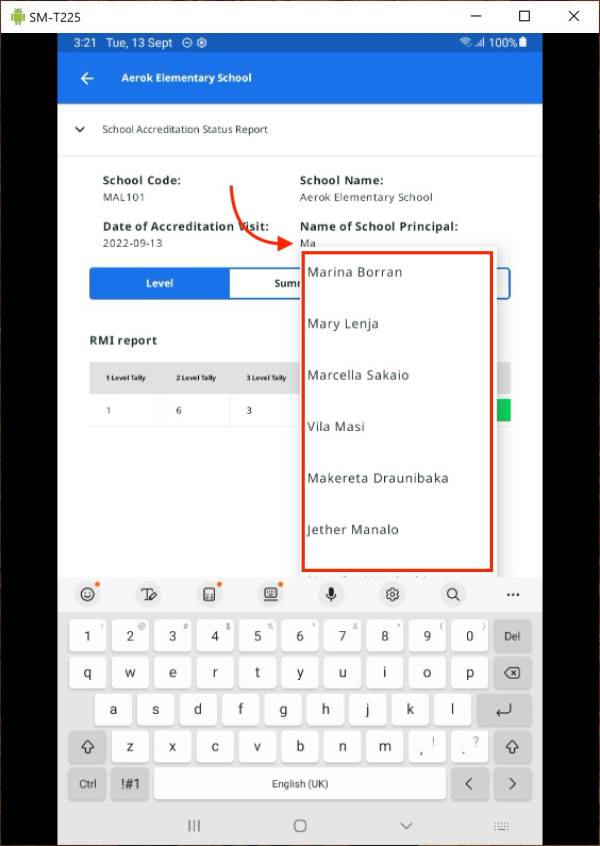
And finally, you can enter the name of the principal of the schools in the report. Click on Principal name, start typing you should get a drop down list of all teachers/principals matching your input.
Returning to list of surveys
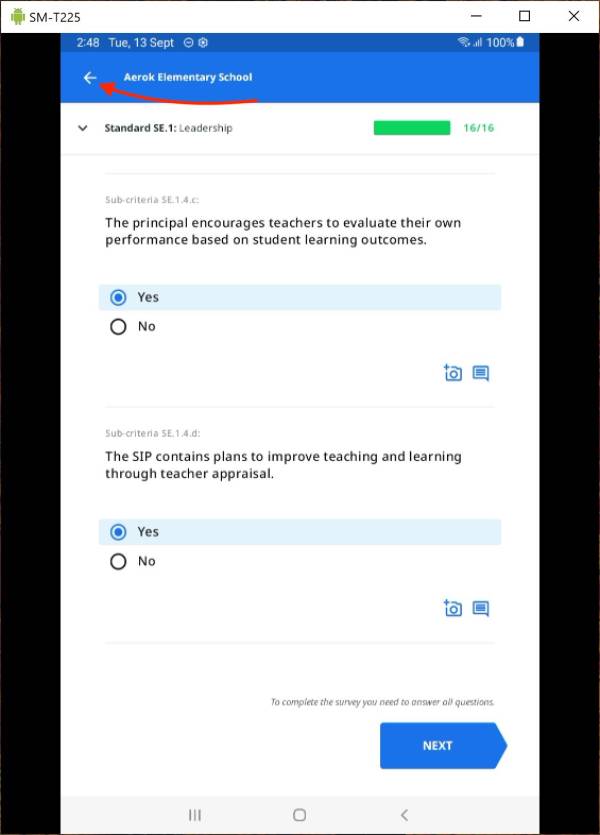
You can return to the list of surveys on the tablet at any time by clicking on the back arrow next to the school name as shown below.
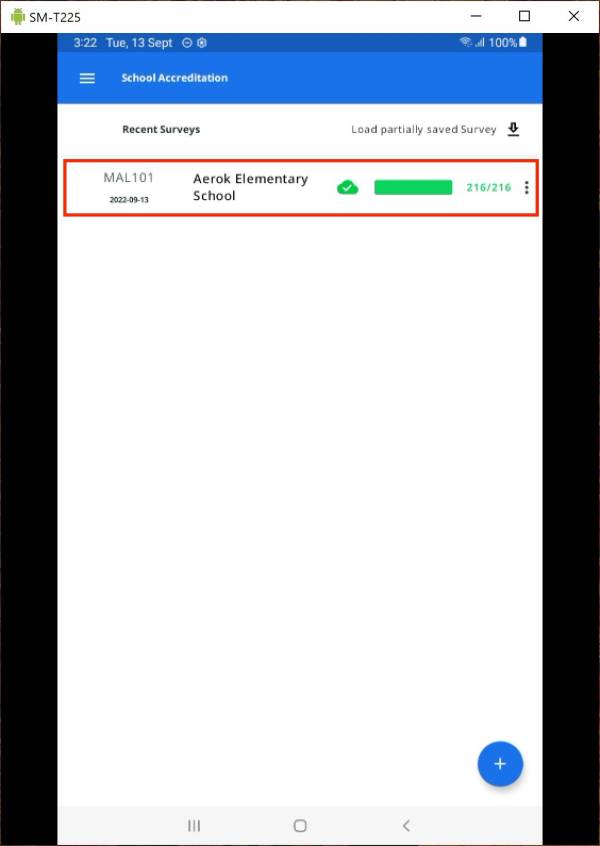
You will see the list of surveys on your tablet. Below you see a single completed survey. Note the progress bar for the overall survey is also available here at all times providing your feedback on your progress.
Whenever the tablet is connected to the Internet it will automatically sync with the Pacific EMIS cloud account. The surveys from the tablet then become available in the Pacific EMIS online web app as shown below.
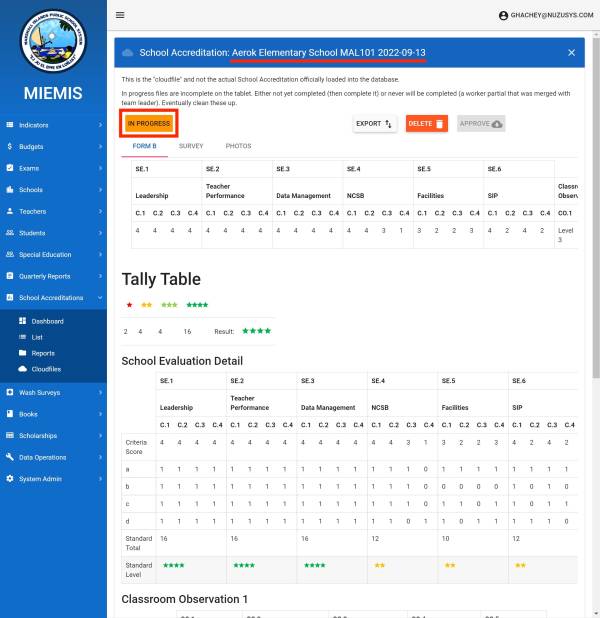
You could enter and view the actual cloud file survey completed on the tablet as shown below.
Survey Cloud Syncing Status
This Education Survey Tool is design to:
- work as an offline tool (since it is often used to conduct surveys in rural areas with limited to no Internet connectivity)
- automatically sync to the Pacific EMIS cloud account when Internet becomes available
- fully stream lined with the Pacific EMIS where cloud files can be viewed, approved and loaded into the database, or deleted.
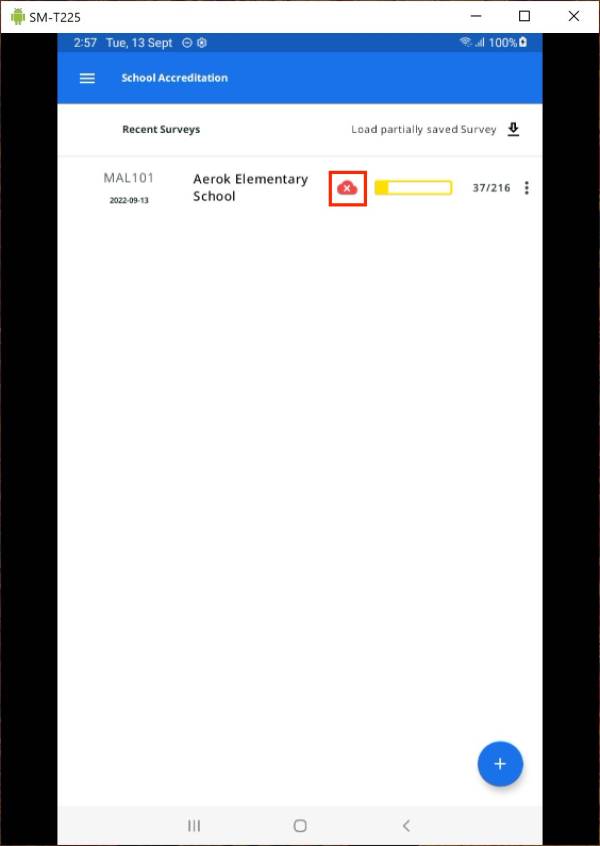
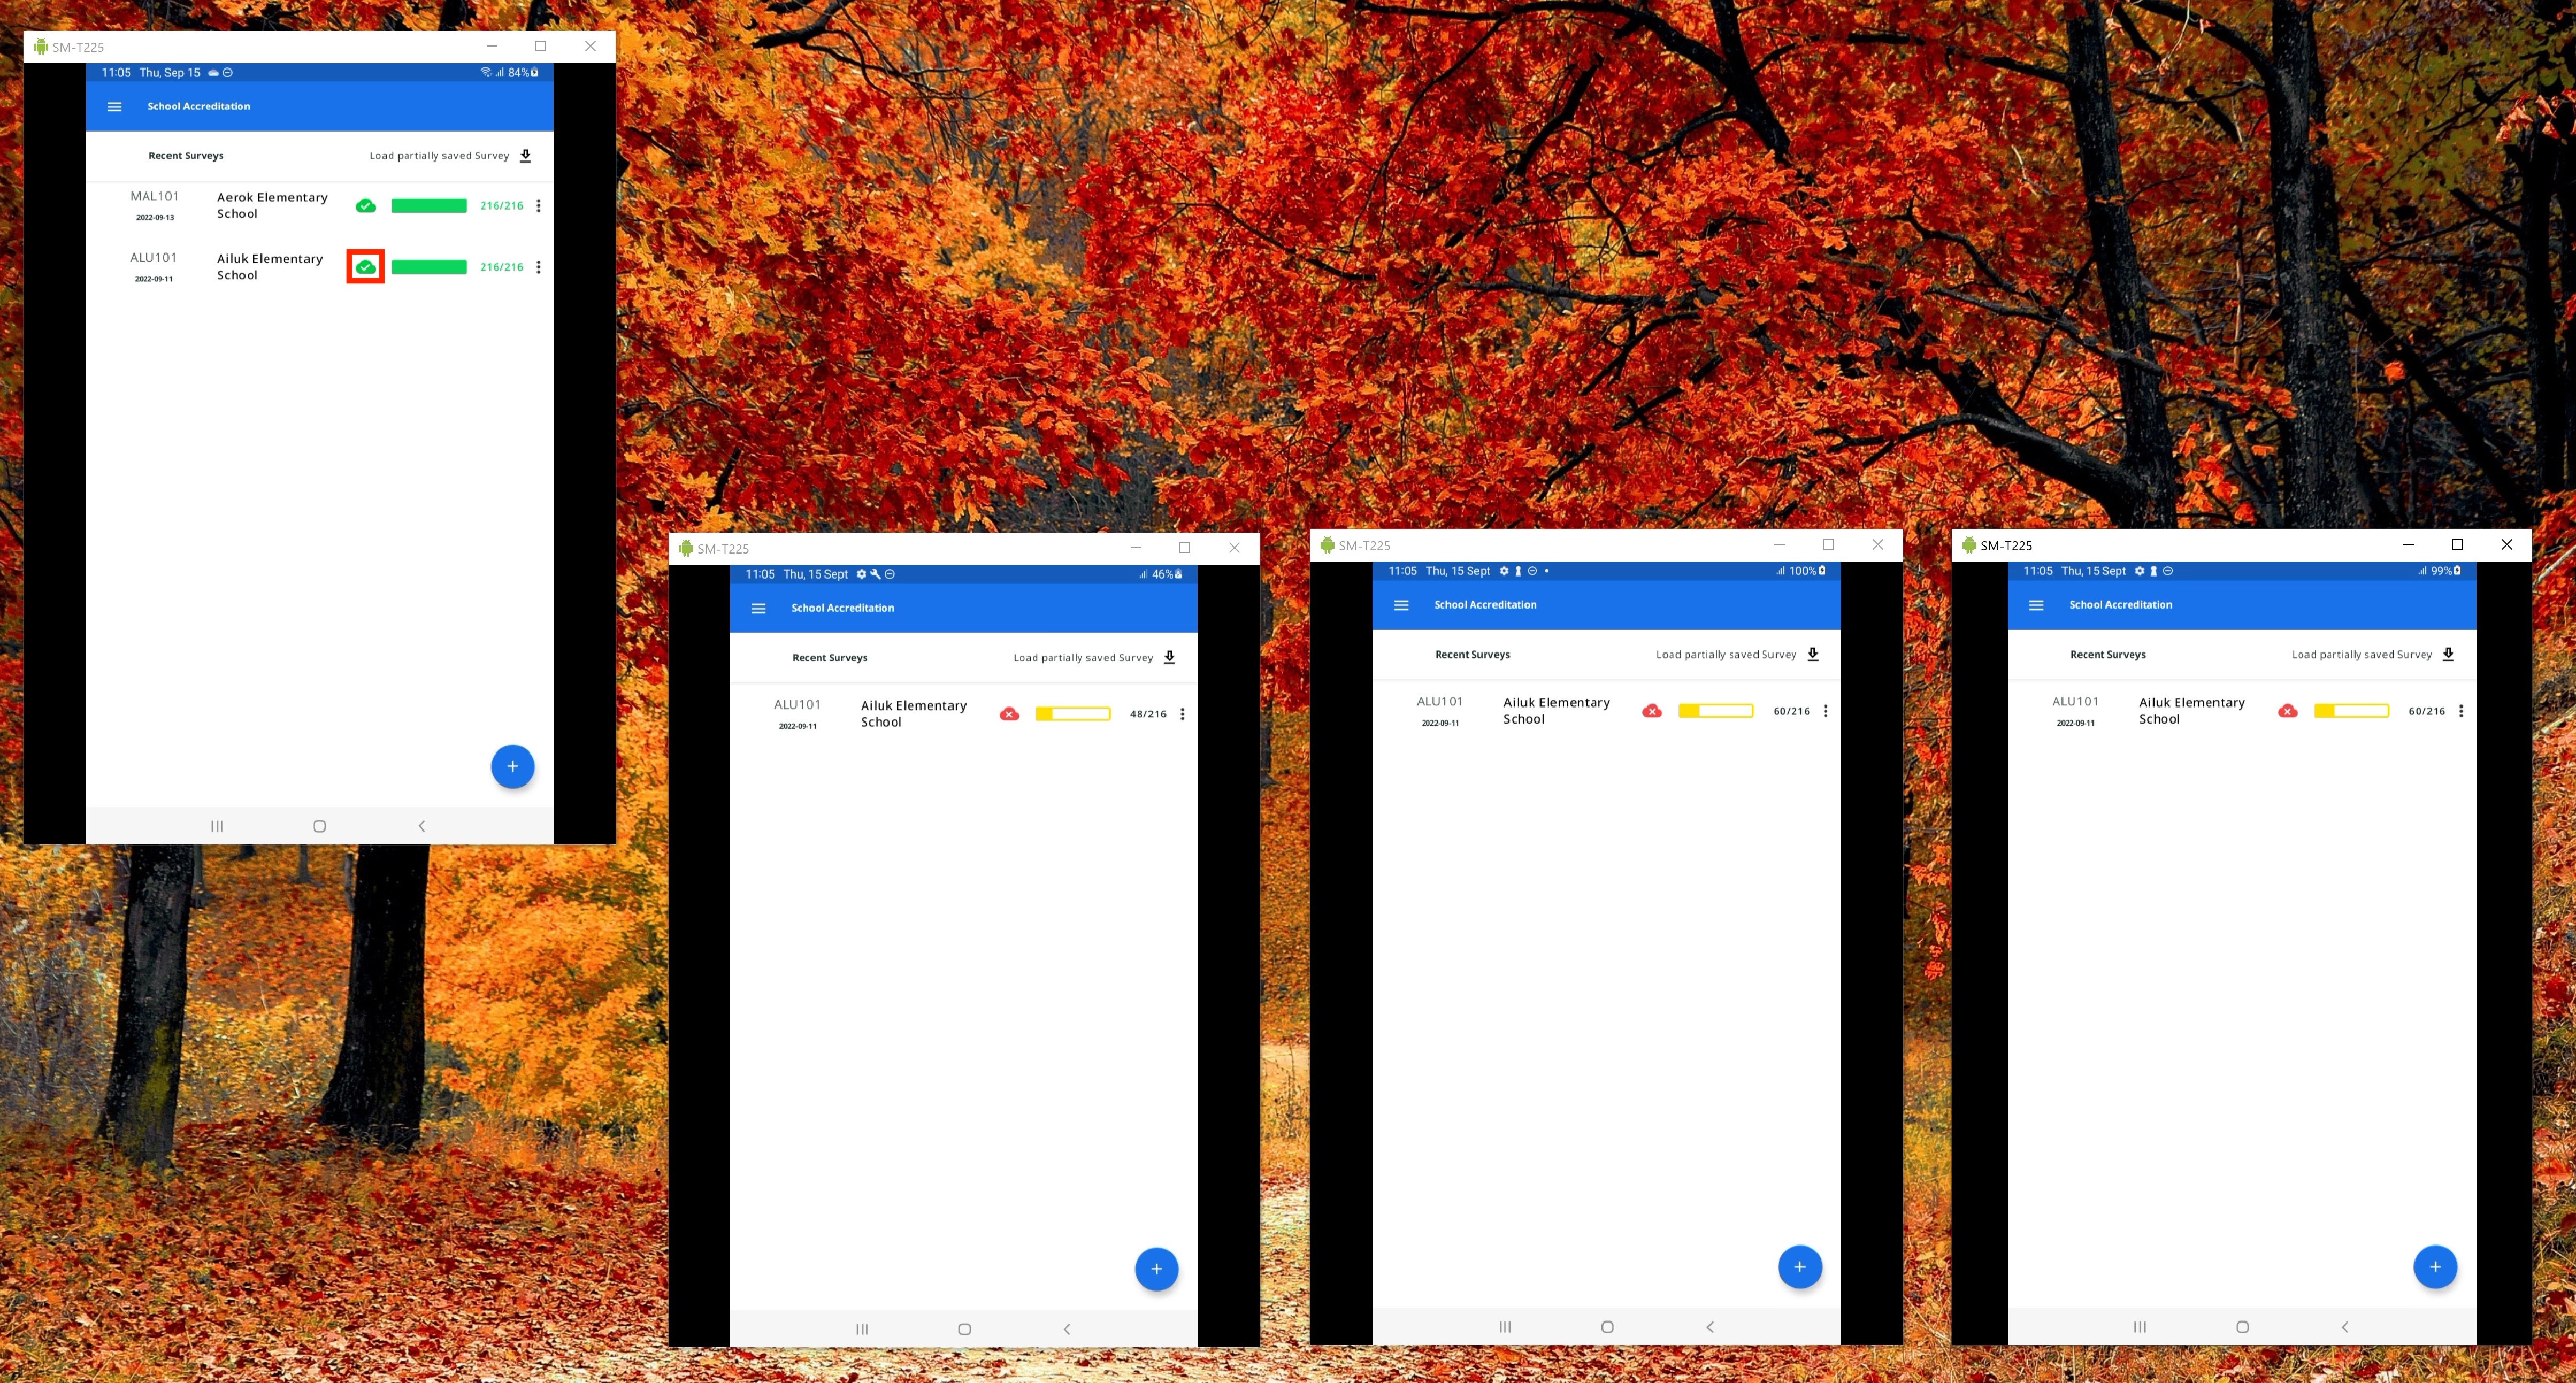
The user can observe the syncing with the cloud status. The red cloud icon as shown below means that the recent changes on the tablet have not started syncing.
The yellow cloud icon as shown below means that the recent changes on the tablet are currently syncing with the cloud.

The green cloud icon as shown below means that the recent changes on the tablet have completely synced and the version on the tablet is the same as the version on the cloud account.

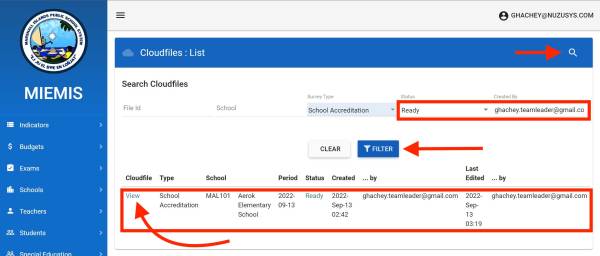
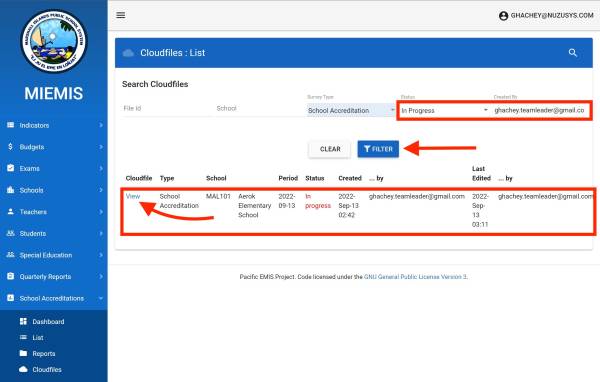
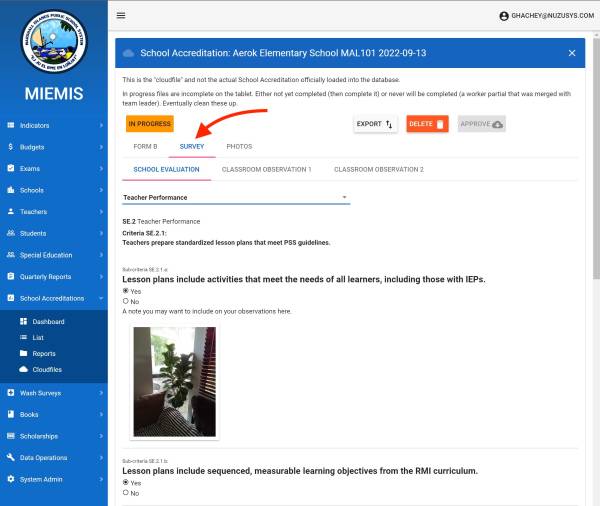
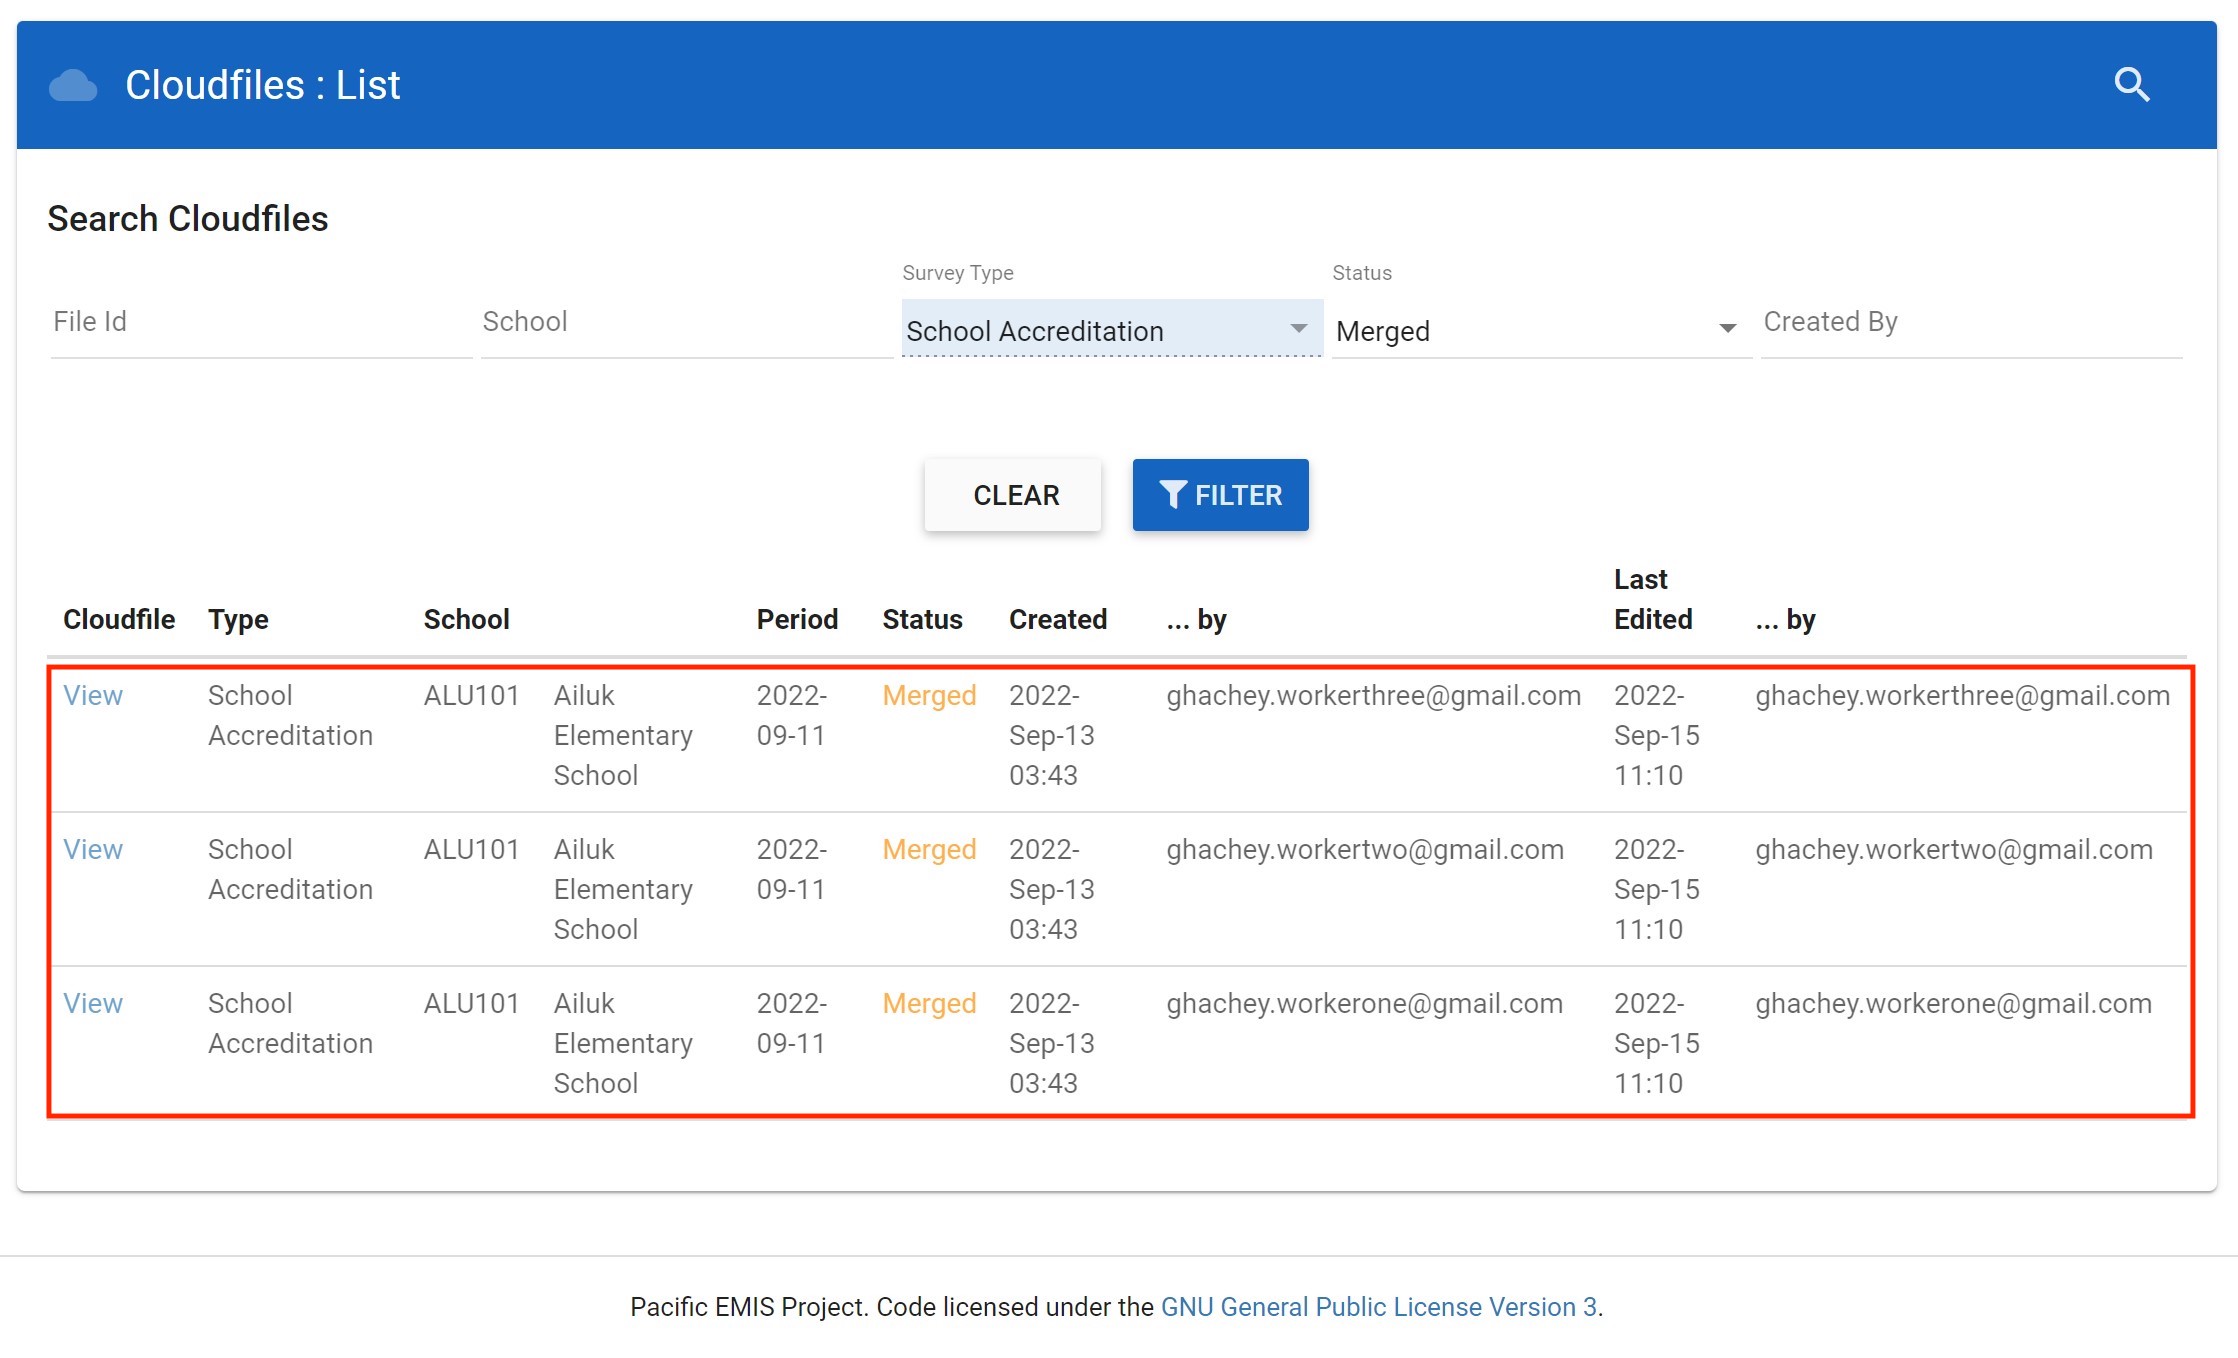
So what does it mean to sync to the cloud? It means you can access it from within the Pacific EMIS online web app. You can search and locate your cloud files as shown below.
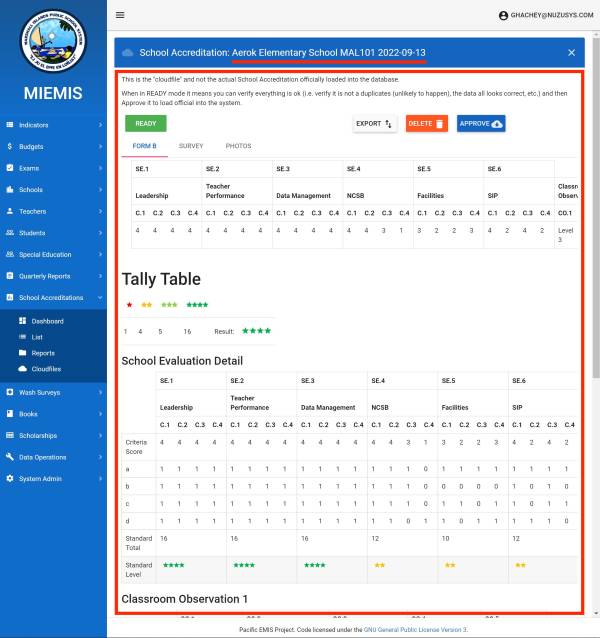
Open it and preview the cloud file. The below shows an optional report called “Form B” that is not typically always available in surveys.
Click on Survey to access all the survey data as shown below.
[Optional] Offline merging of surveys between tablets
The tablet app has a special feature that while not required may be desired by some teams. It can merge partial surveys from tablets to tablets offline (not WiFi, no Internet) using Bluetooth technology. This may be required in the following real world scenario used by a country. Since the surveys are large they are conducted by a team of typically four individuals. For the purpose of this merging feature the four individual should be organized as follows:
- Team Leader
- Worker 1
- Worker 2
- Worker 3
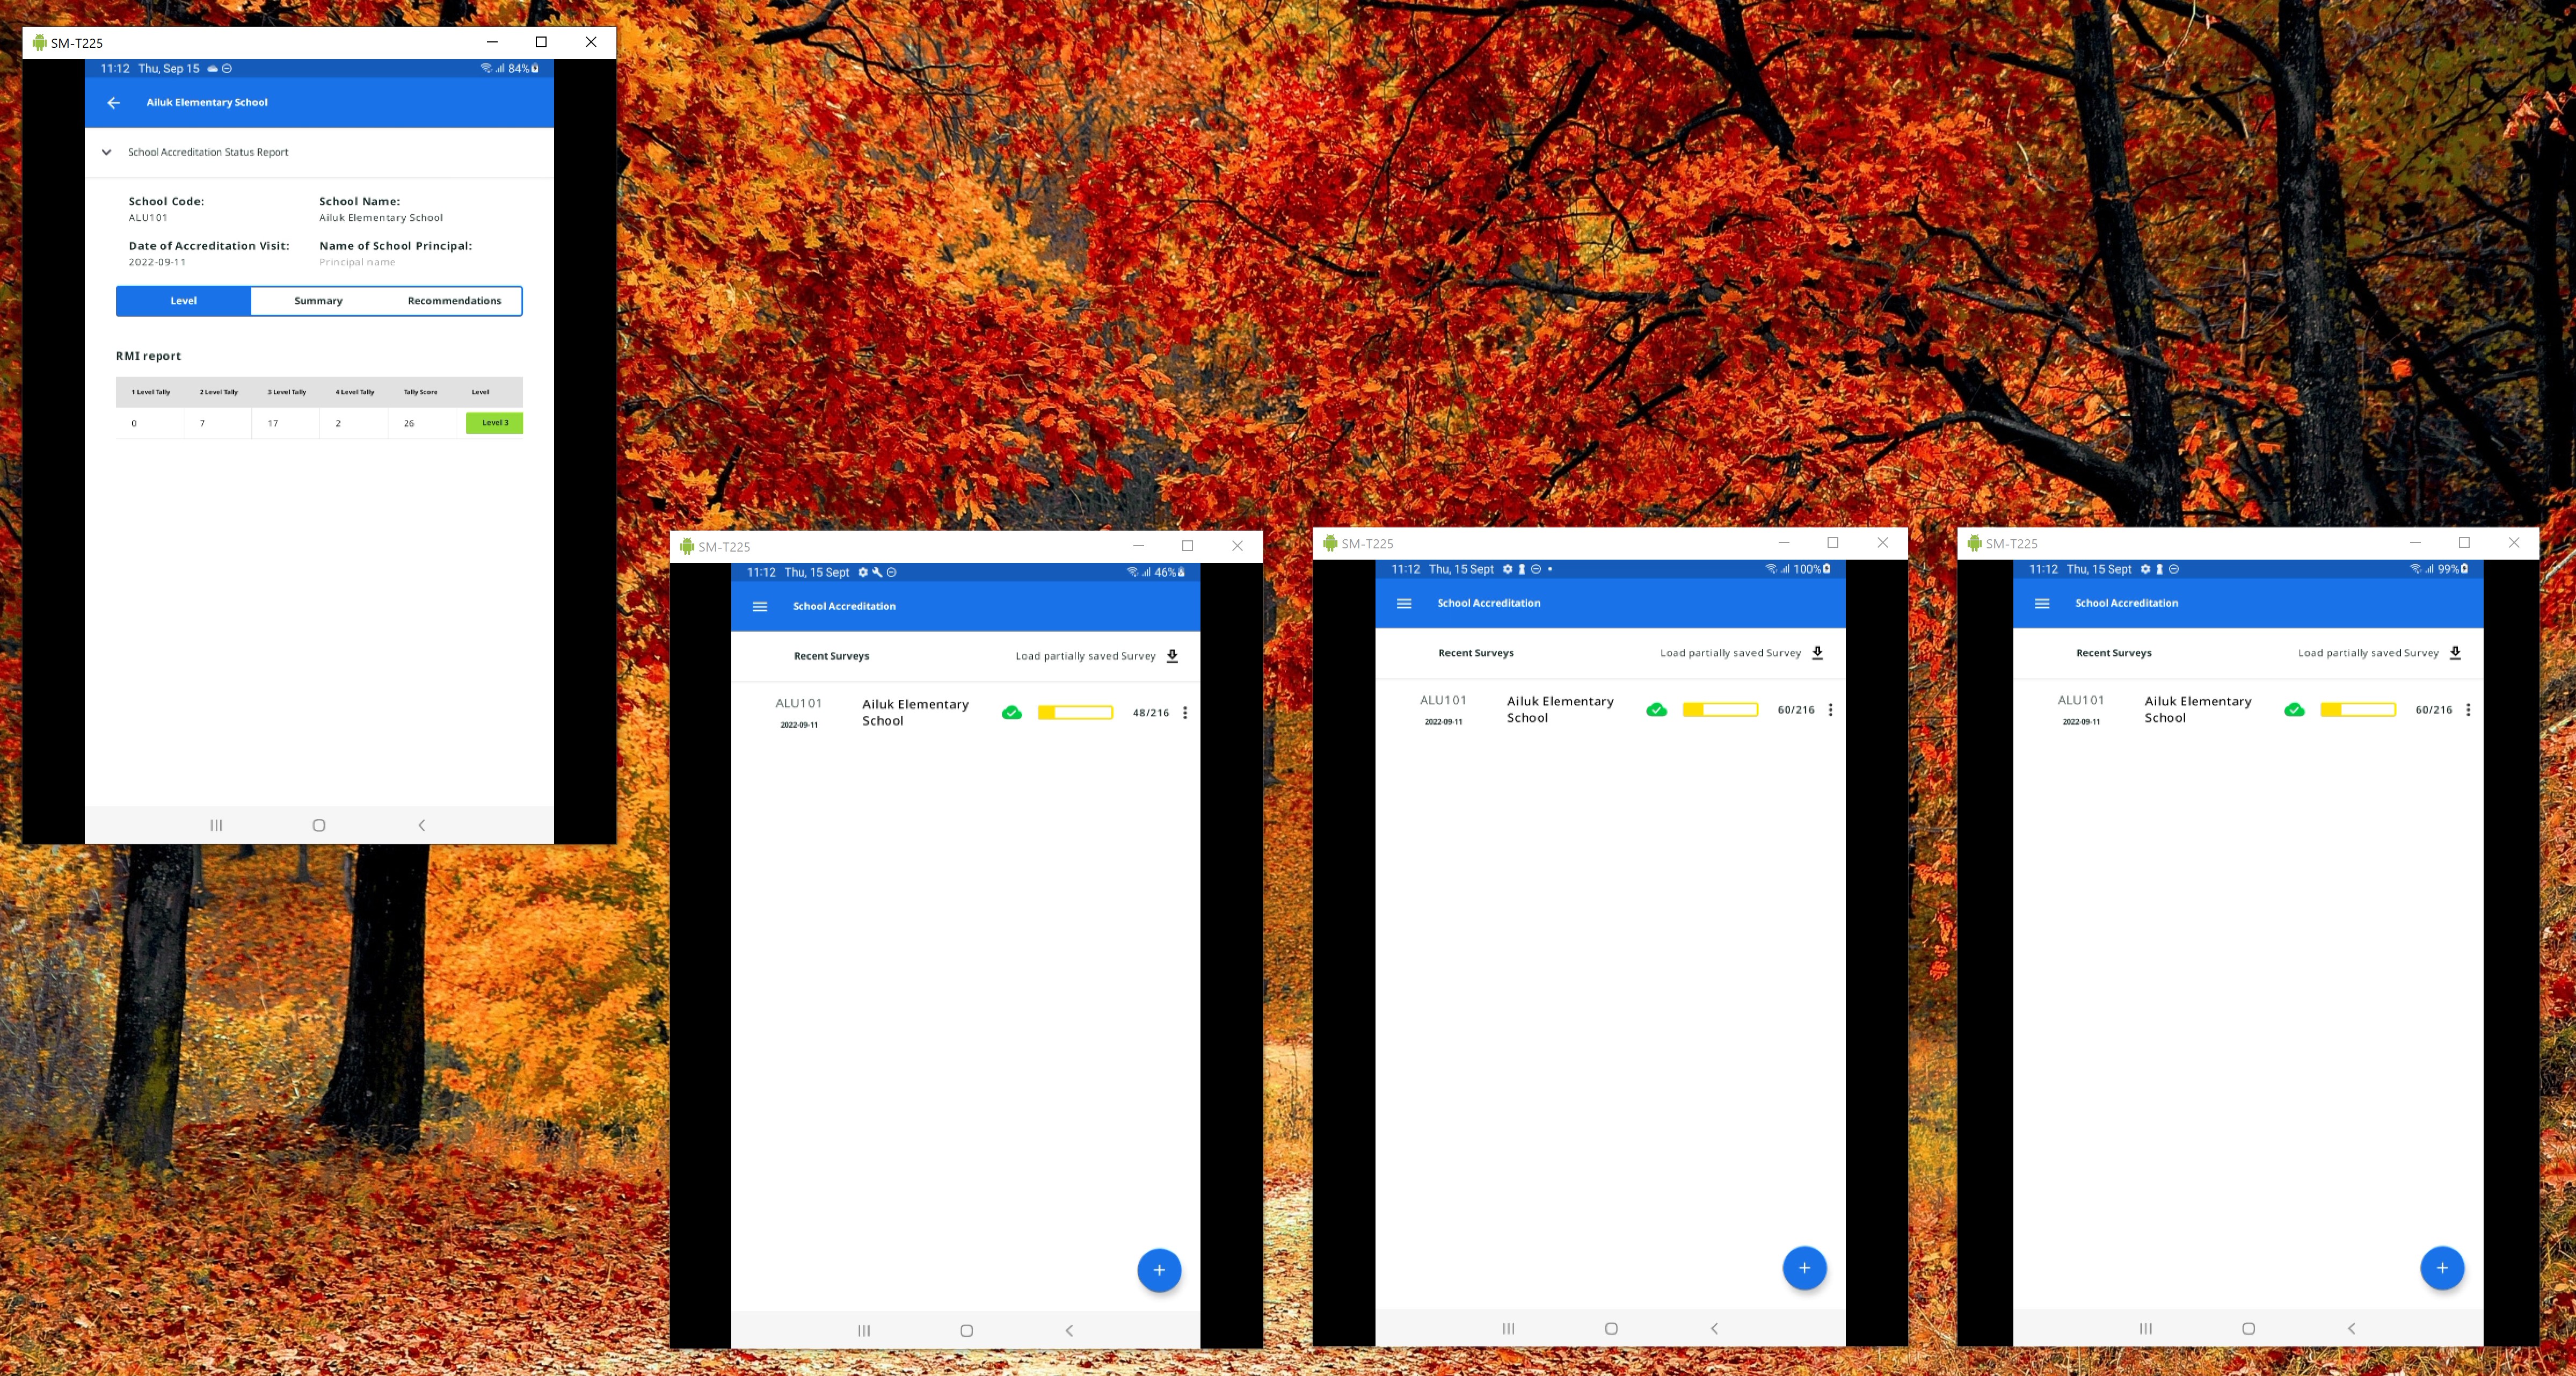
This is depicted in the layout of the four tablets used for demonstration purposes below.
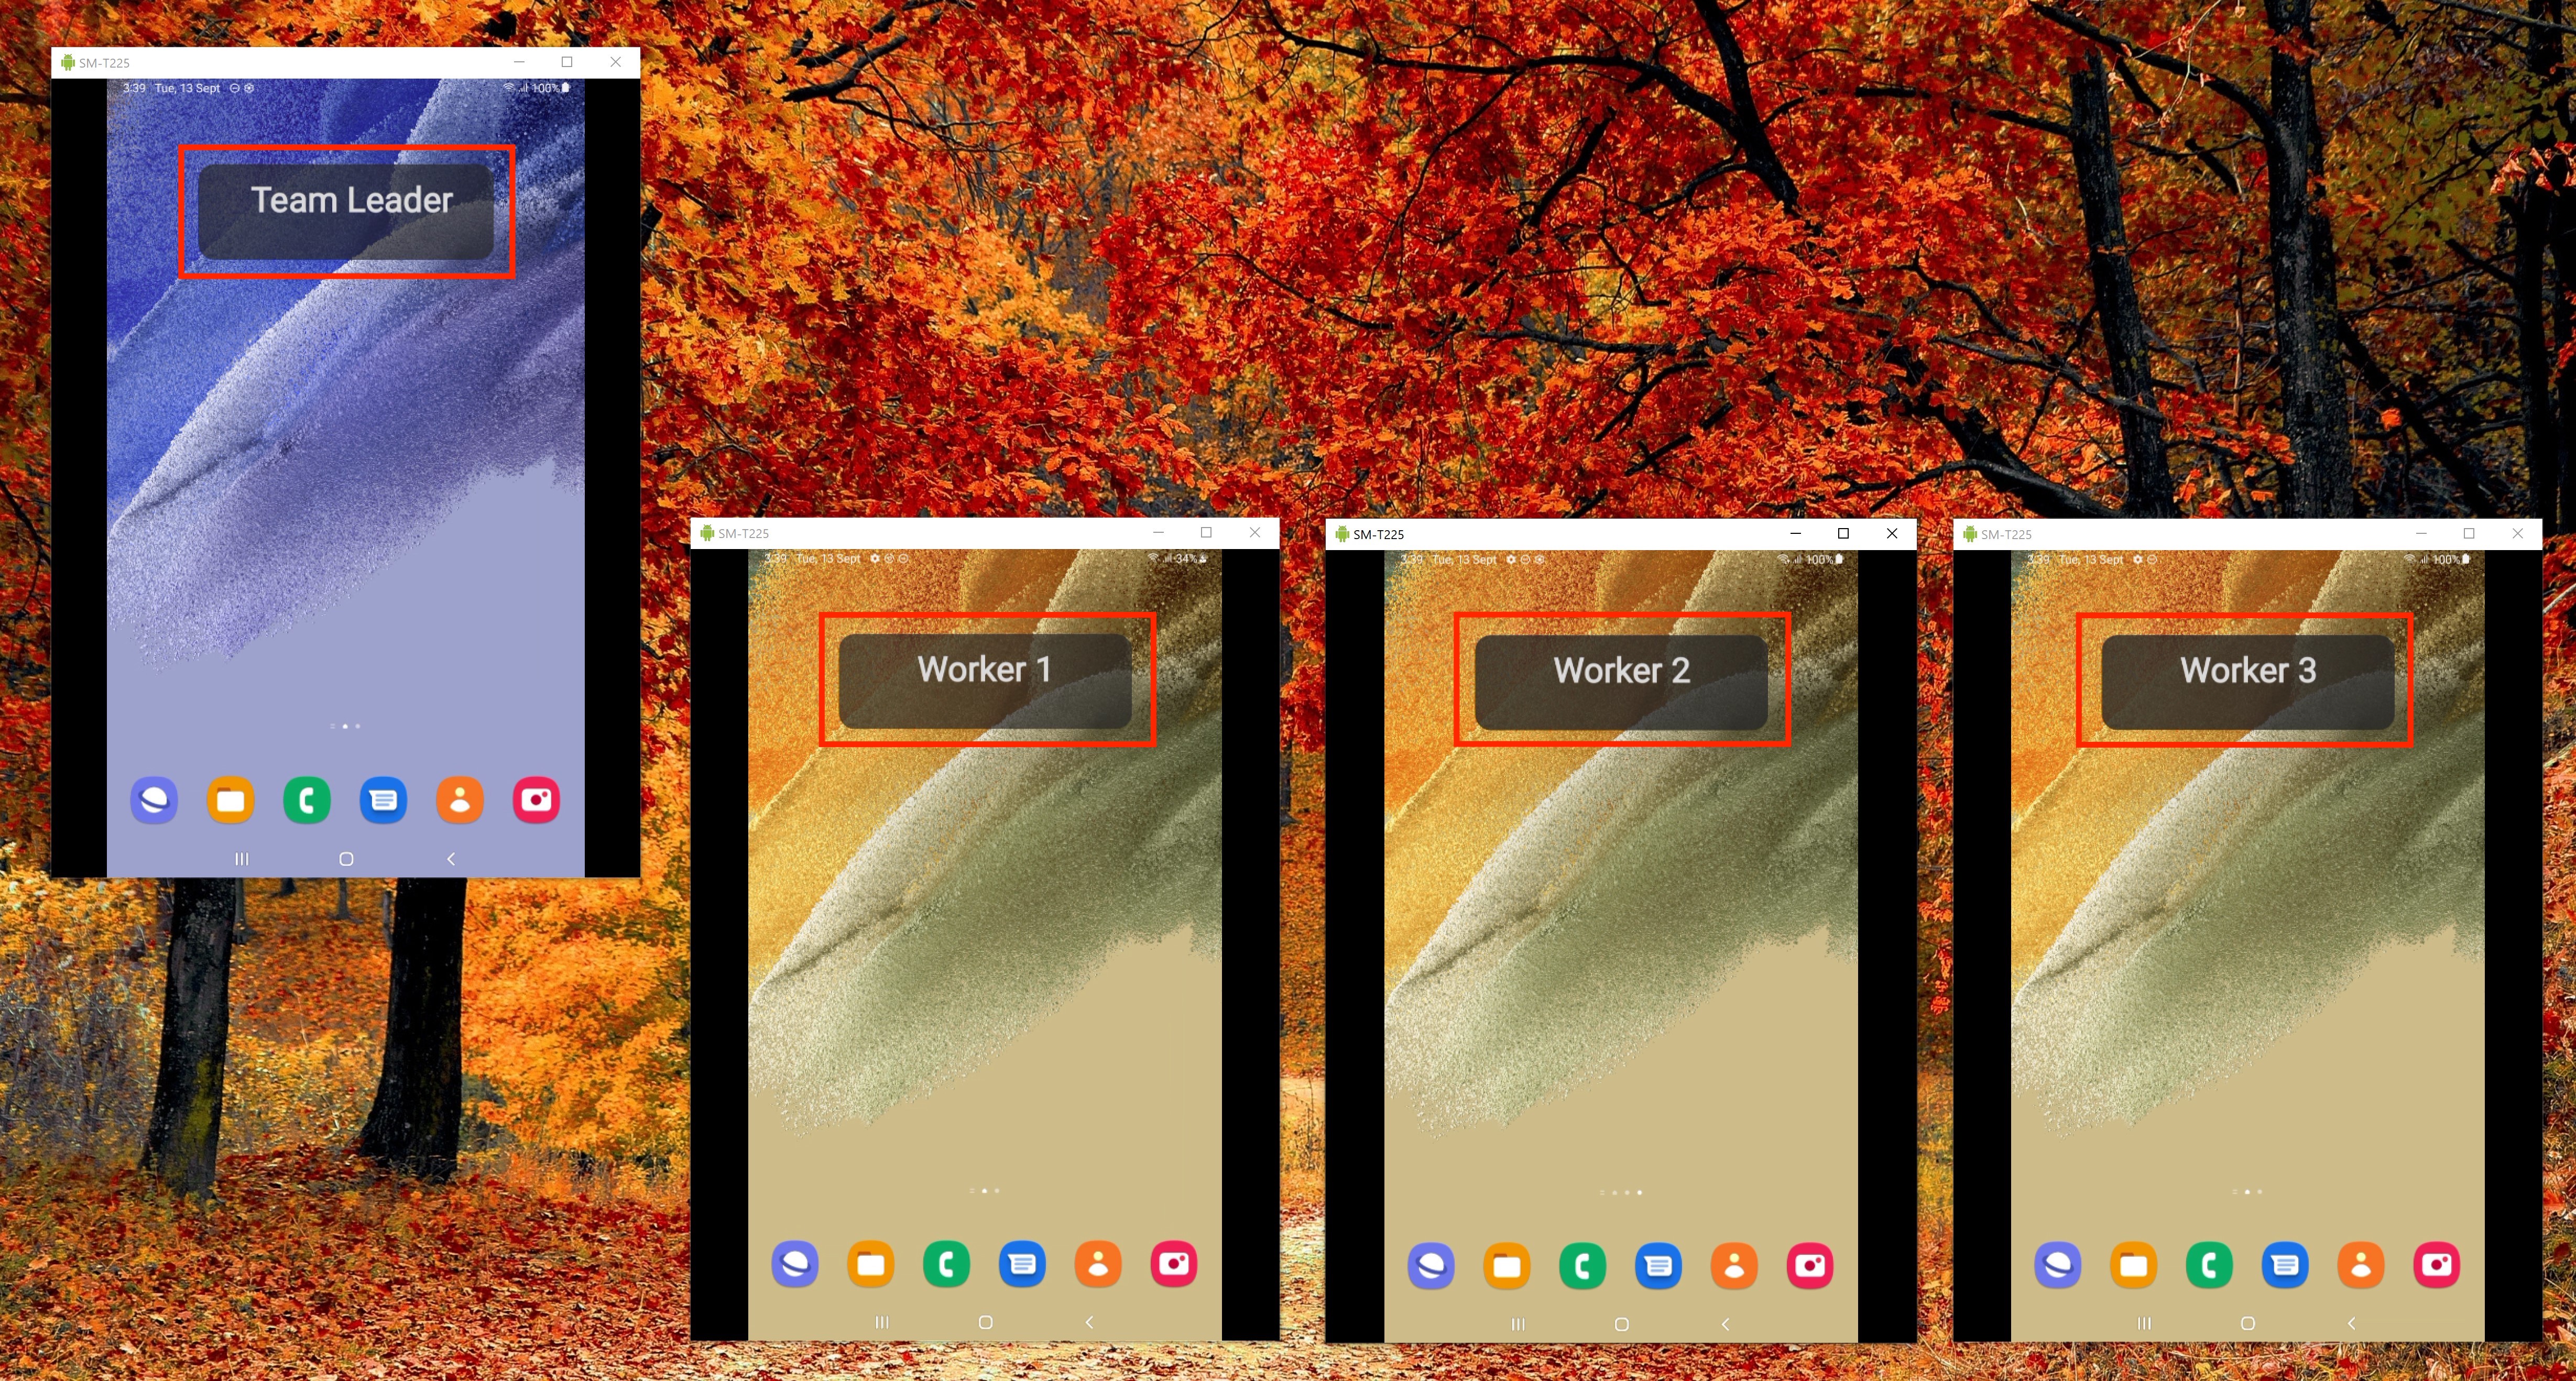
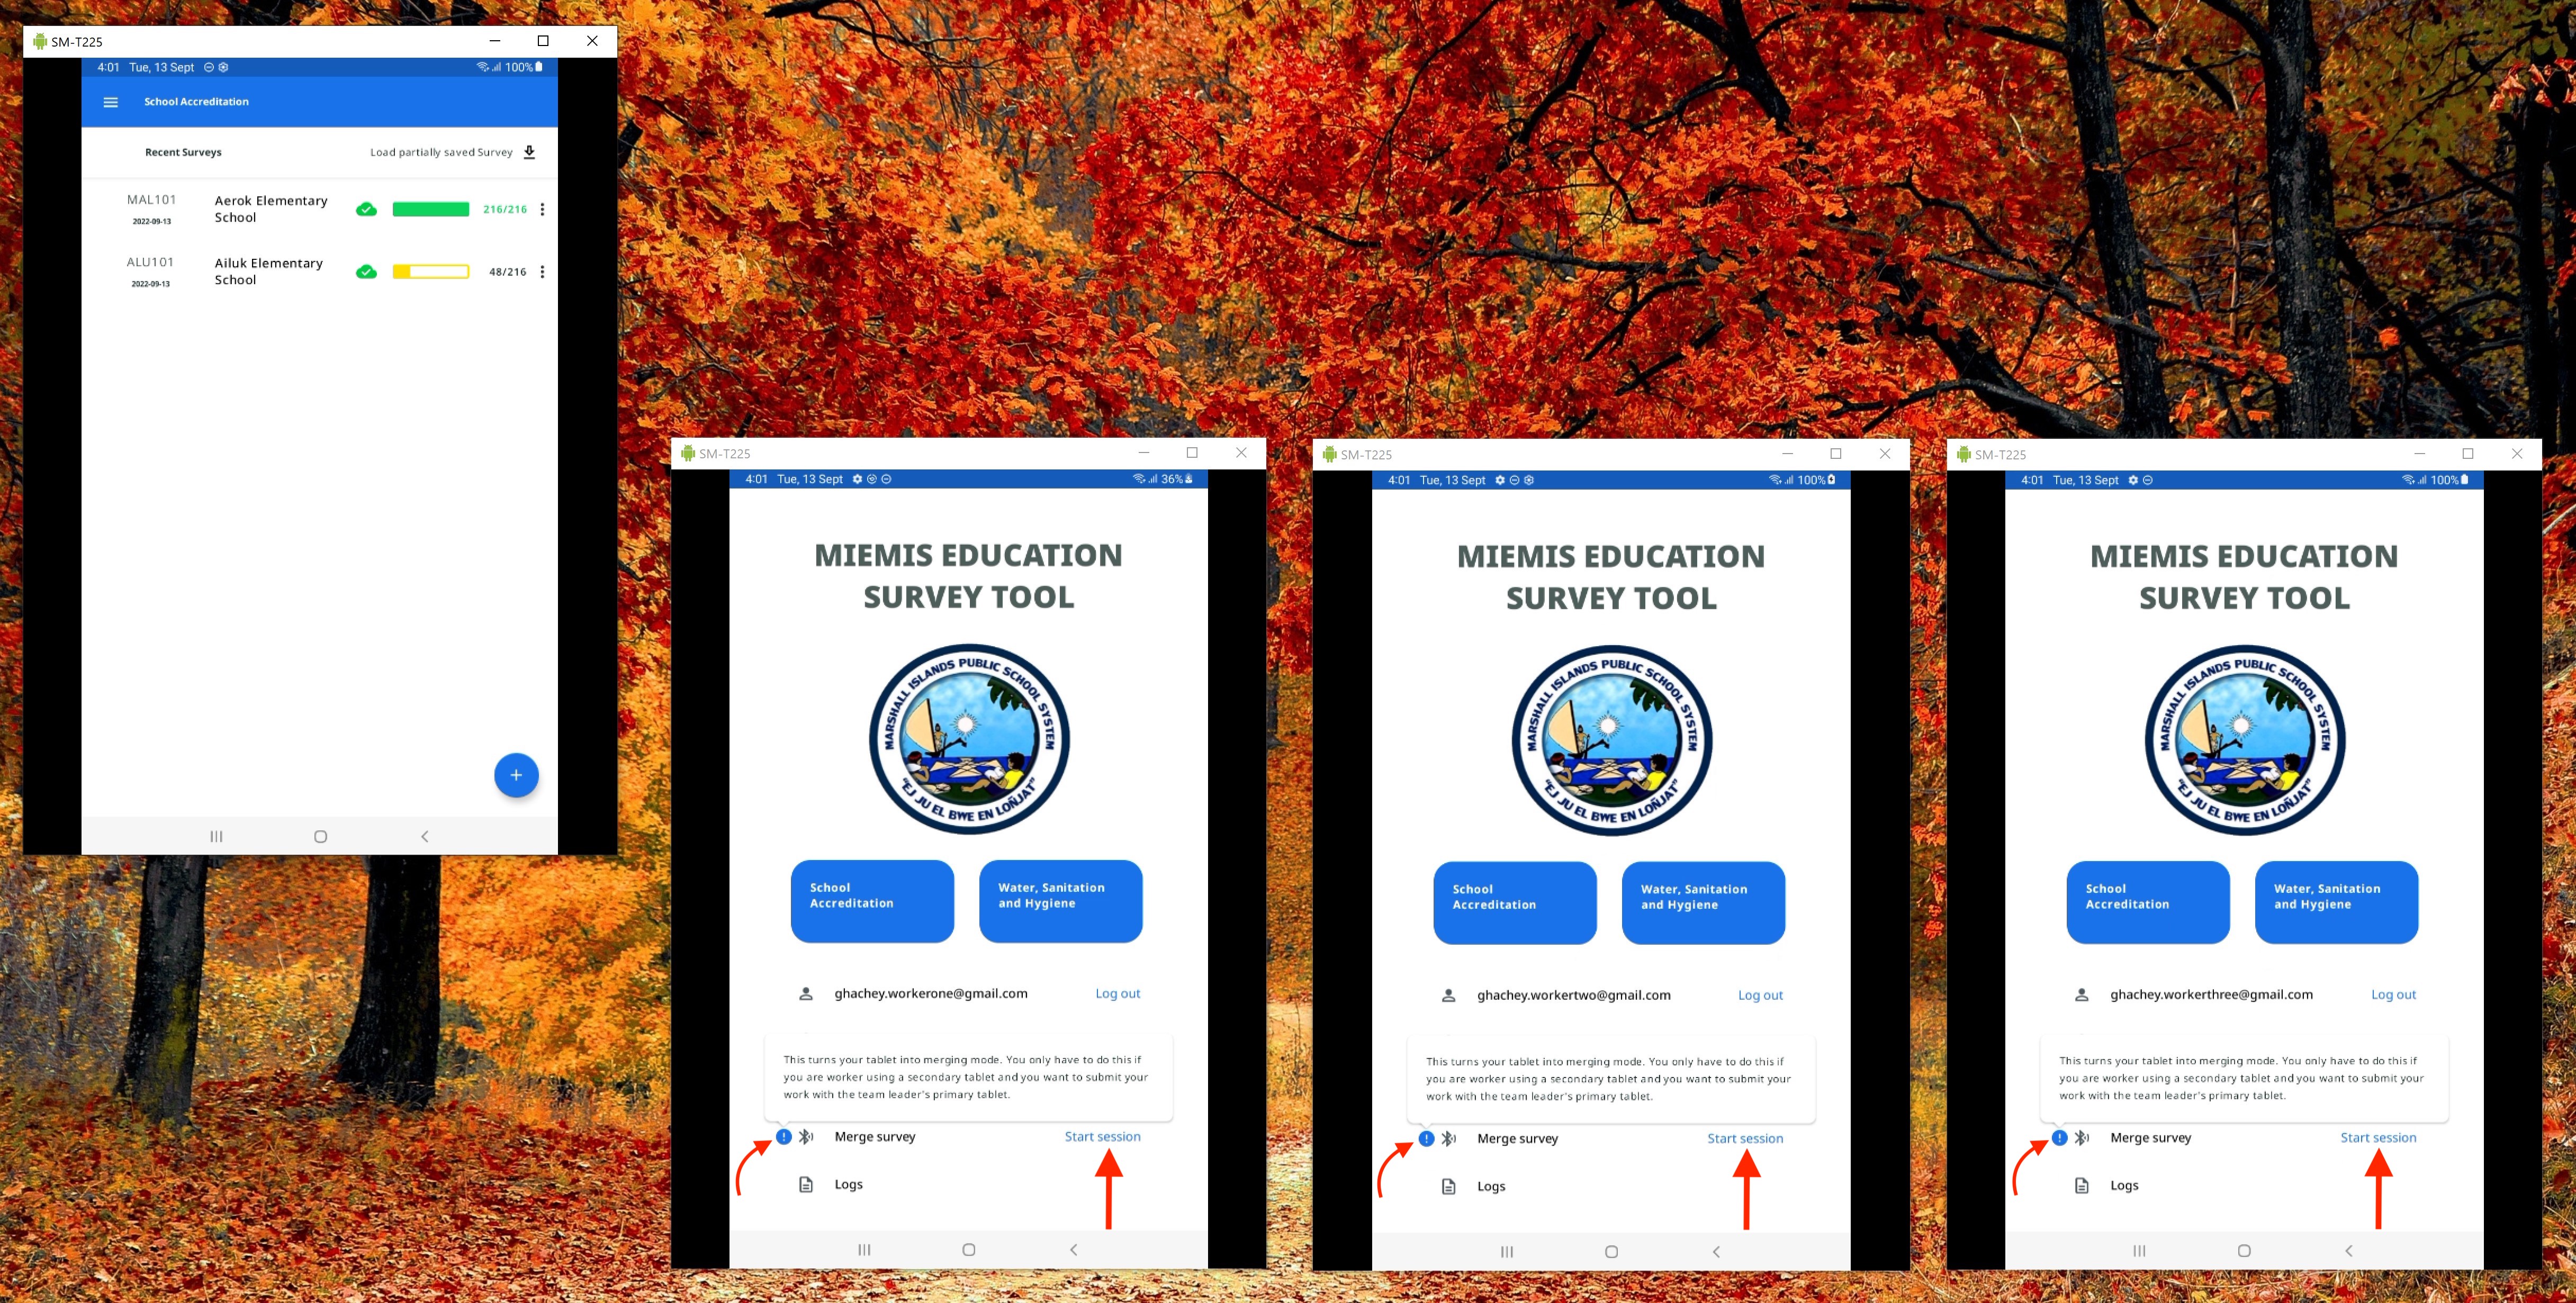
Now each user can start their own Education Survey Tool app as usual. Note the Team Leader already has a completed survey while the three workers have nothing on their tablets yet.
Now is time for the whole team to create their new survey for the school being inspected. Care must be taken to select the same correct school and the same date tag.

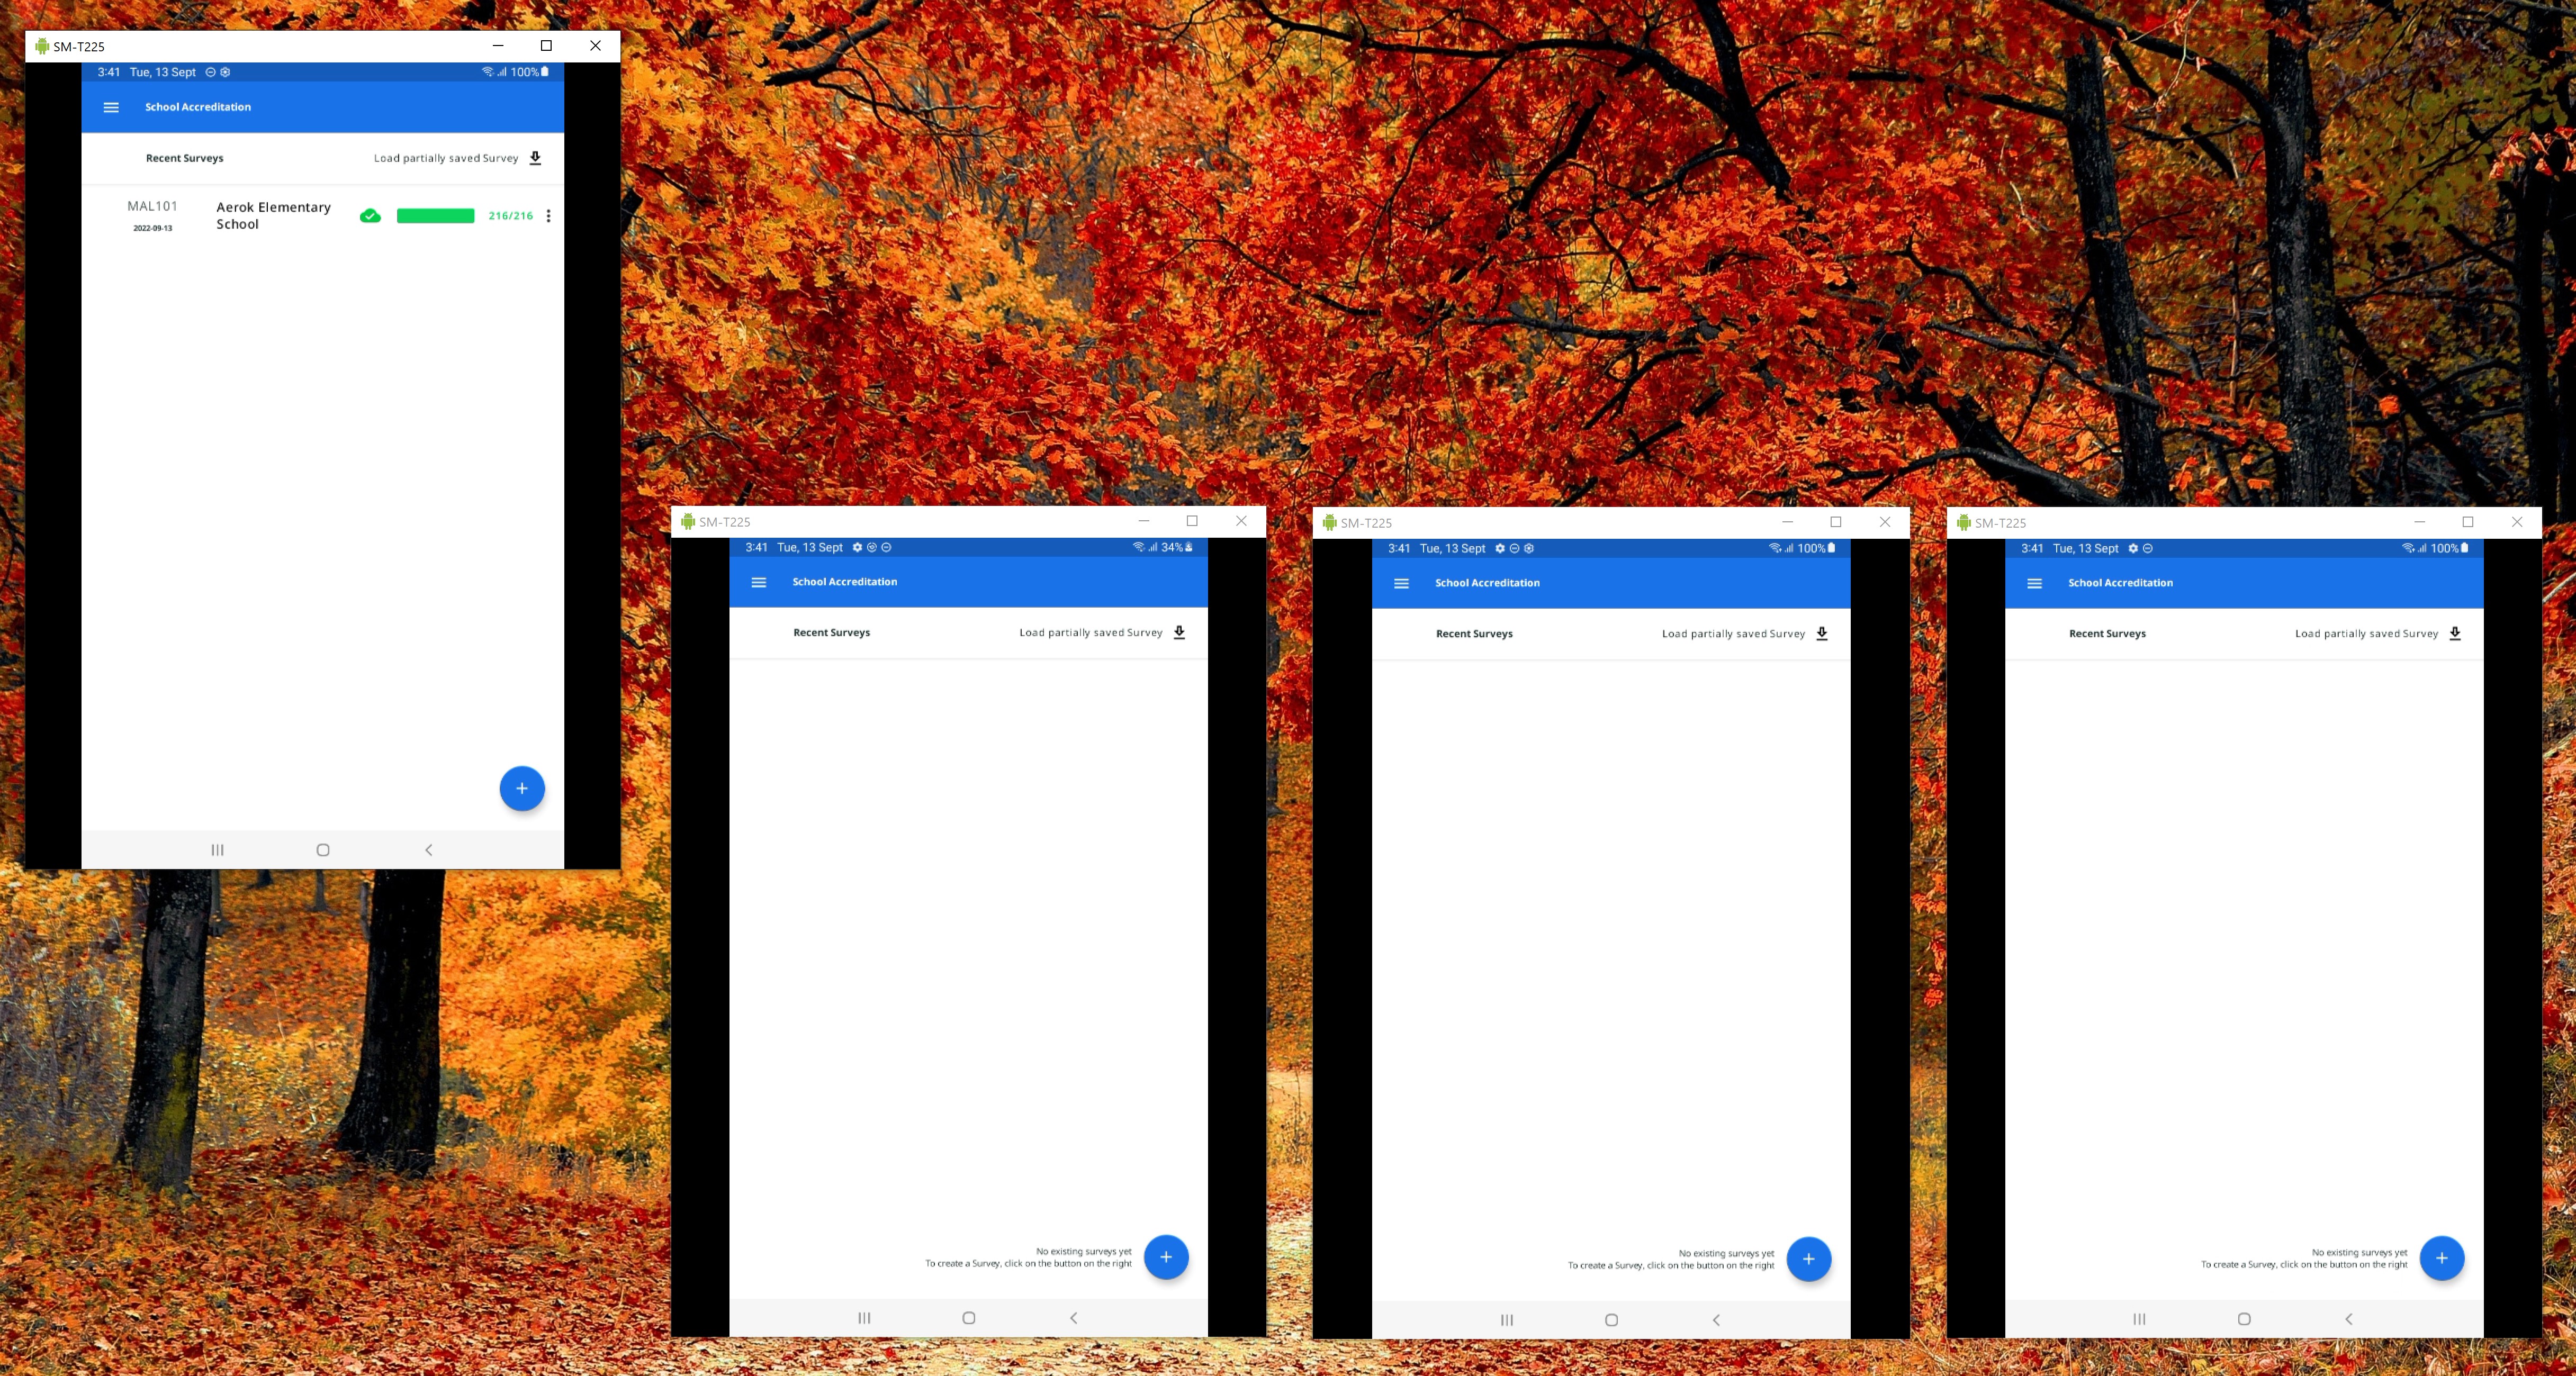
Each user now has a empty survey as shown below.
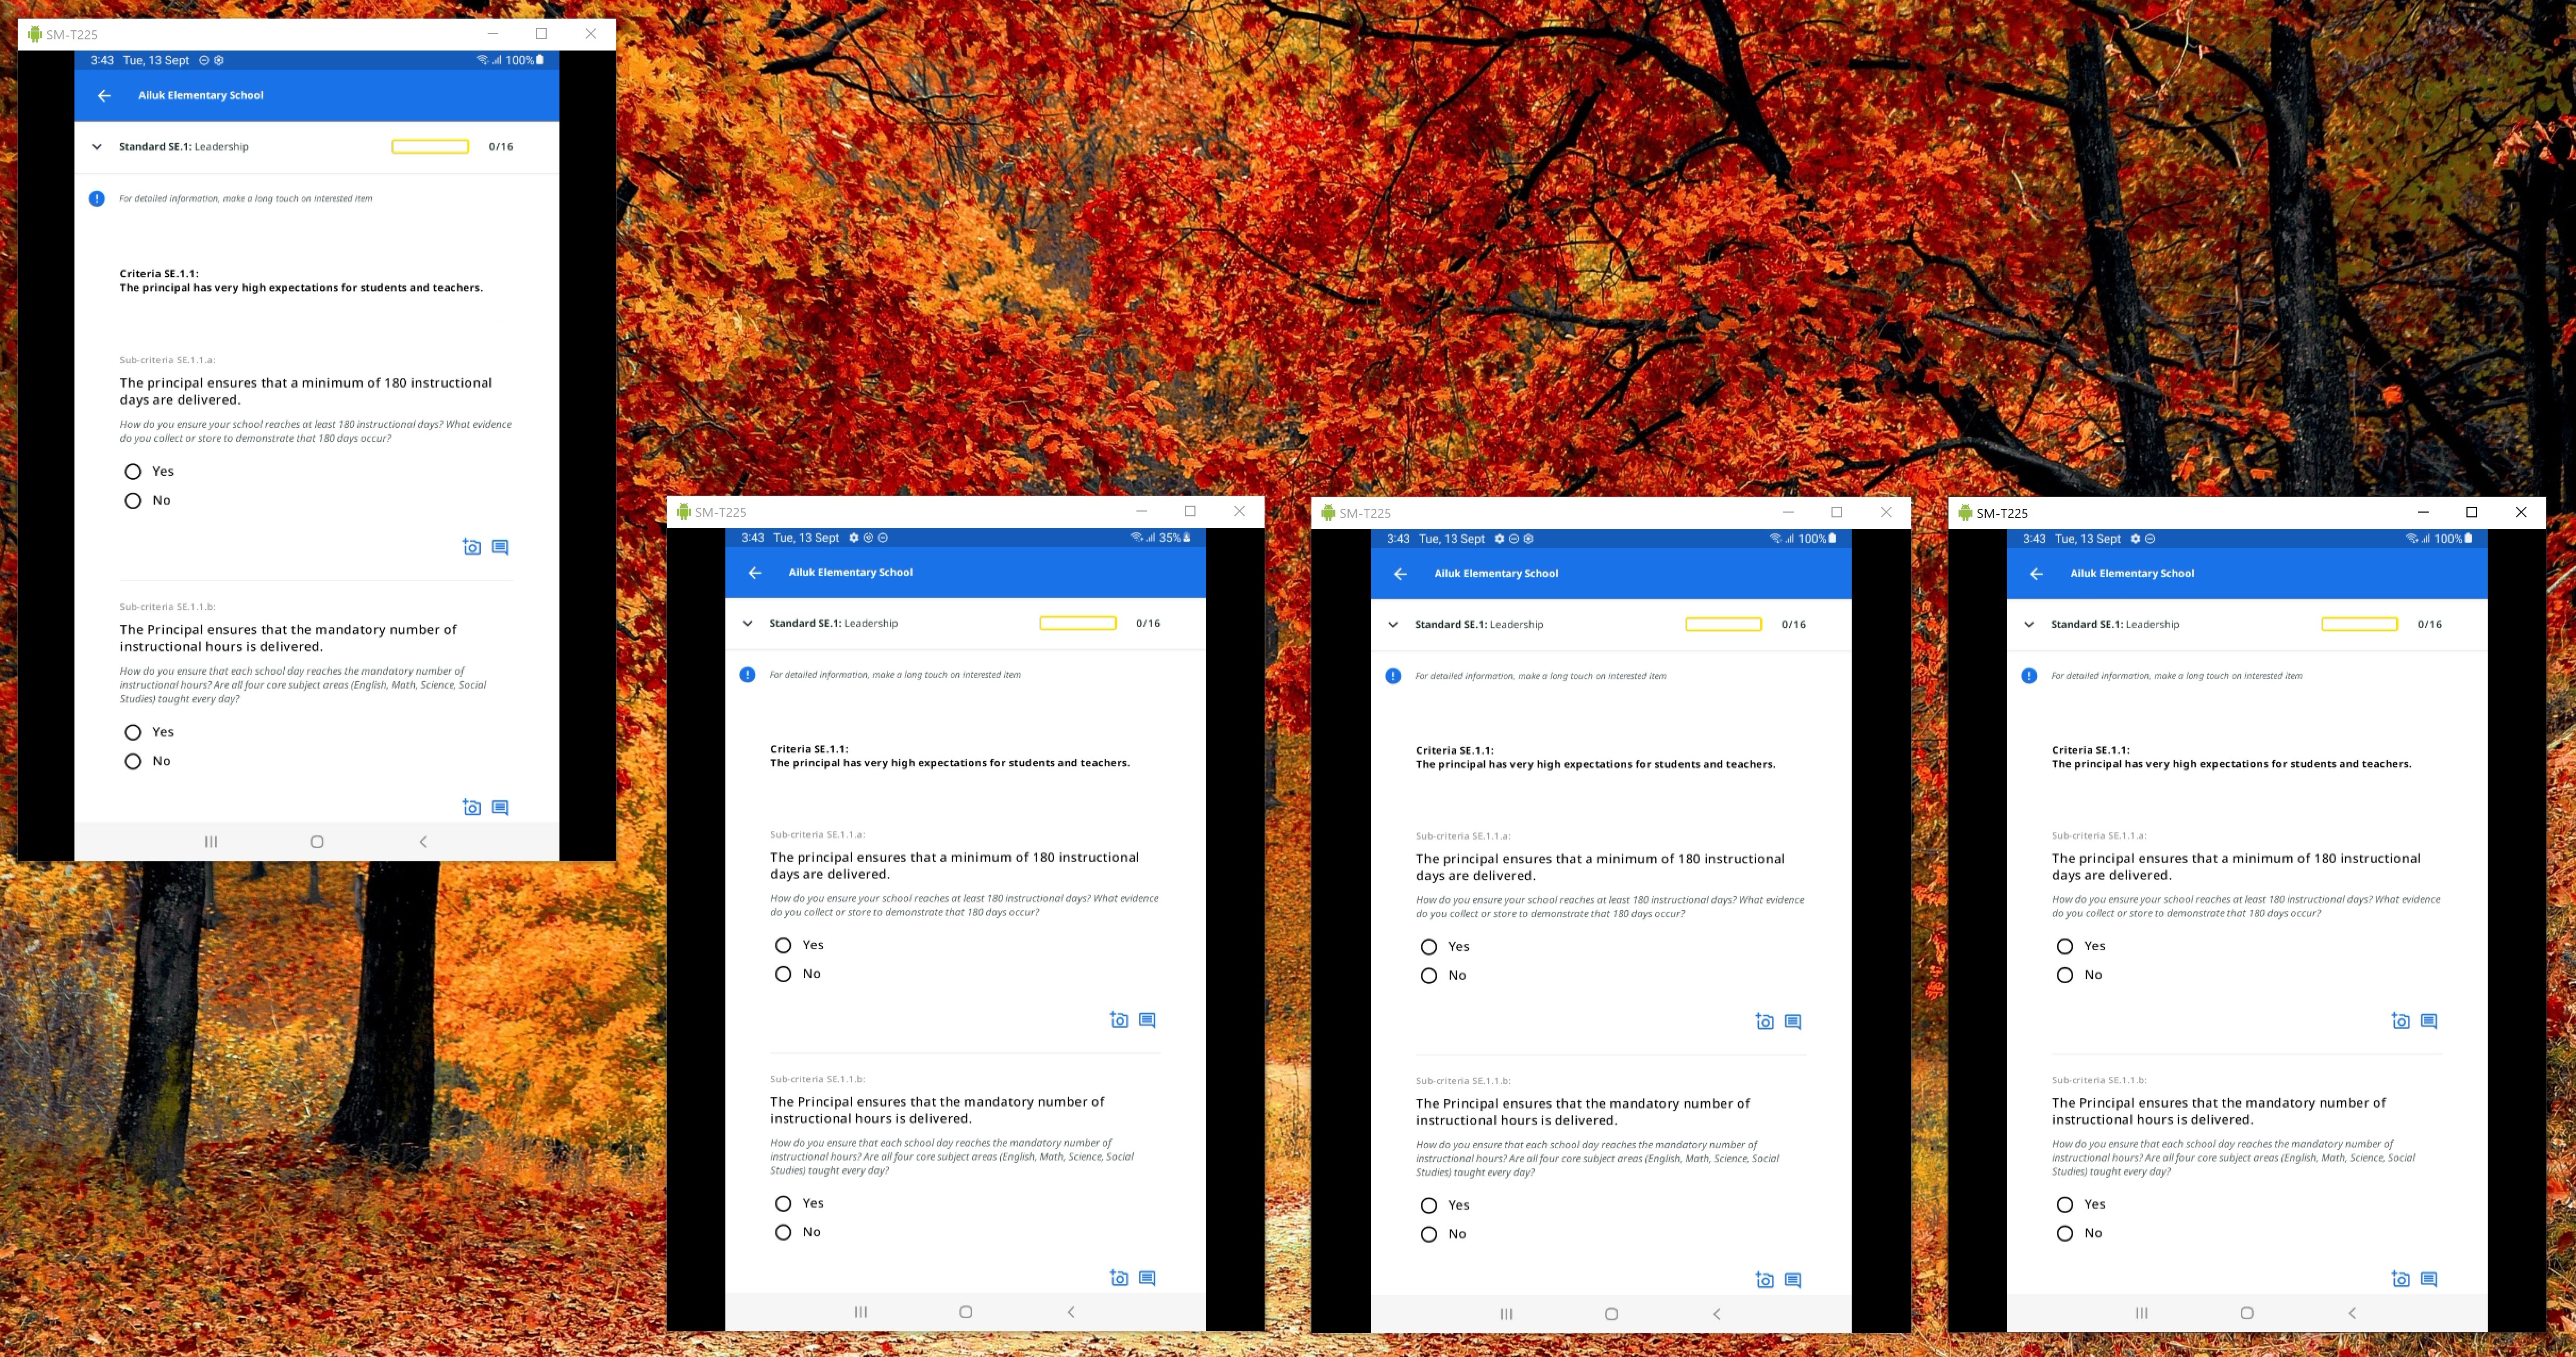
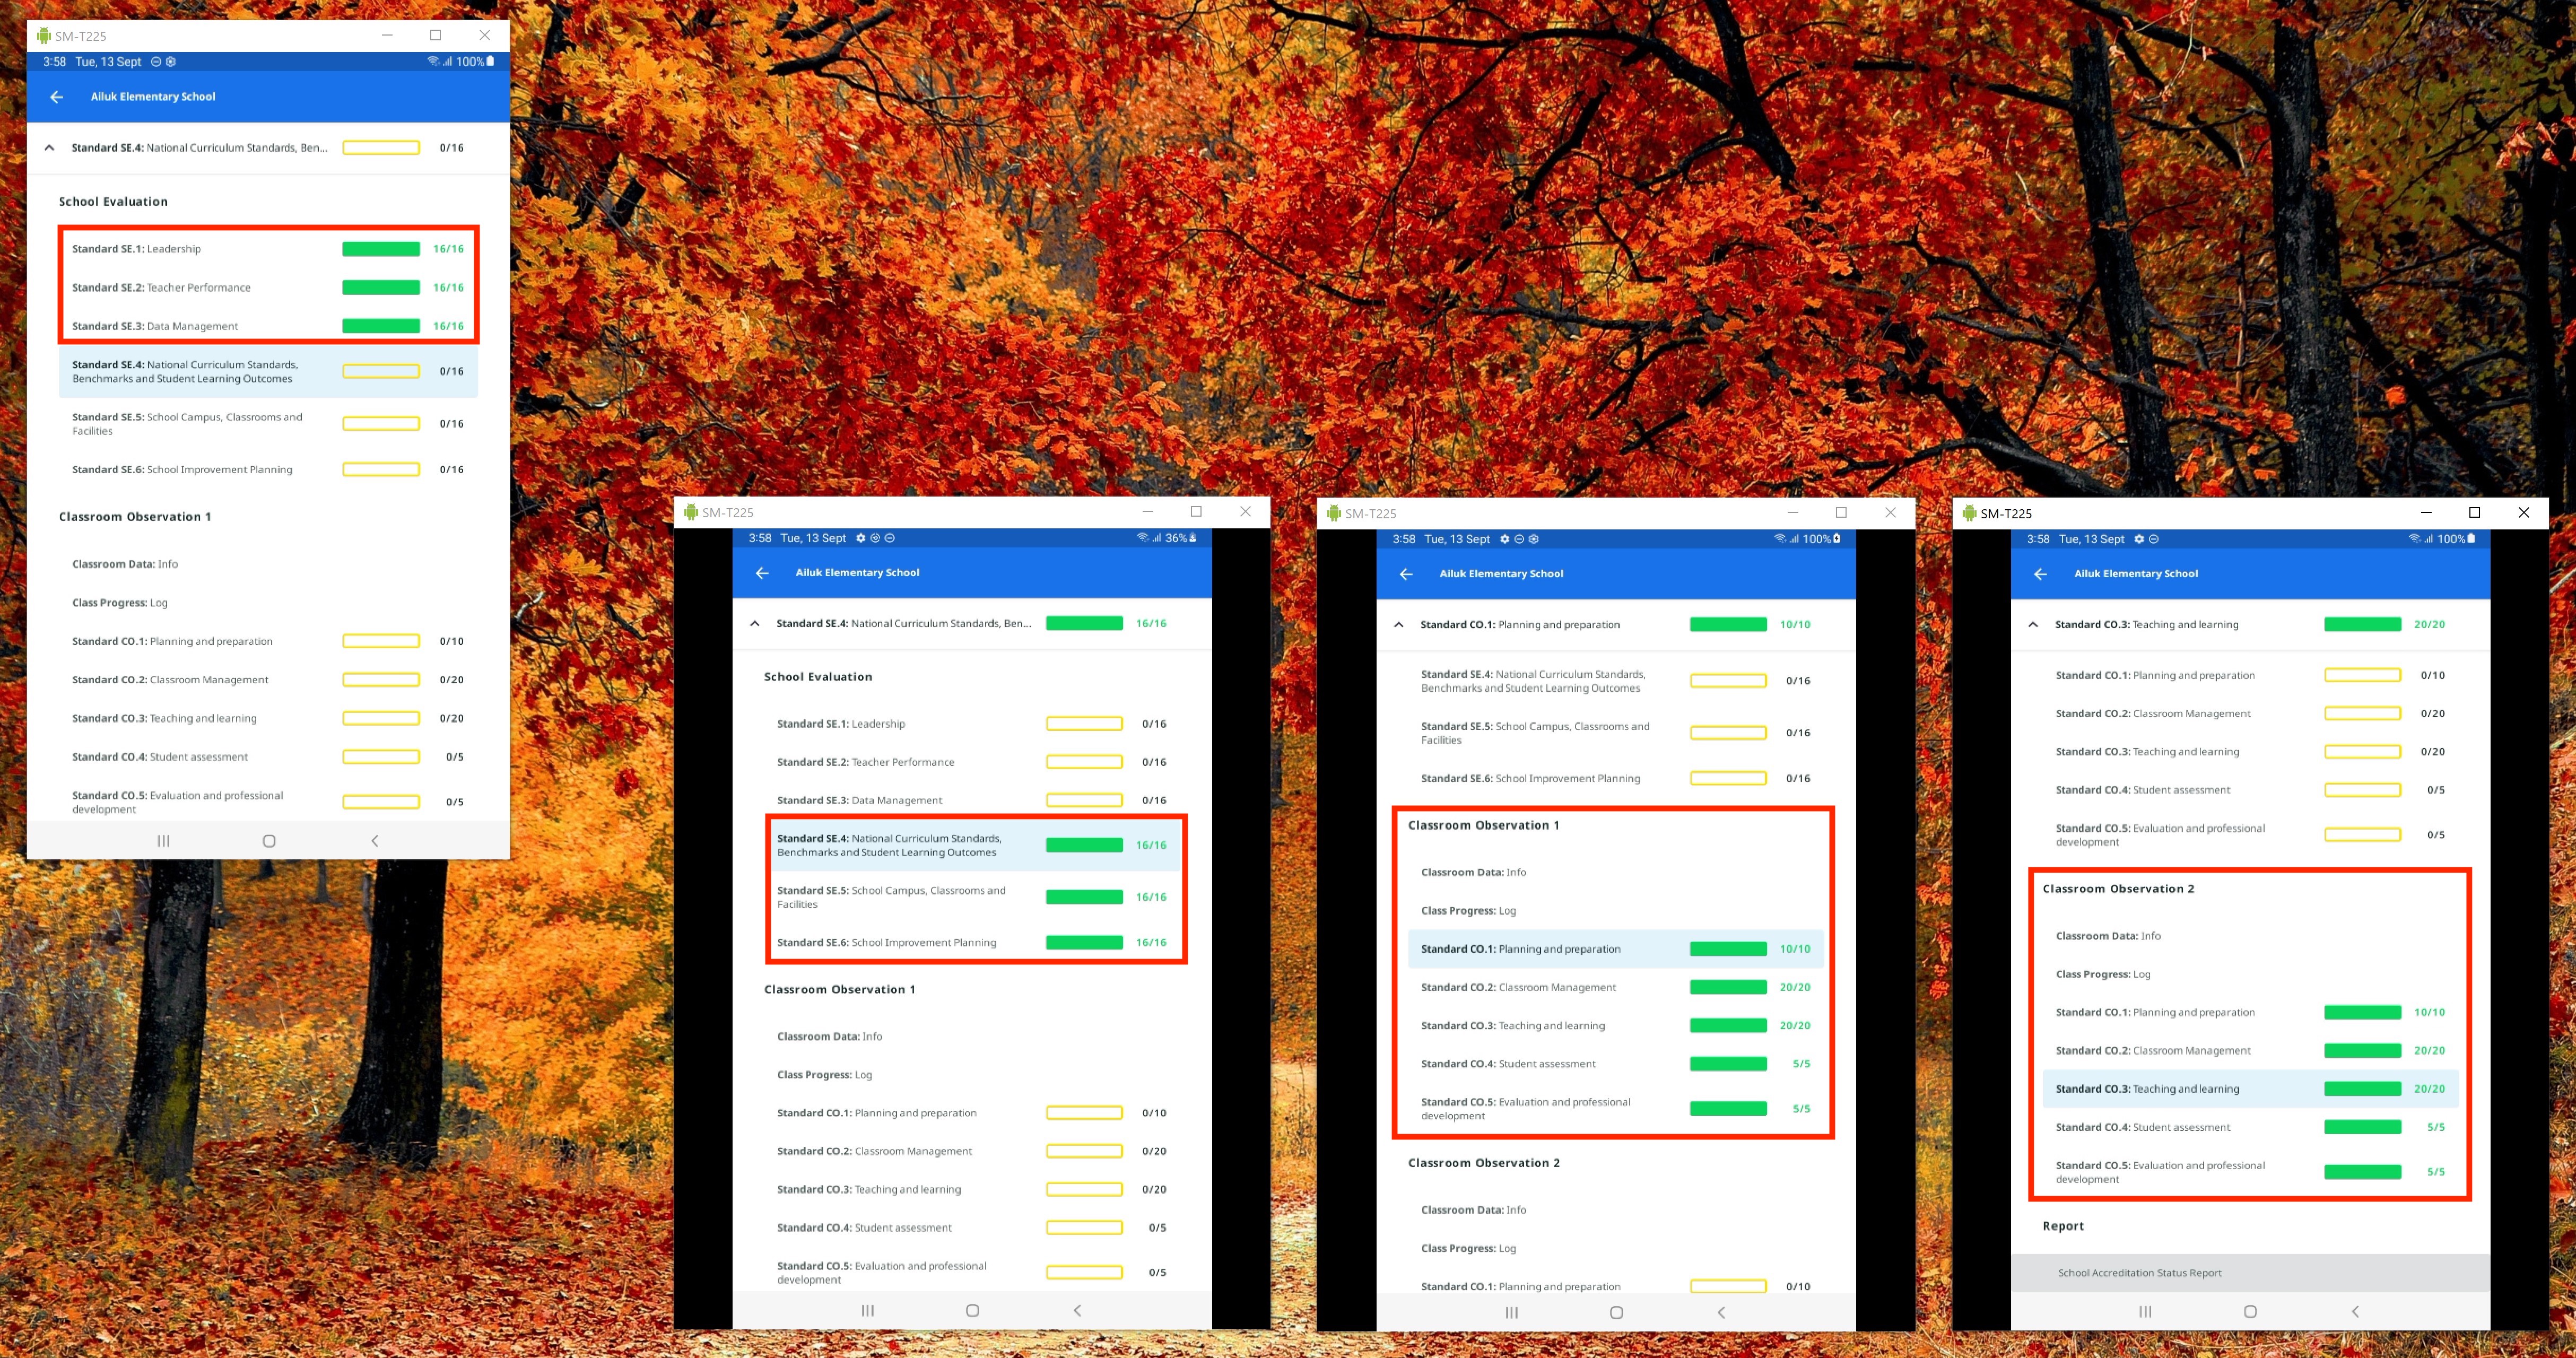
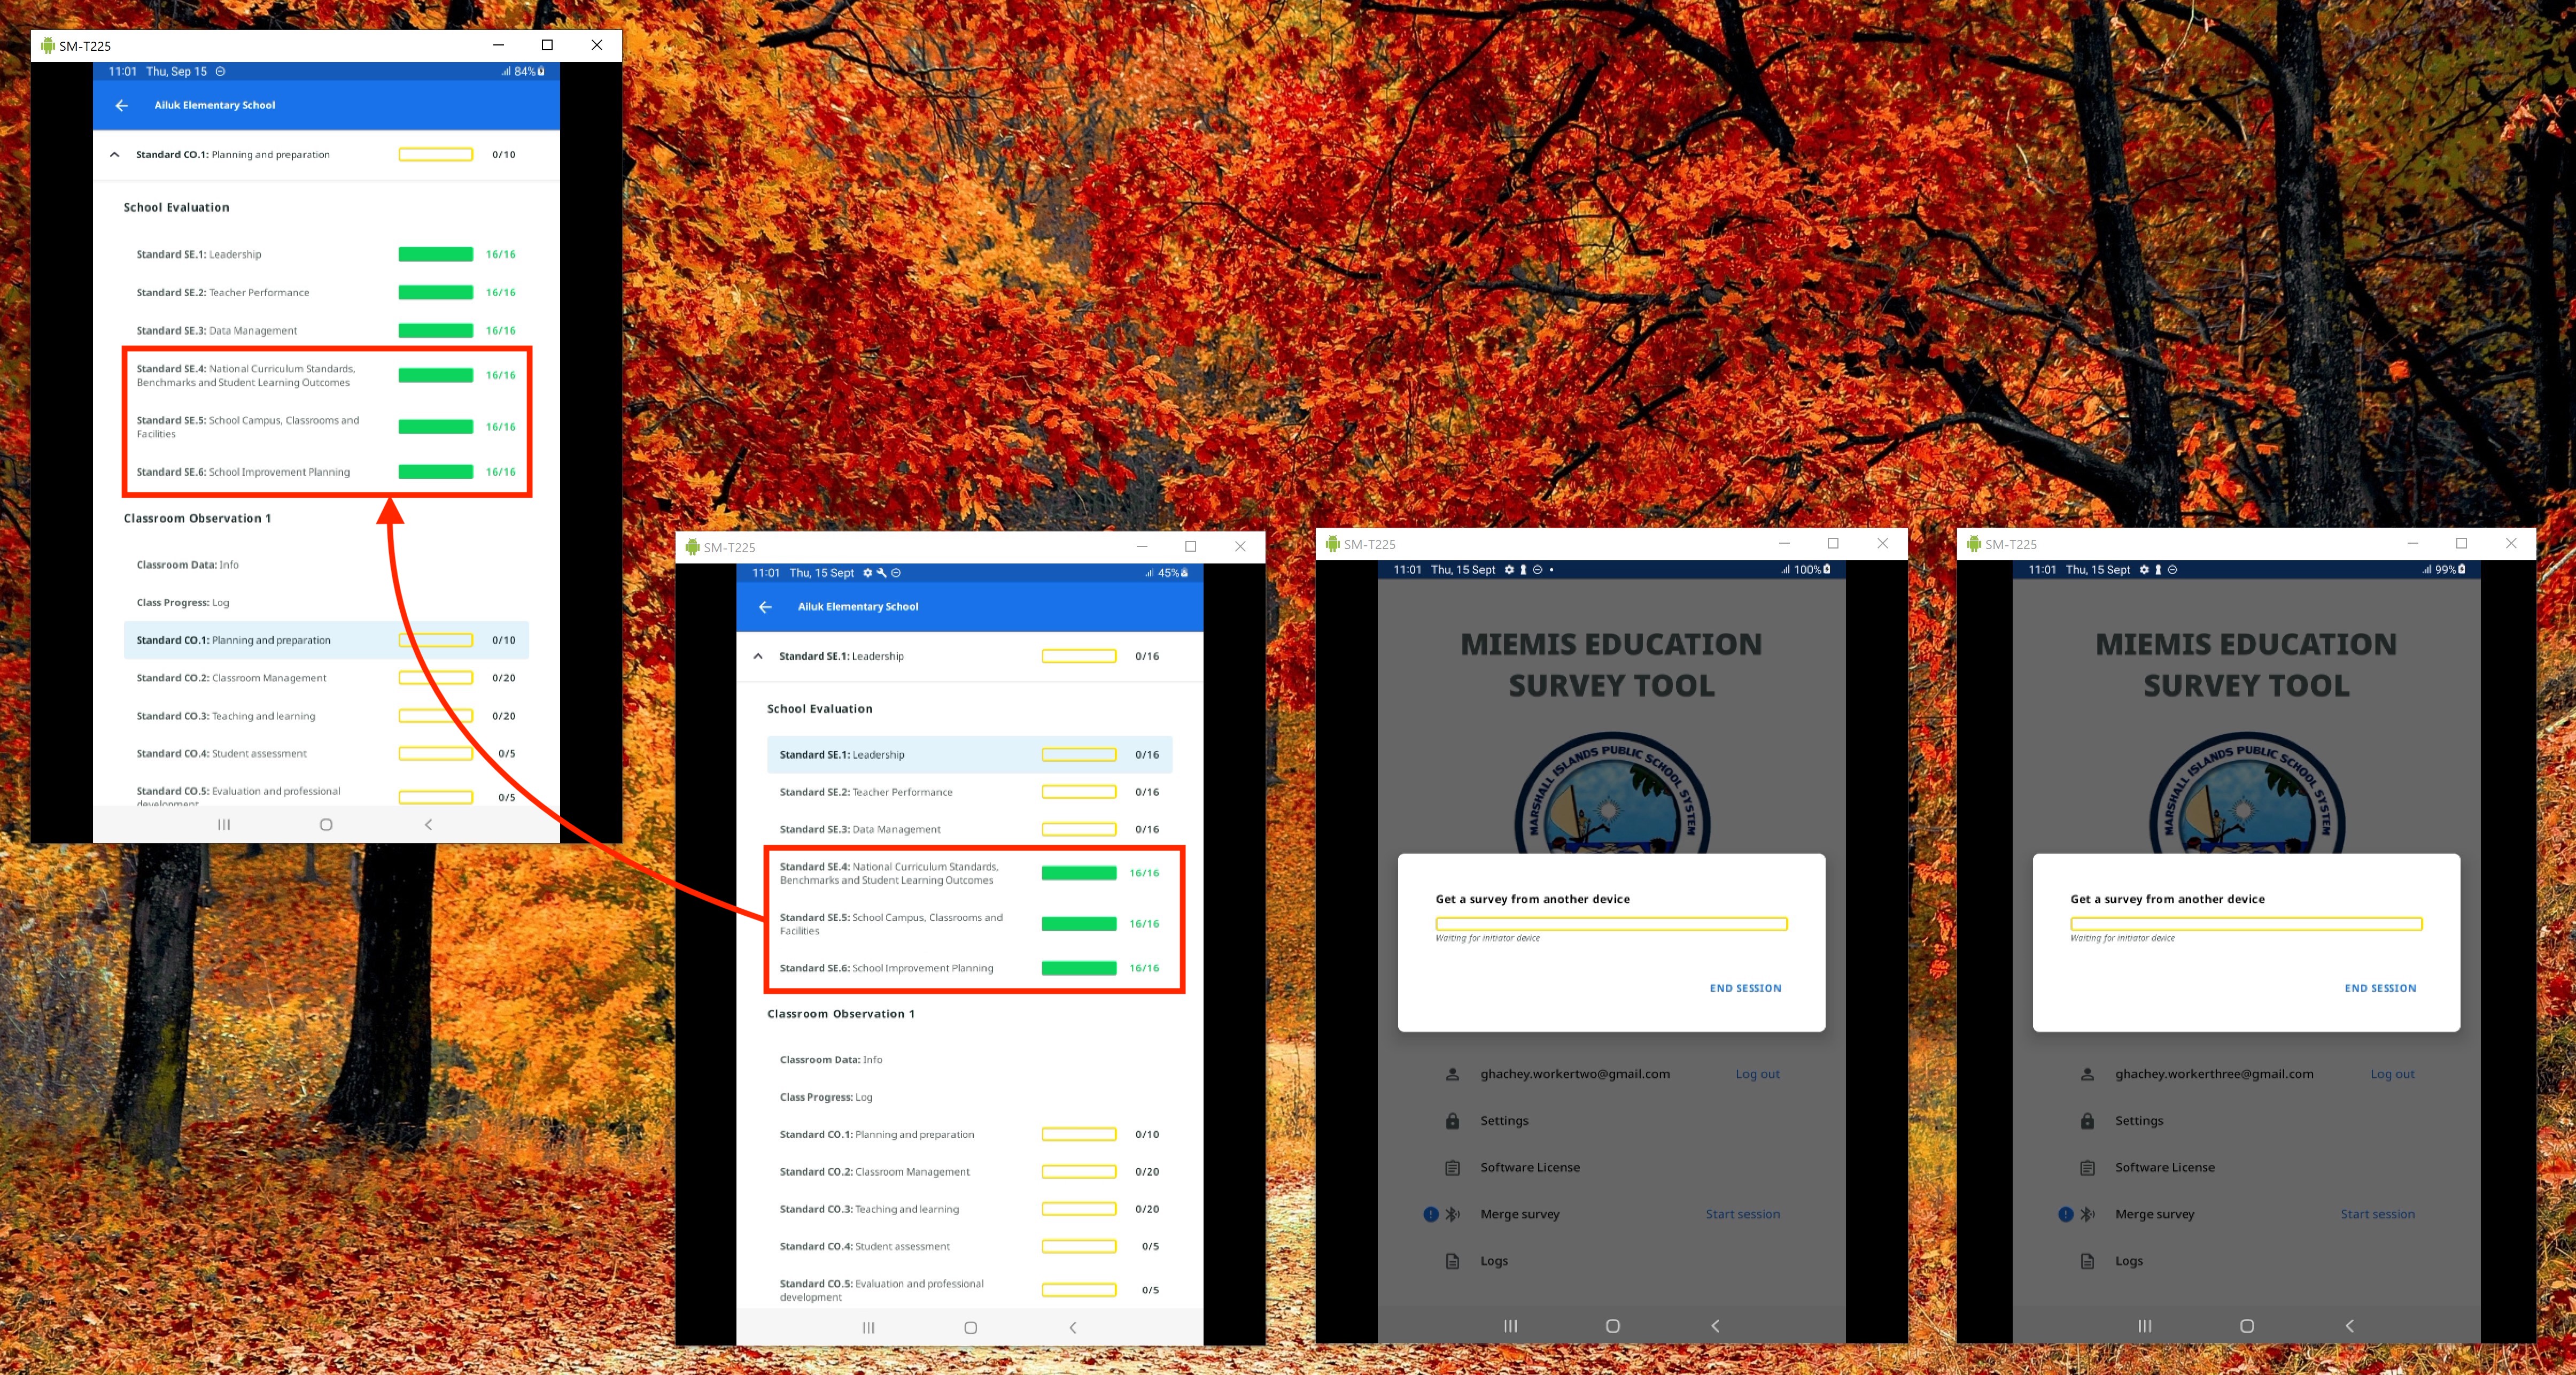
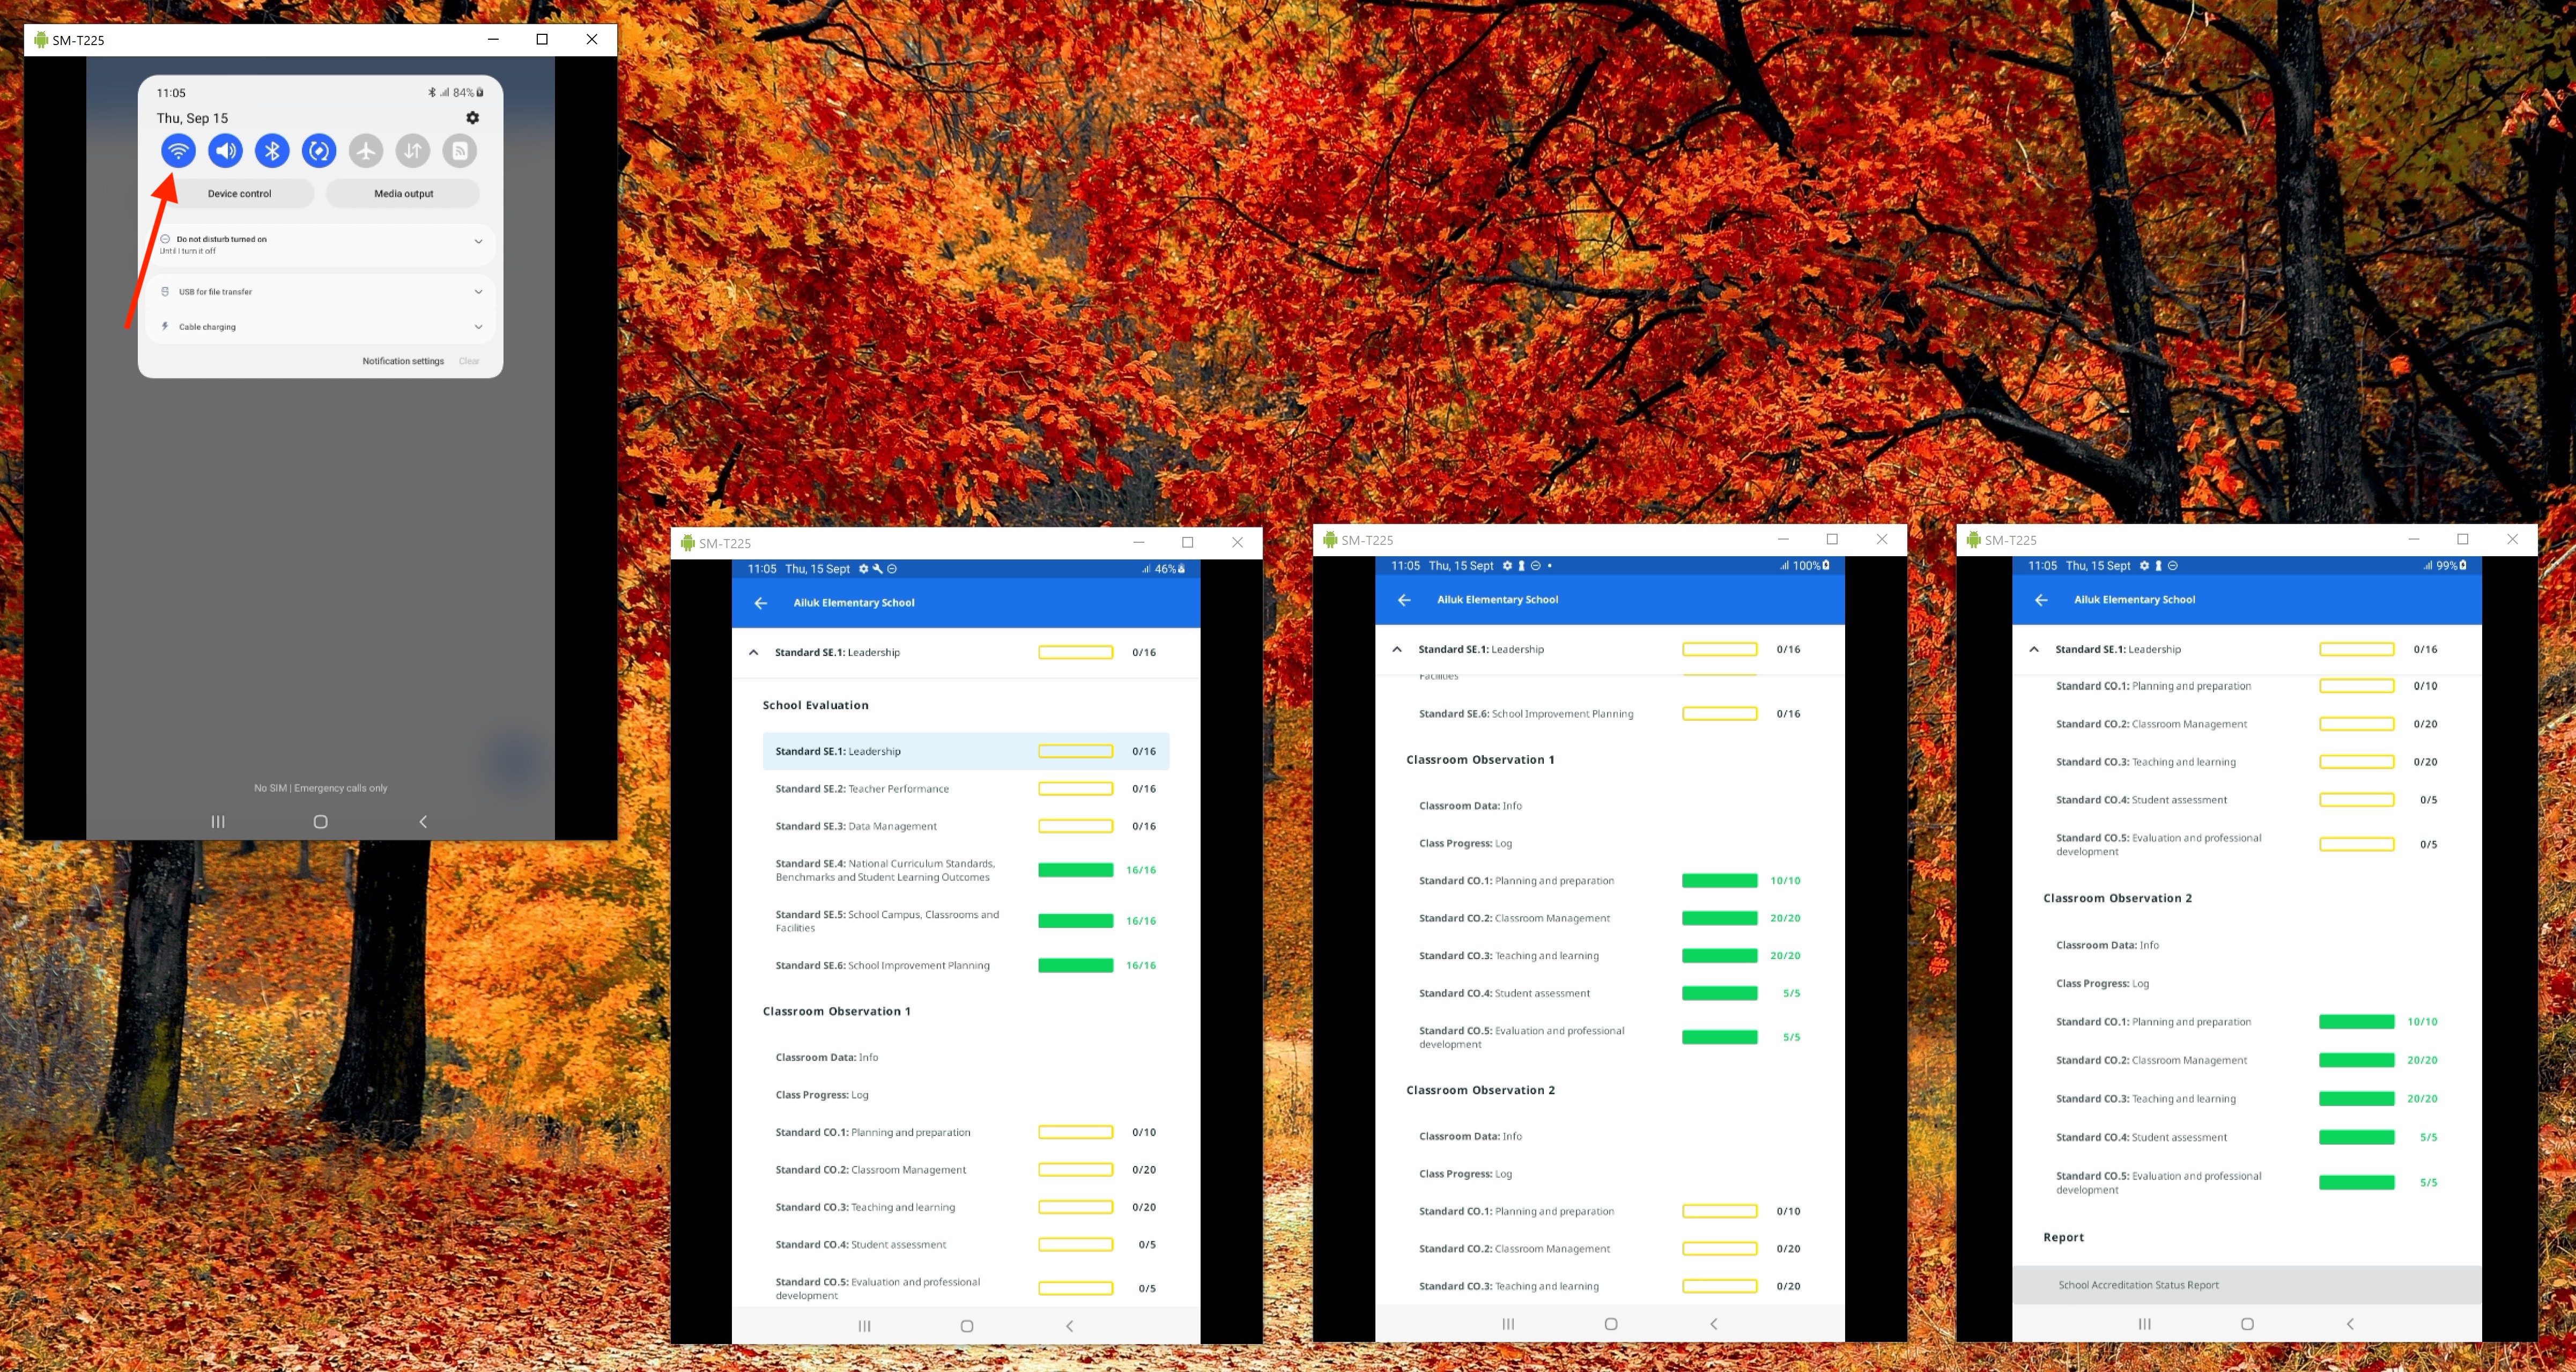
Just as it normally would be done, each user must fill in their own part of the survey as assigned to them. For example, below the team leader completed the Standard 1, 2 and 3. Worker 1 completed Standard 4, 5 and 6. Worker 3 completed all of Classroom Observation 1. Worker 4 completed all of Classroom Observation 2.
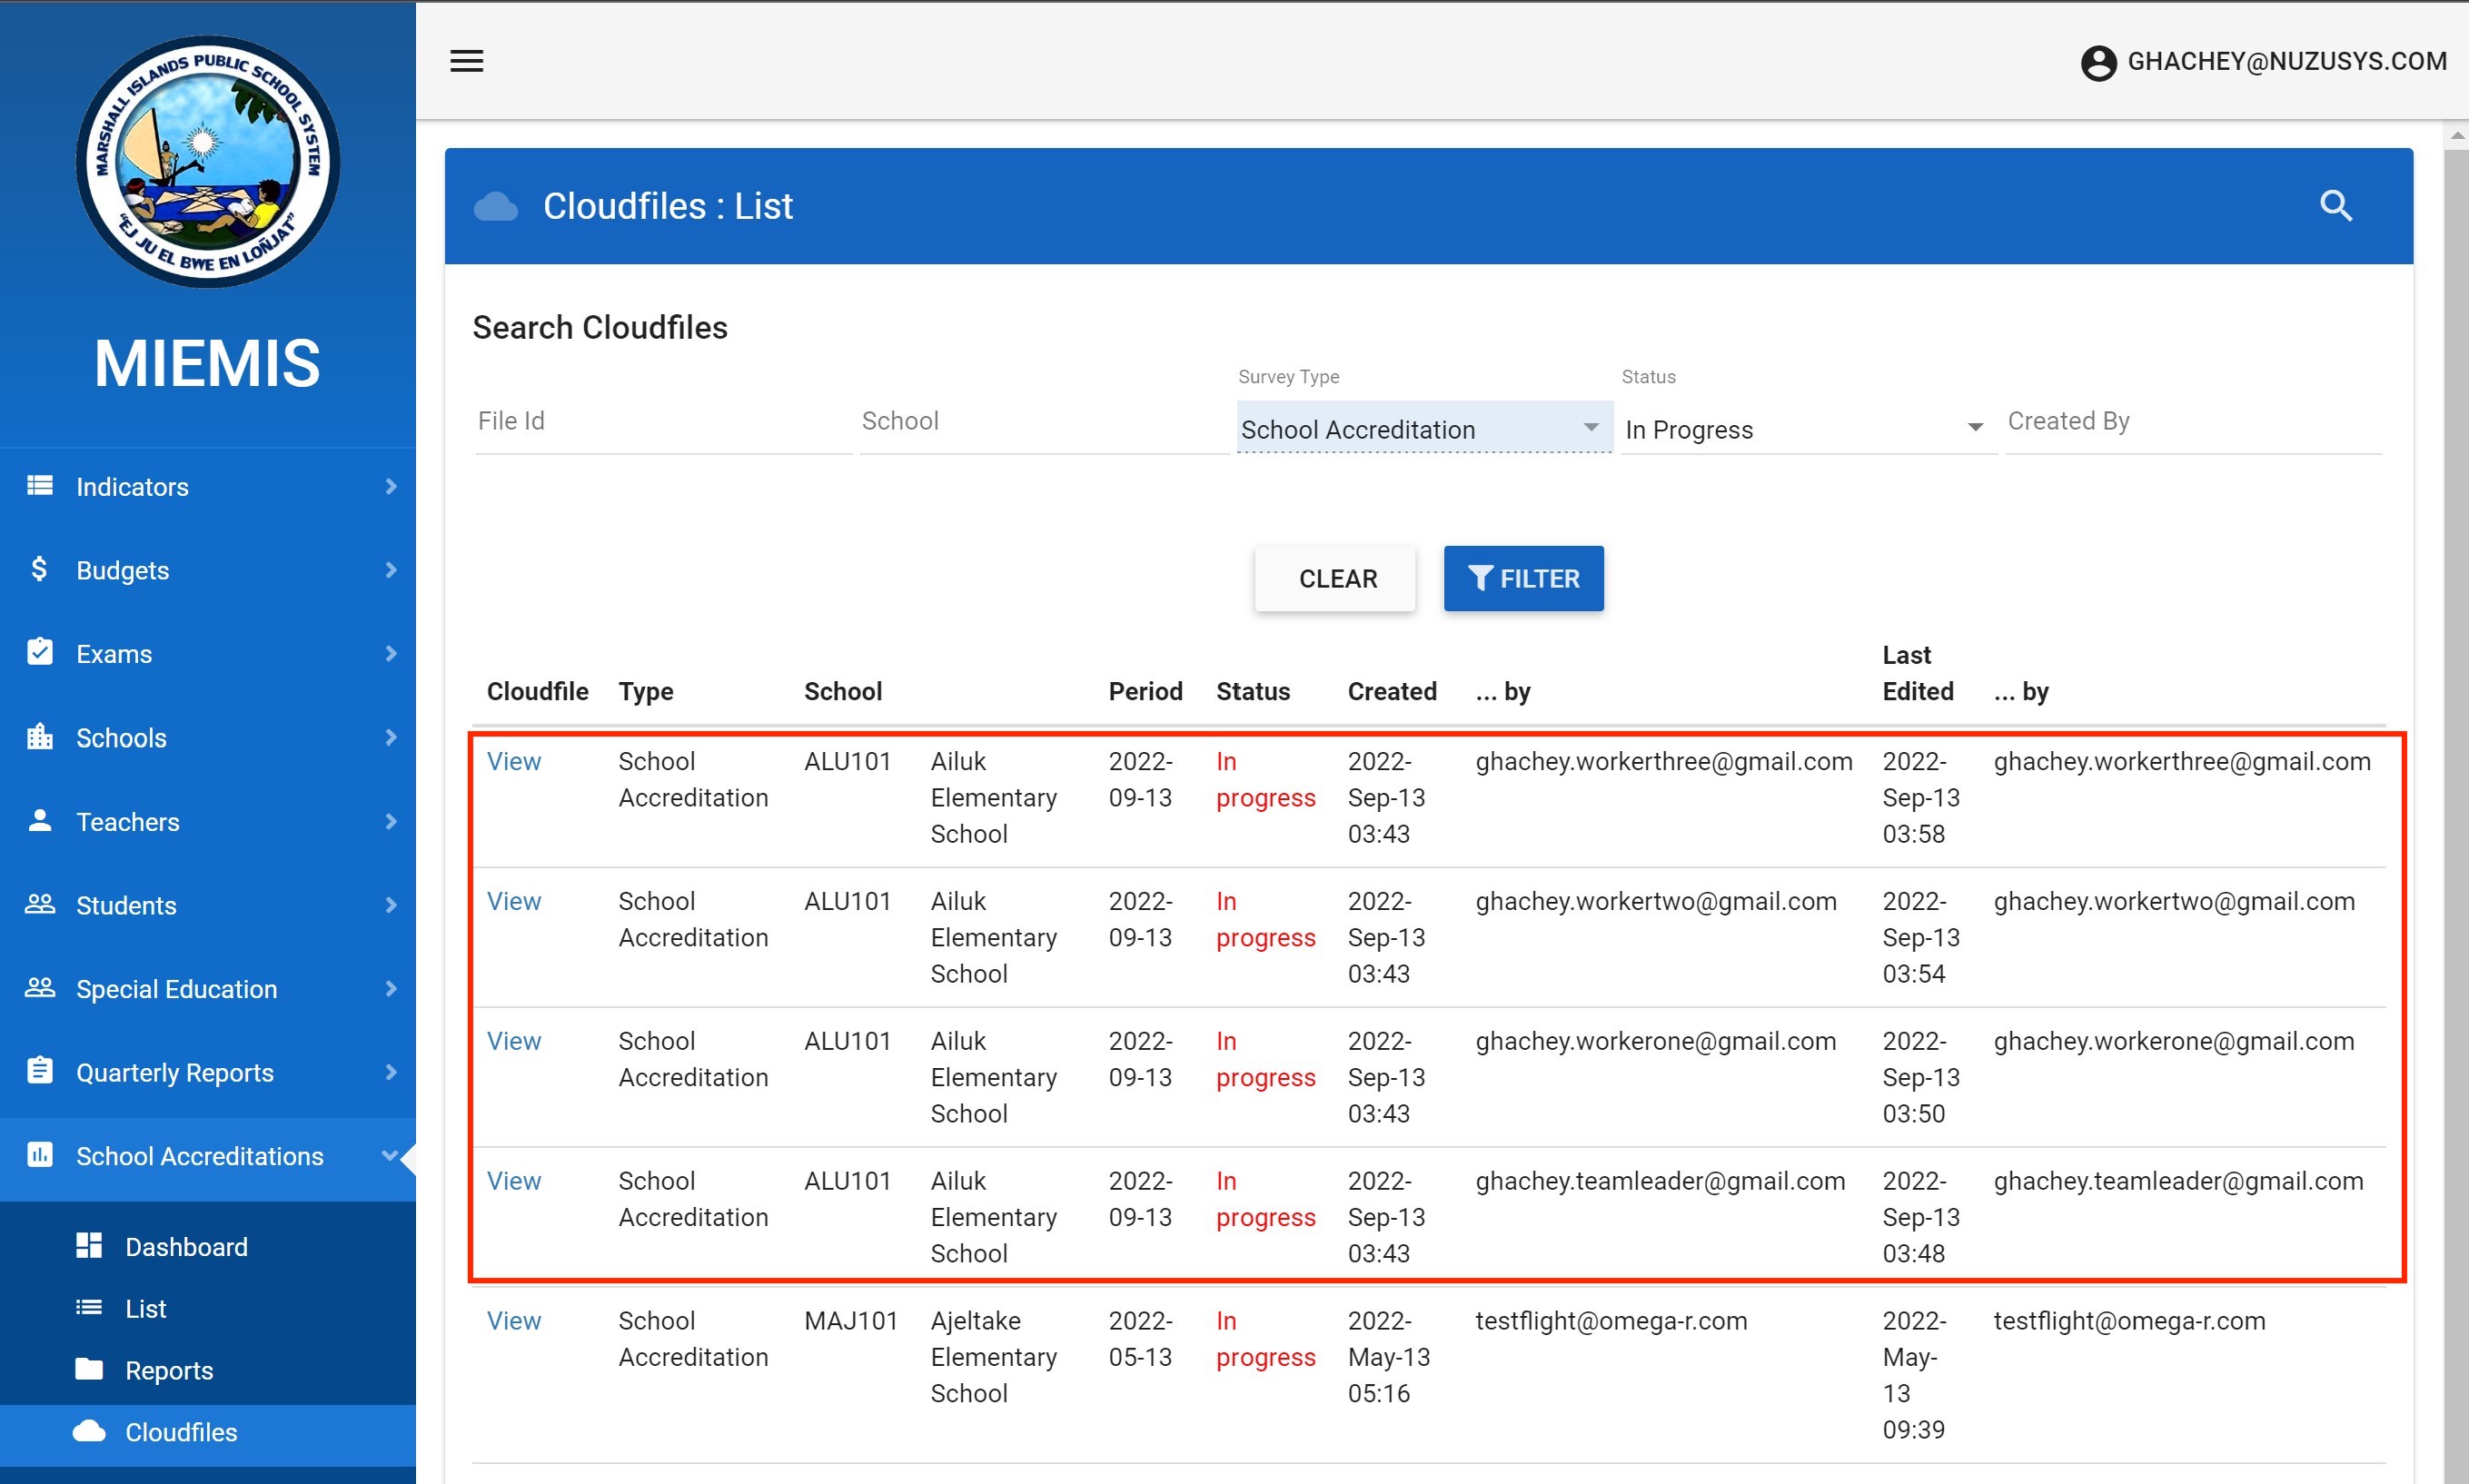
As a side note, if and only if the tablet had Internet connectivity you would not at this point see all for partial surveys by four different users in the EMIS online web app as shown below.
Back to the tablets. The time has come to merge. The merging is a one way thing only. Workers merge their partial surveys to the team leader who will end up with a complete survey. That is the final survey of interest to be reviewed and finally approved by management within the EMIS online web application.
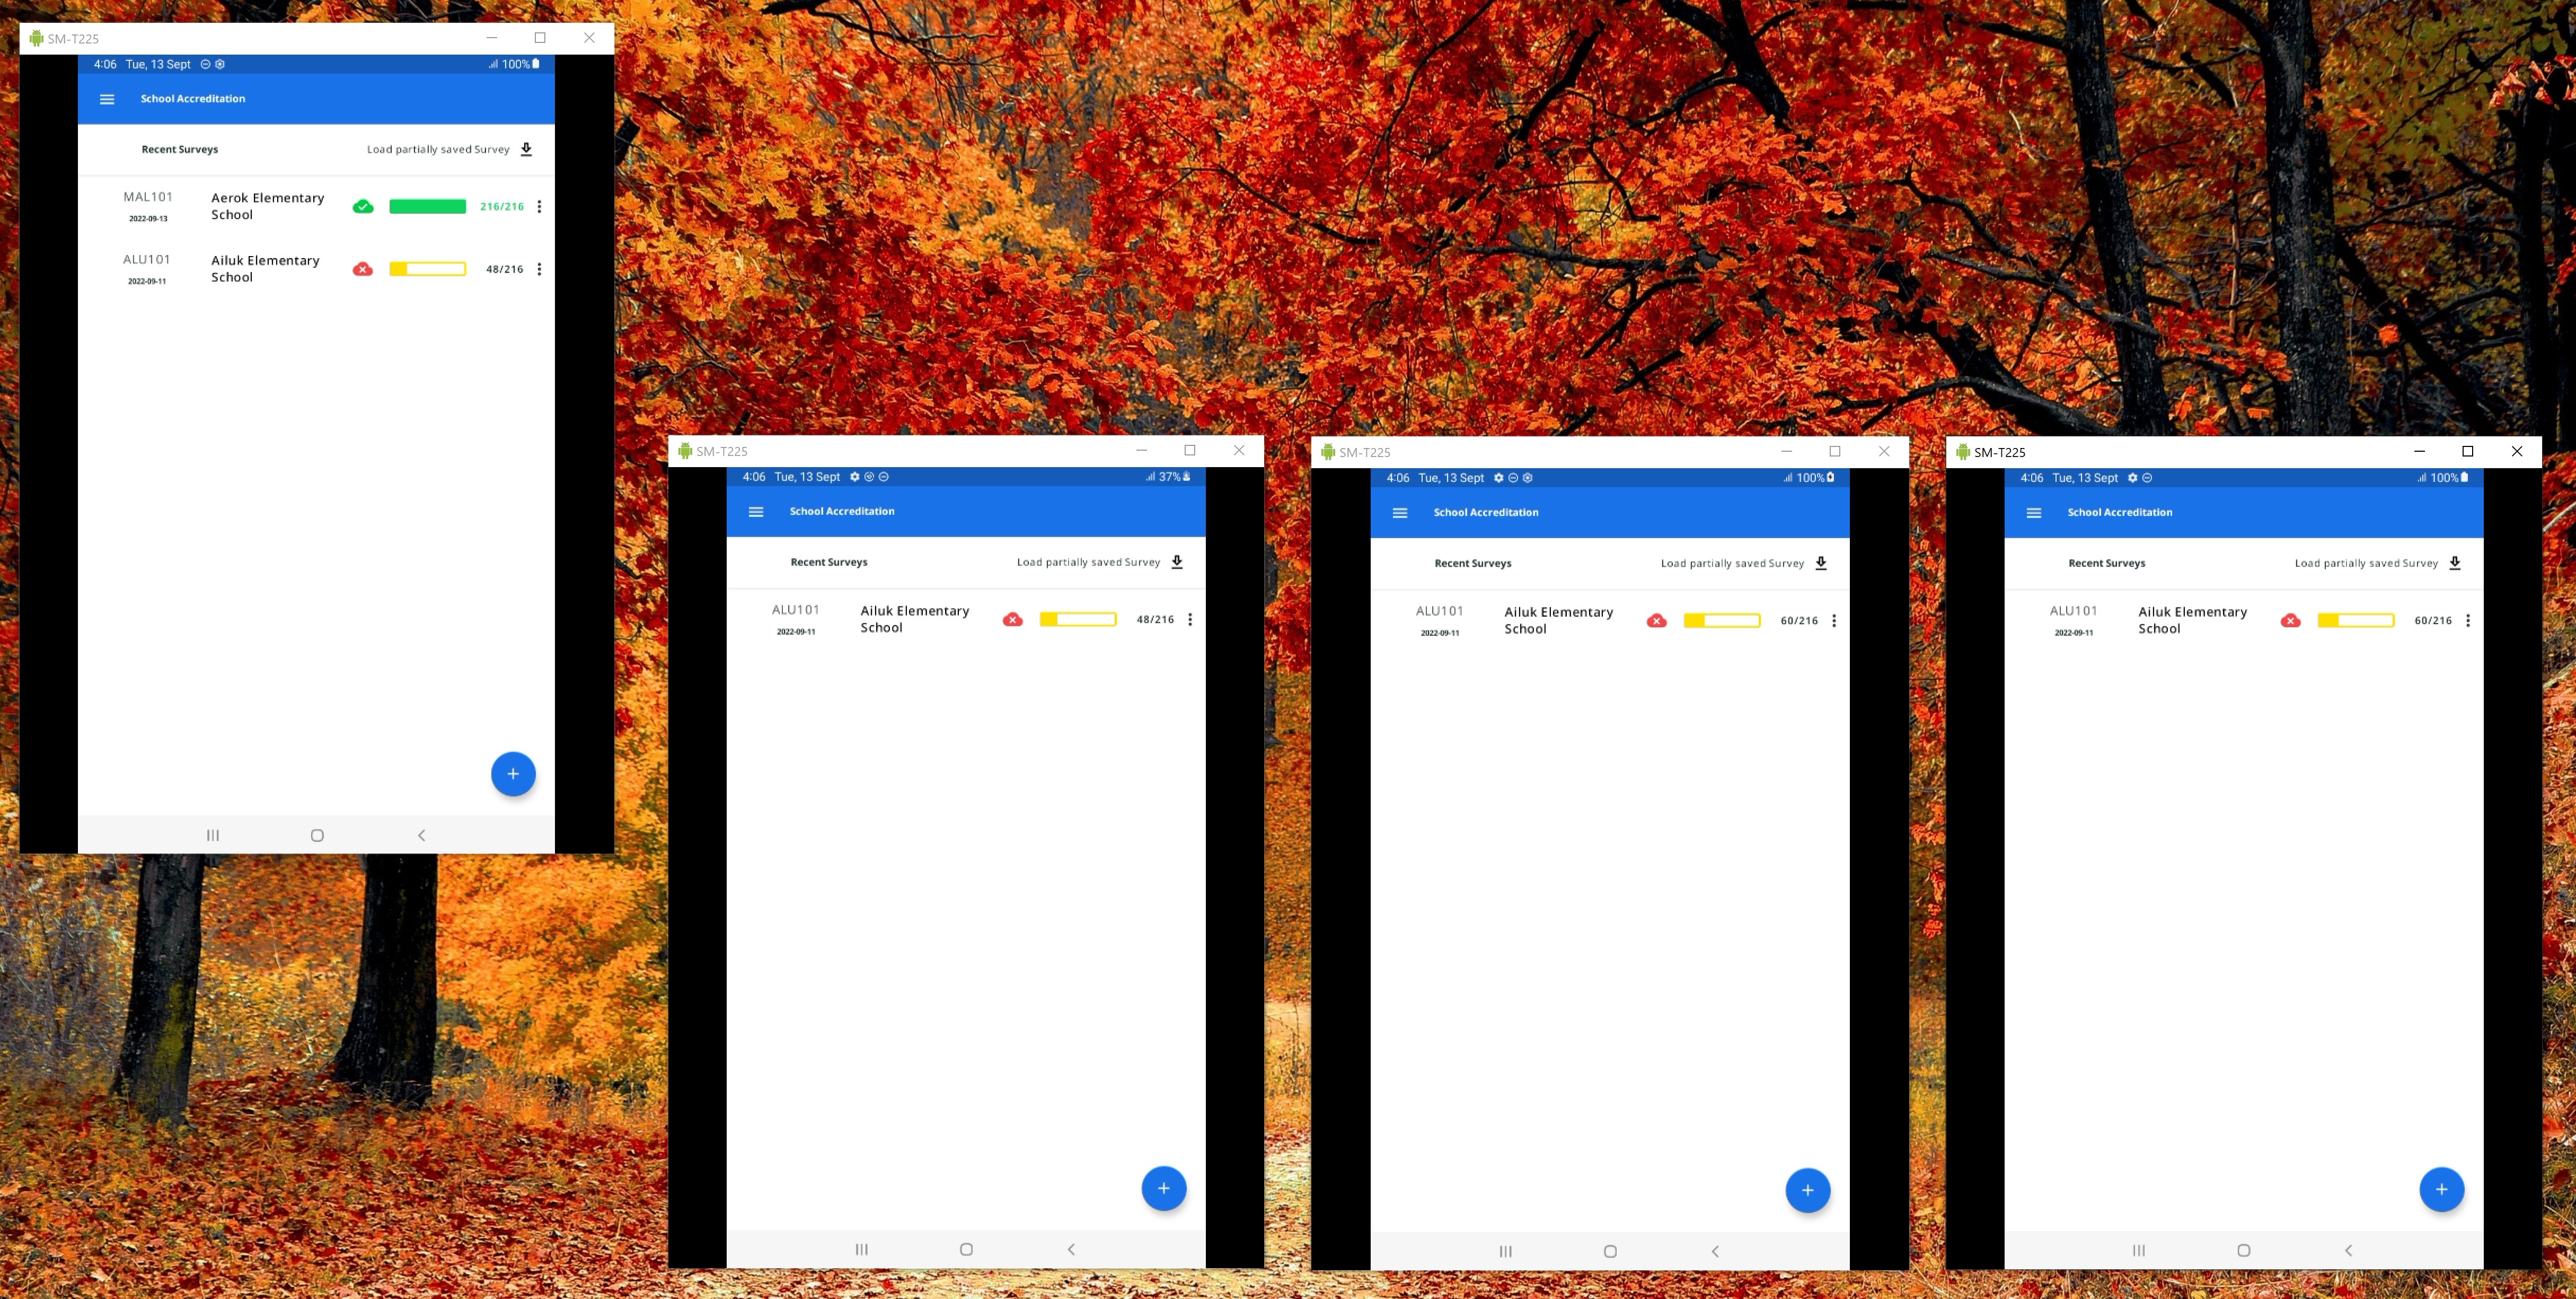
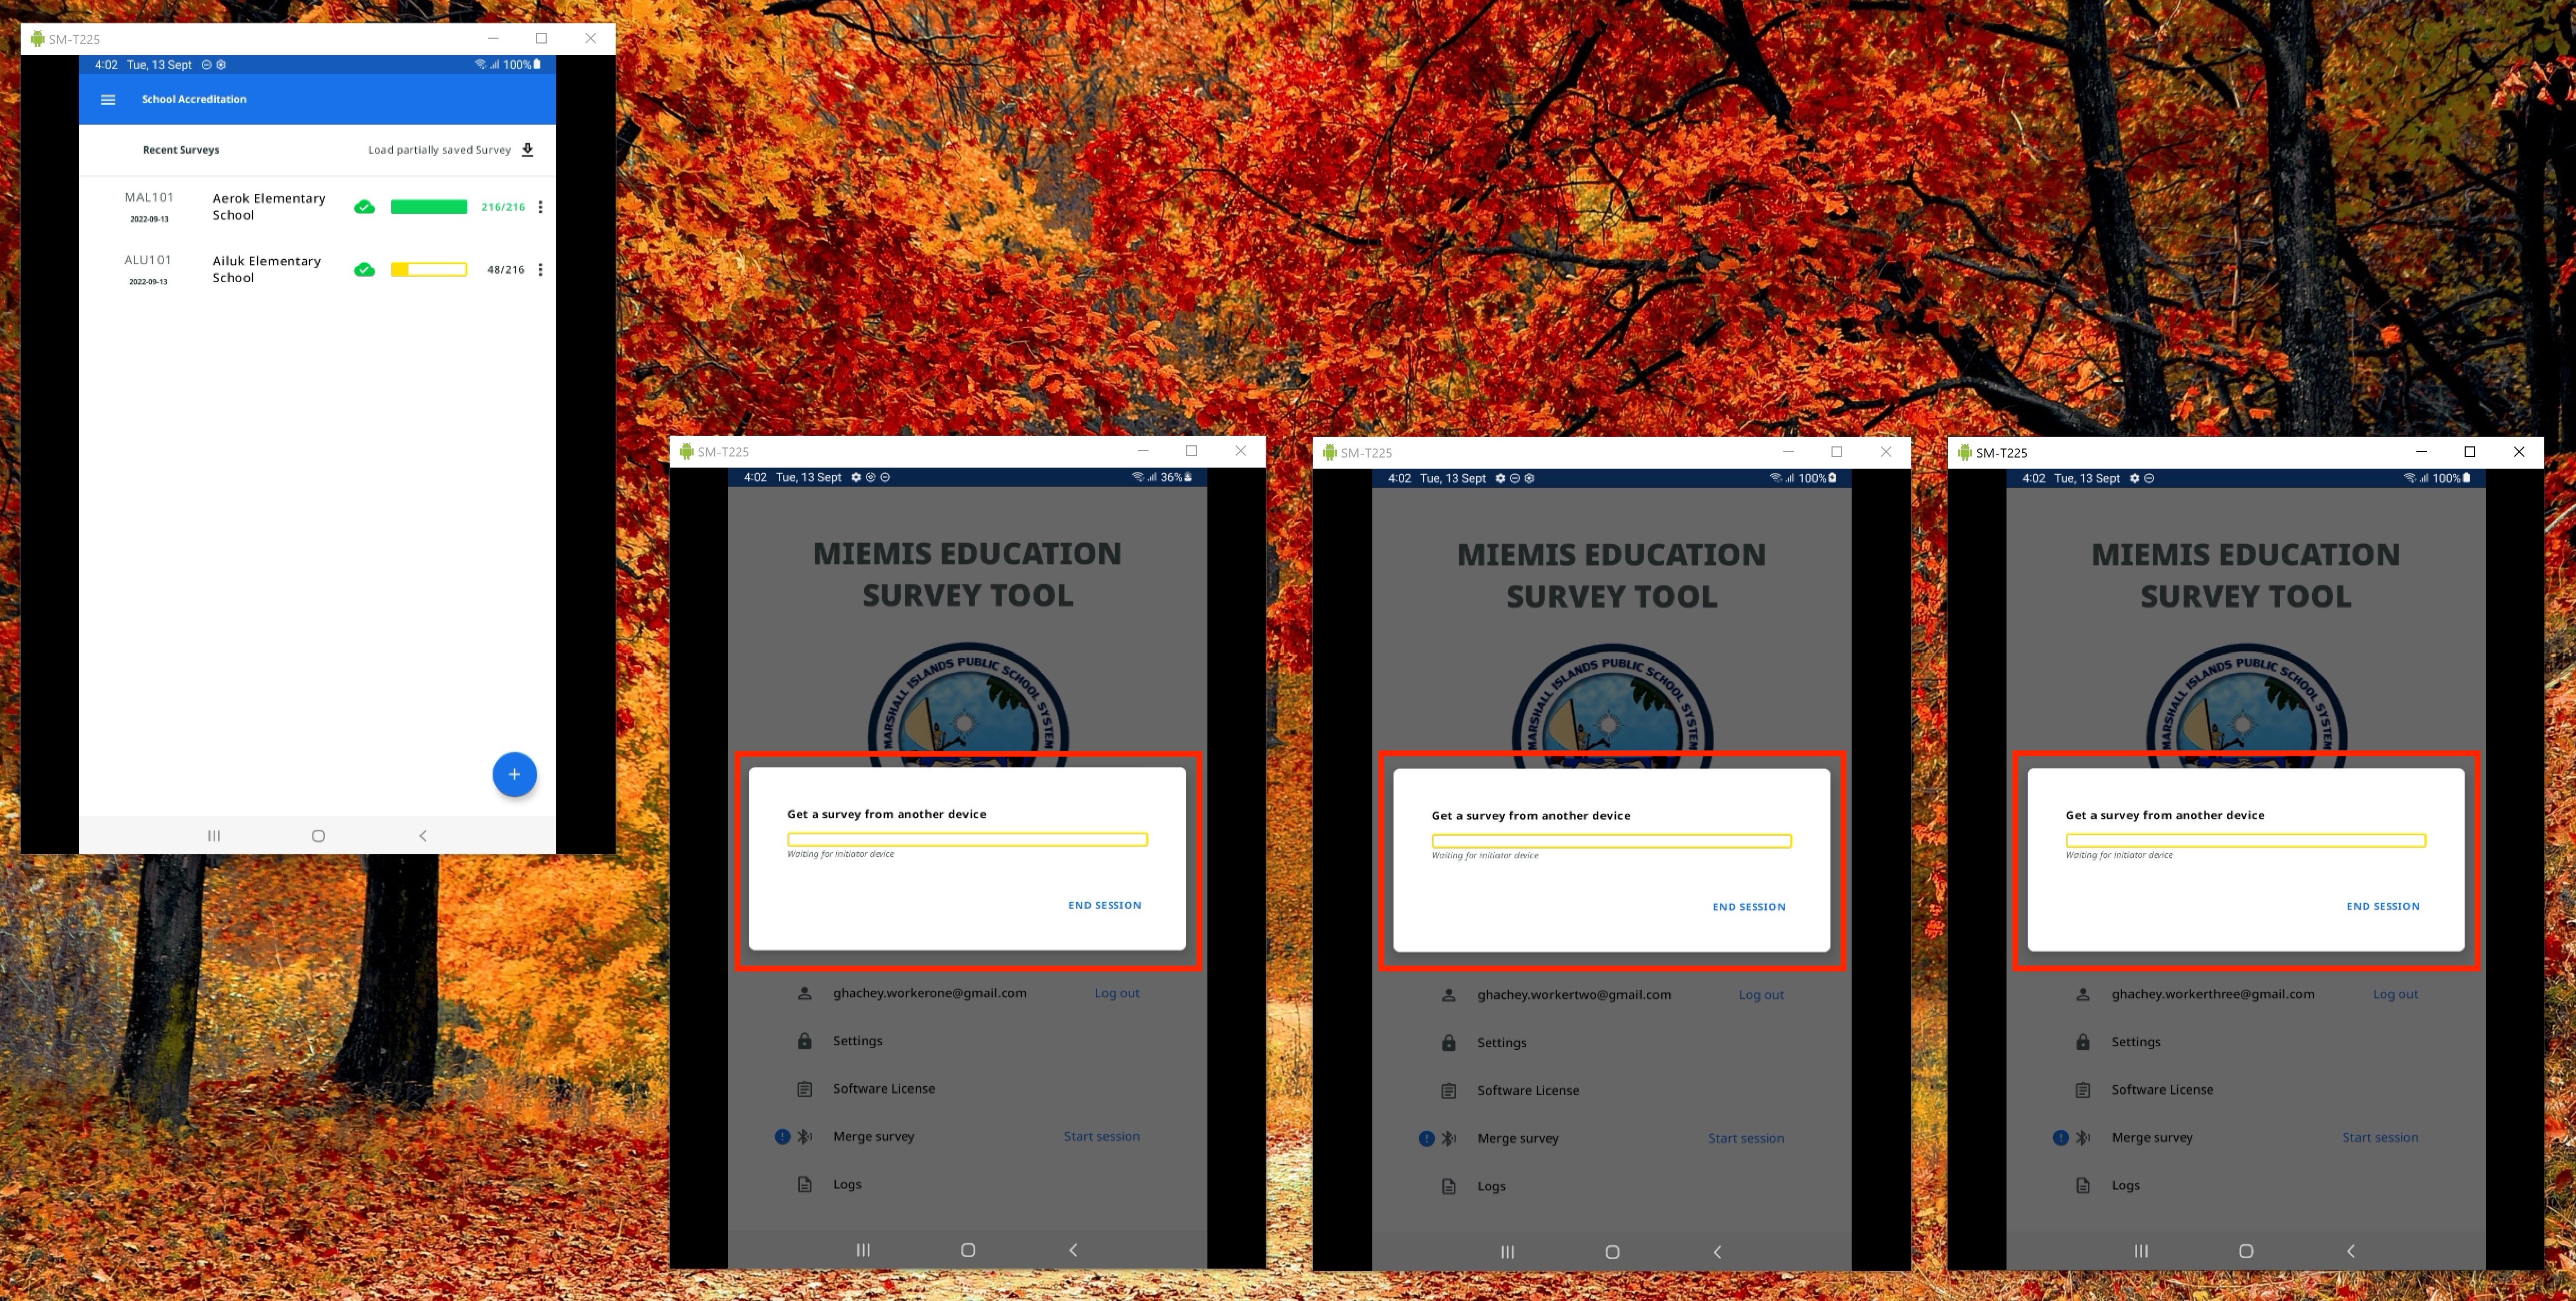
Before proceeding, just to show this is all being done offline the screenshot below shows all the survey not synced.
Now, each worker (Worker 1, Worker 2, Worker 3) must go to the home page. Optionally click on the ! for an informational message. When ready to send their completed “partial” surveys the worker can click on Start session.
You will see the below.
When ready, the team leader can receive the partially completed surveys. From the team leader's tablet, to the right of the survey to be completed click on the vertical dots to access the menu as shown below. Click on Merge.
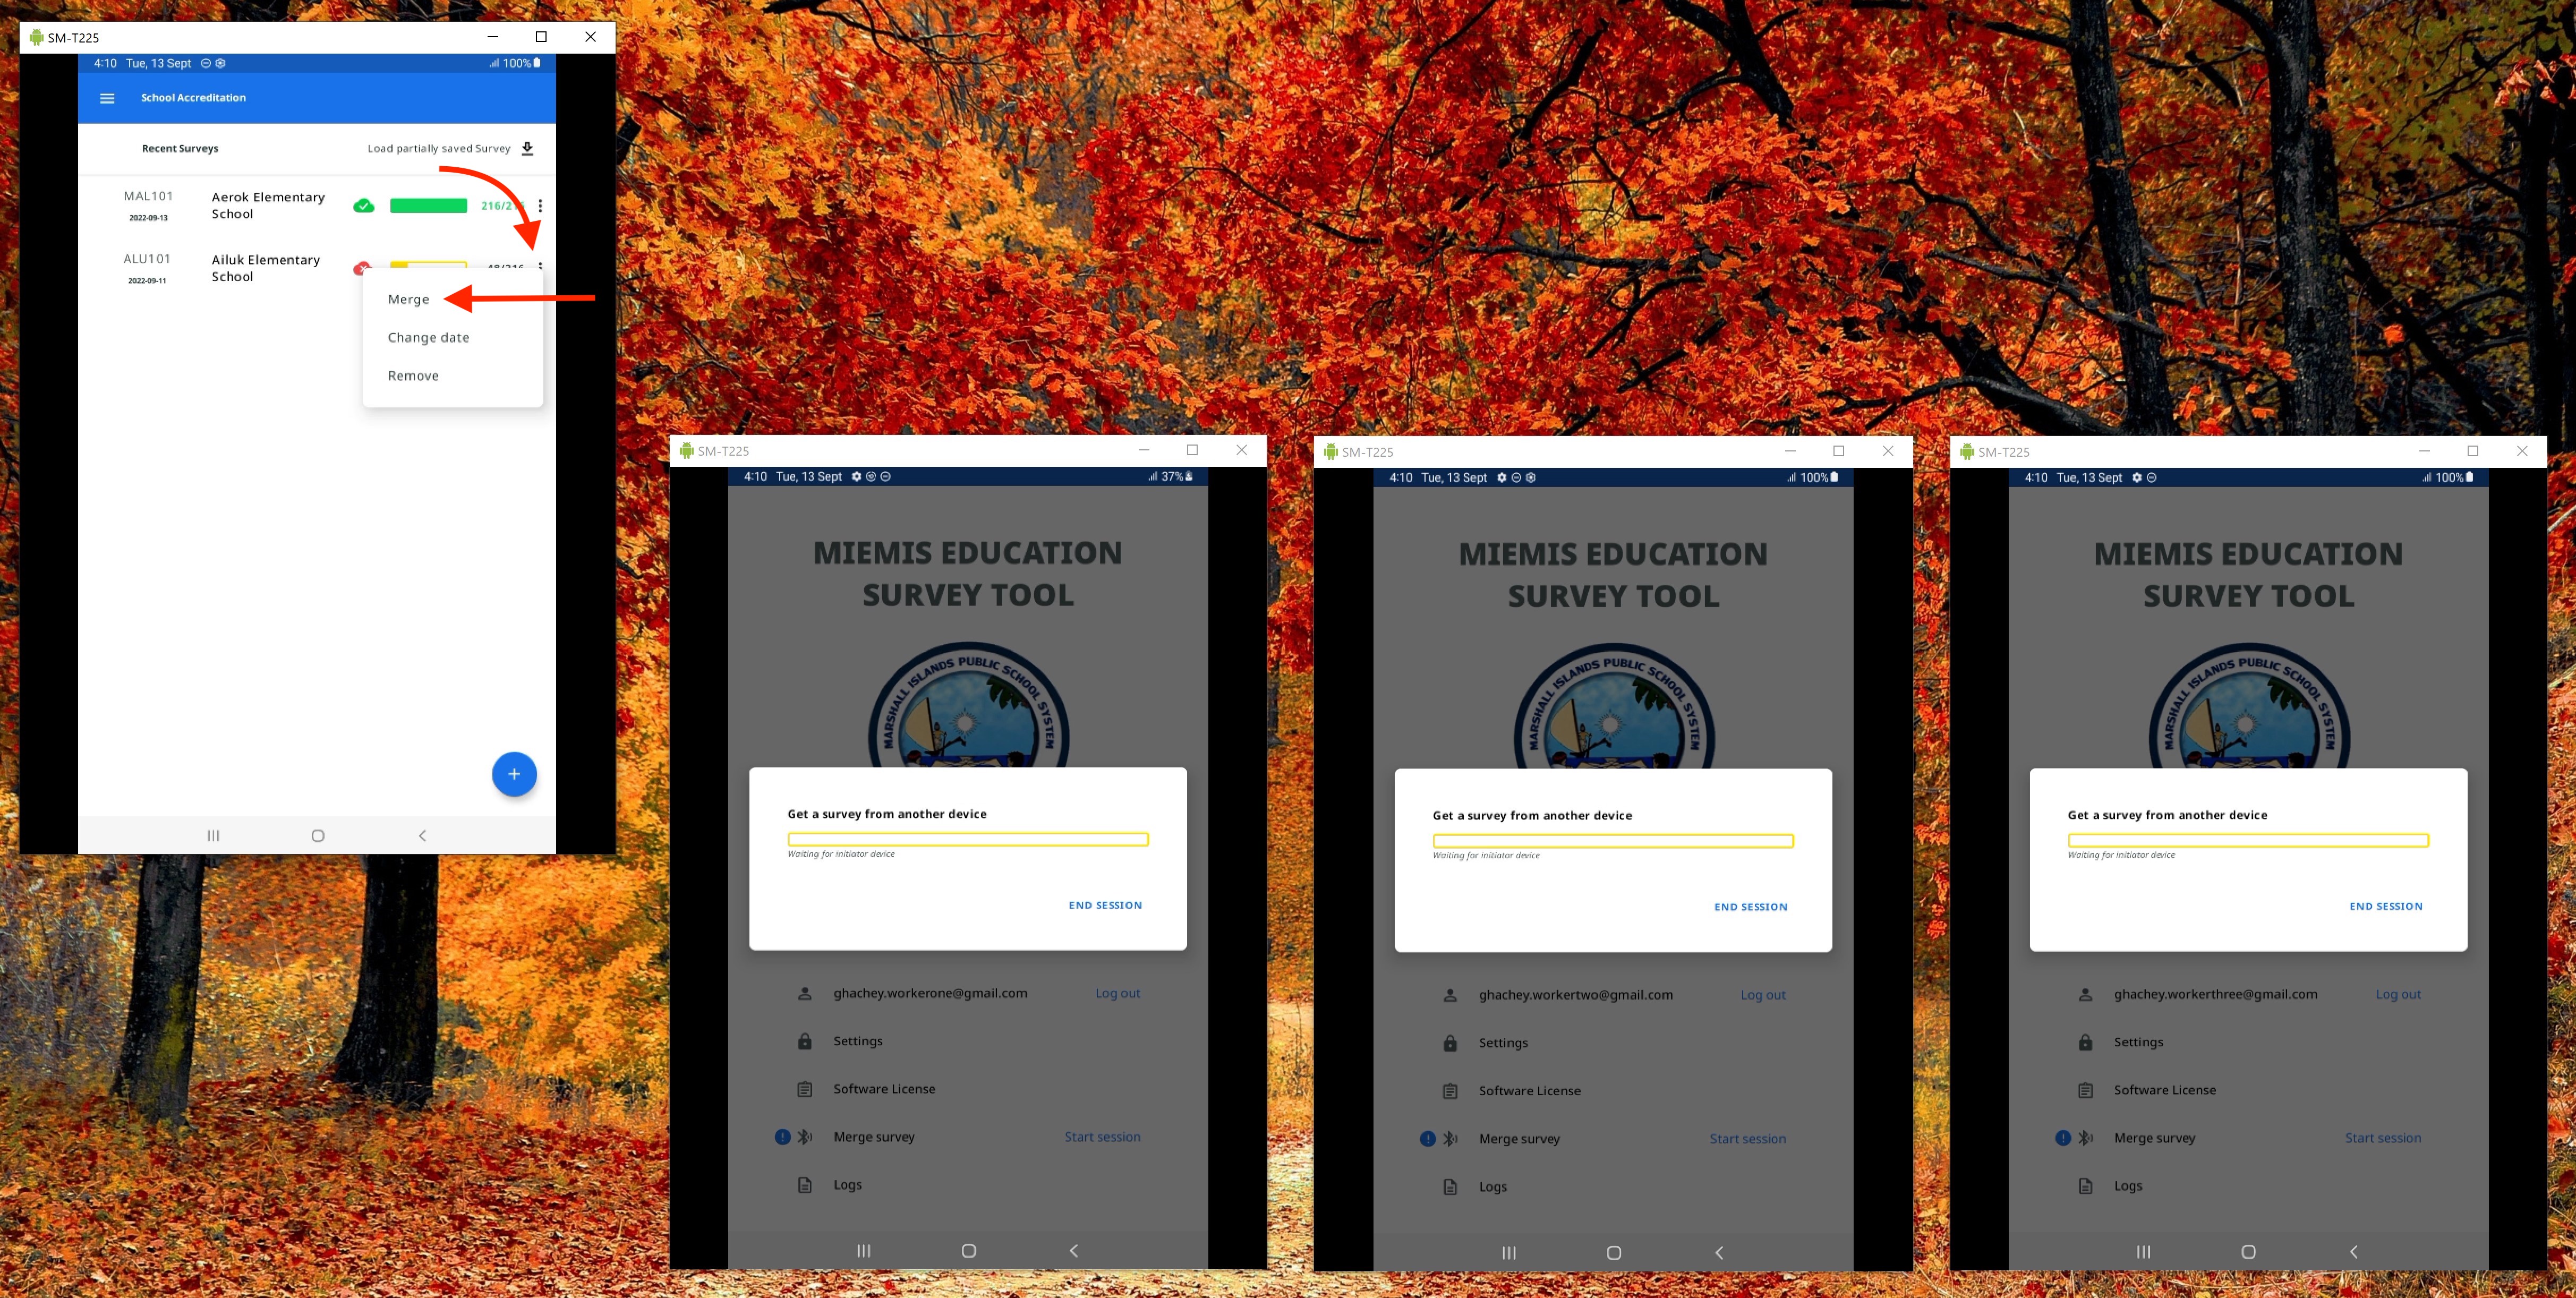
You will have to allow a Bluetooth connection. Then you will eventually see a list of nearby tablets. Note how clear the tablets are identified (i.e. Worker 1, Worker 2, etc.) This is why it is recommended for the administrators of the tablets to rename them in the settings. Identify which tablet you want to merge from, select it and click on Choose Device.

You will then see a list of relevant surveys, likely just one. Select it and click on Select Survey.
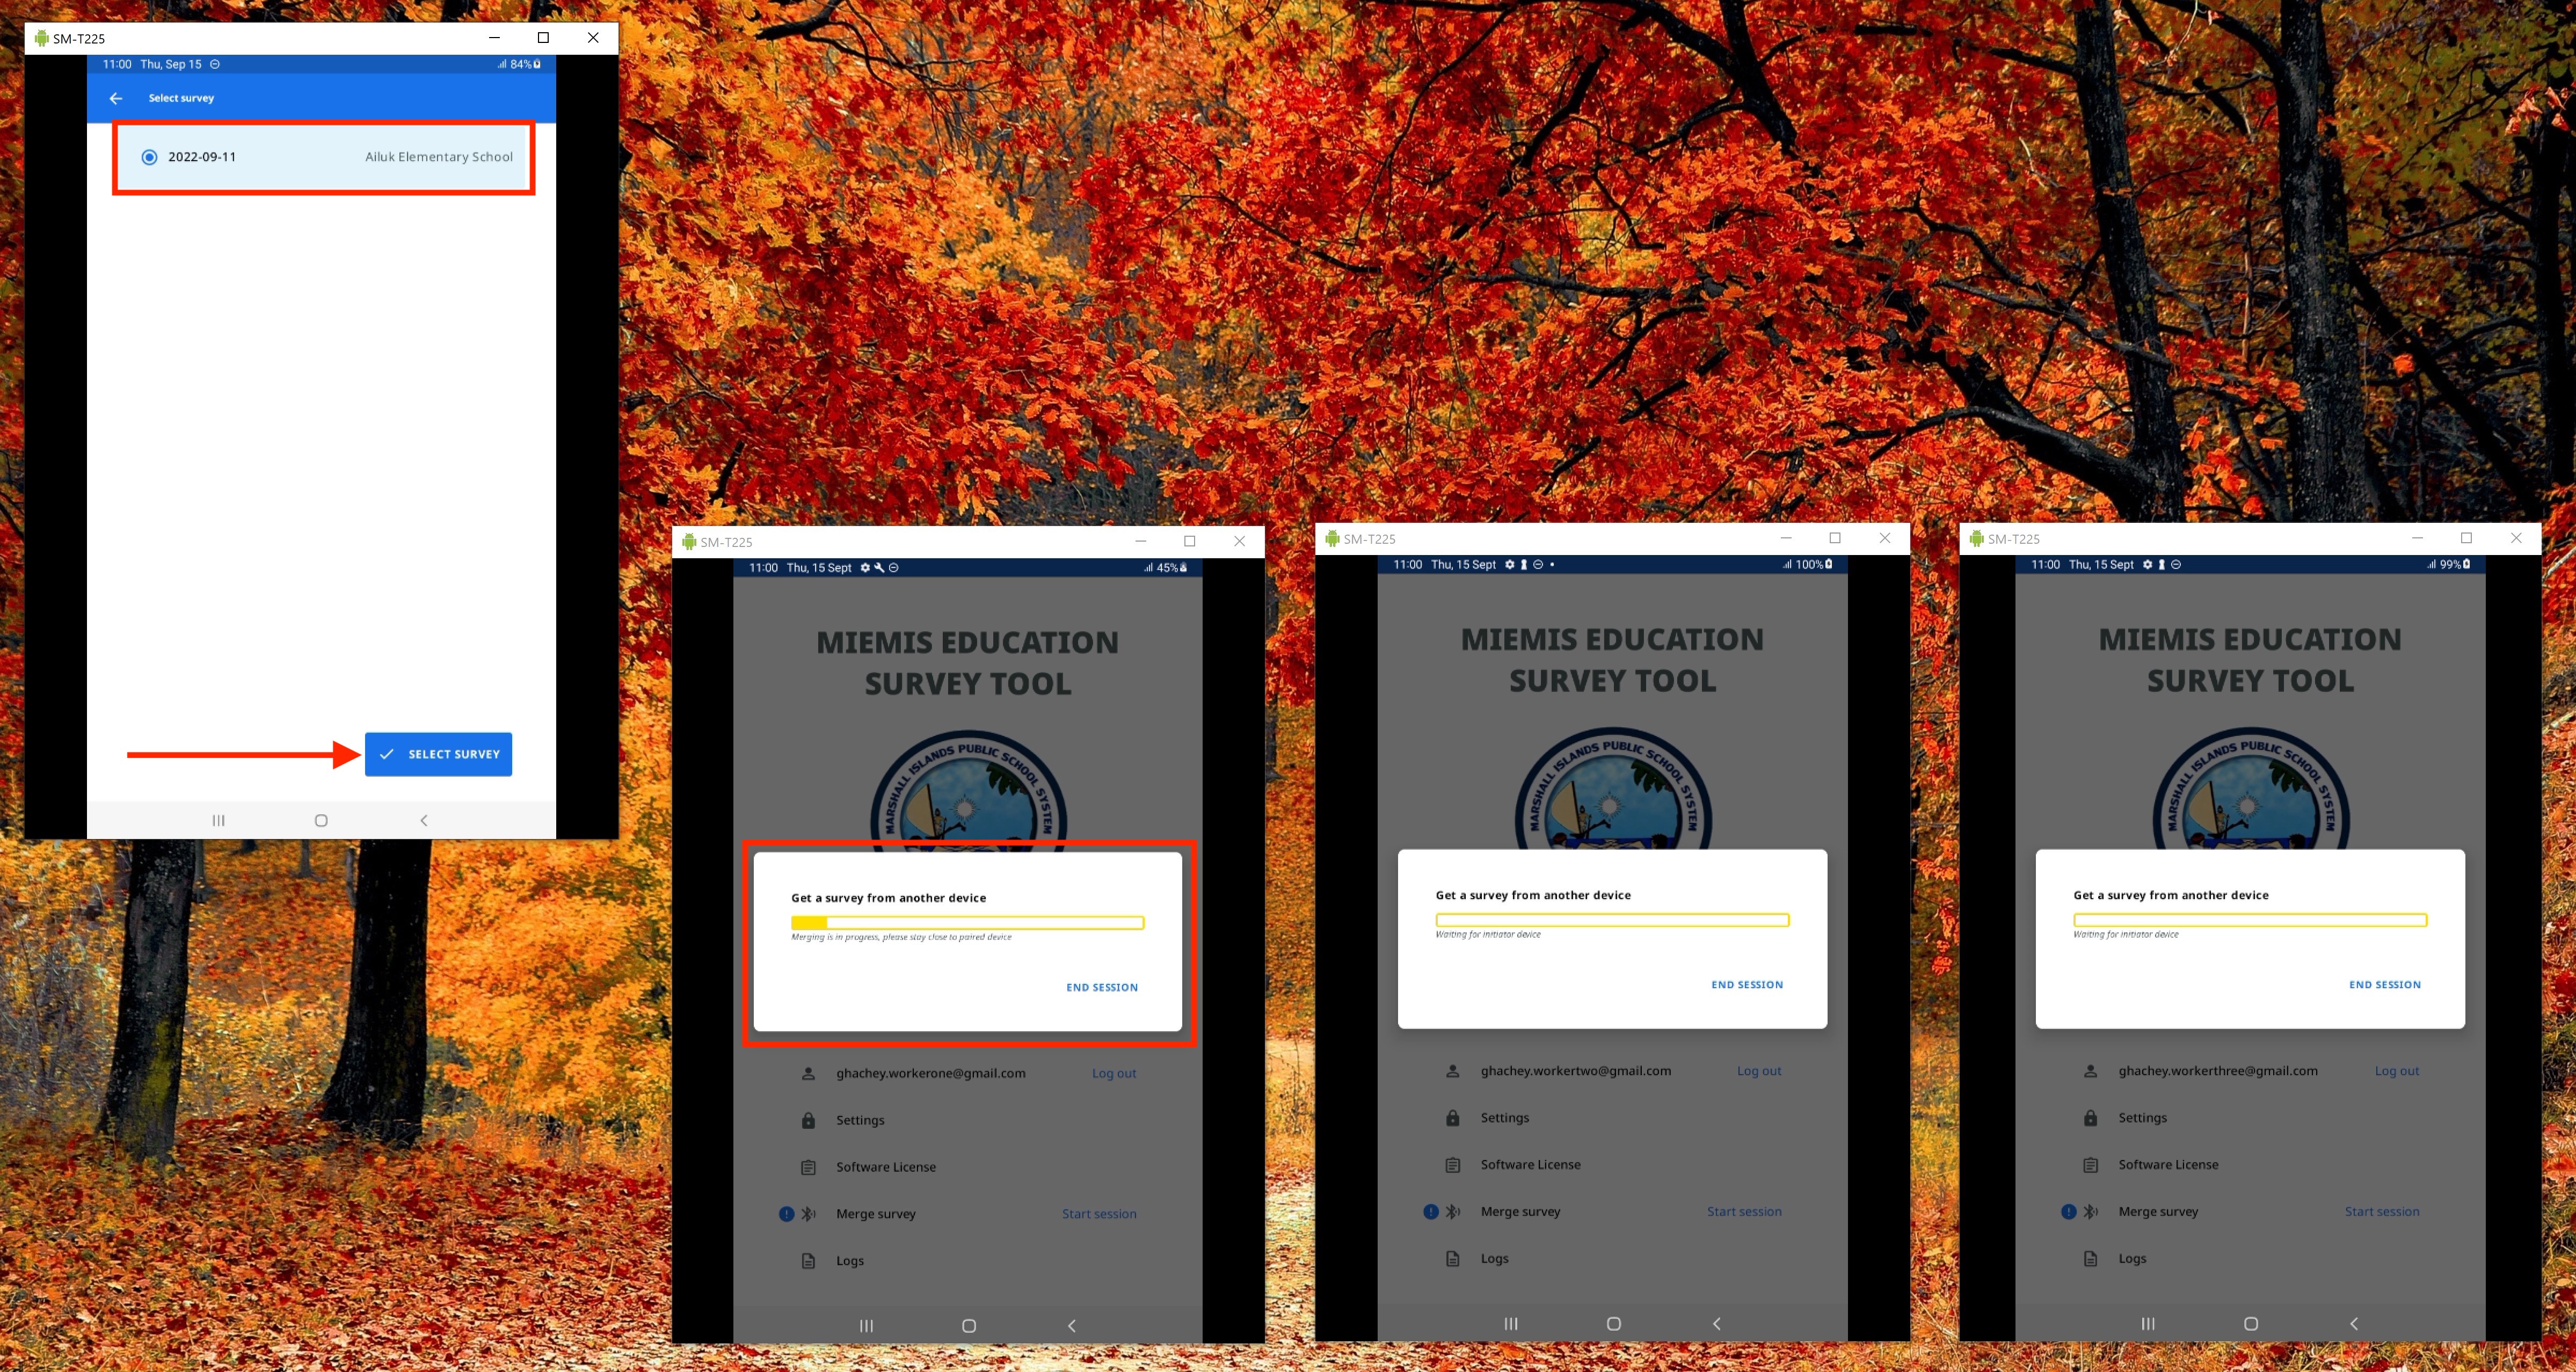
This will trigger the merging of Worker 1 tablet's partially completed survey into the team leader's survey. When completed it will look something like below. Note the time it takes for this largely depends on how many photos were taken. Another reason to chose quality of photos over quantity.
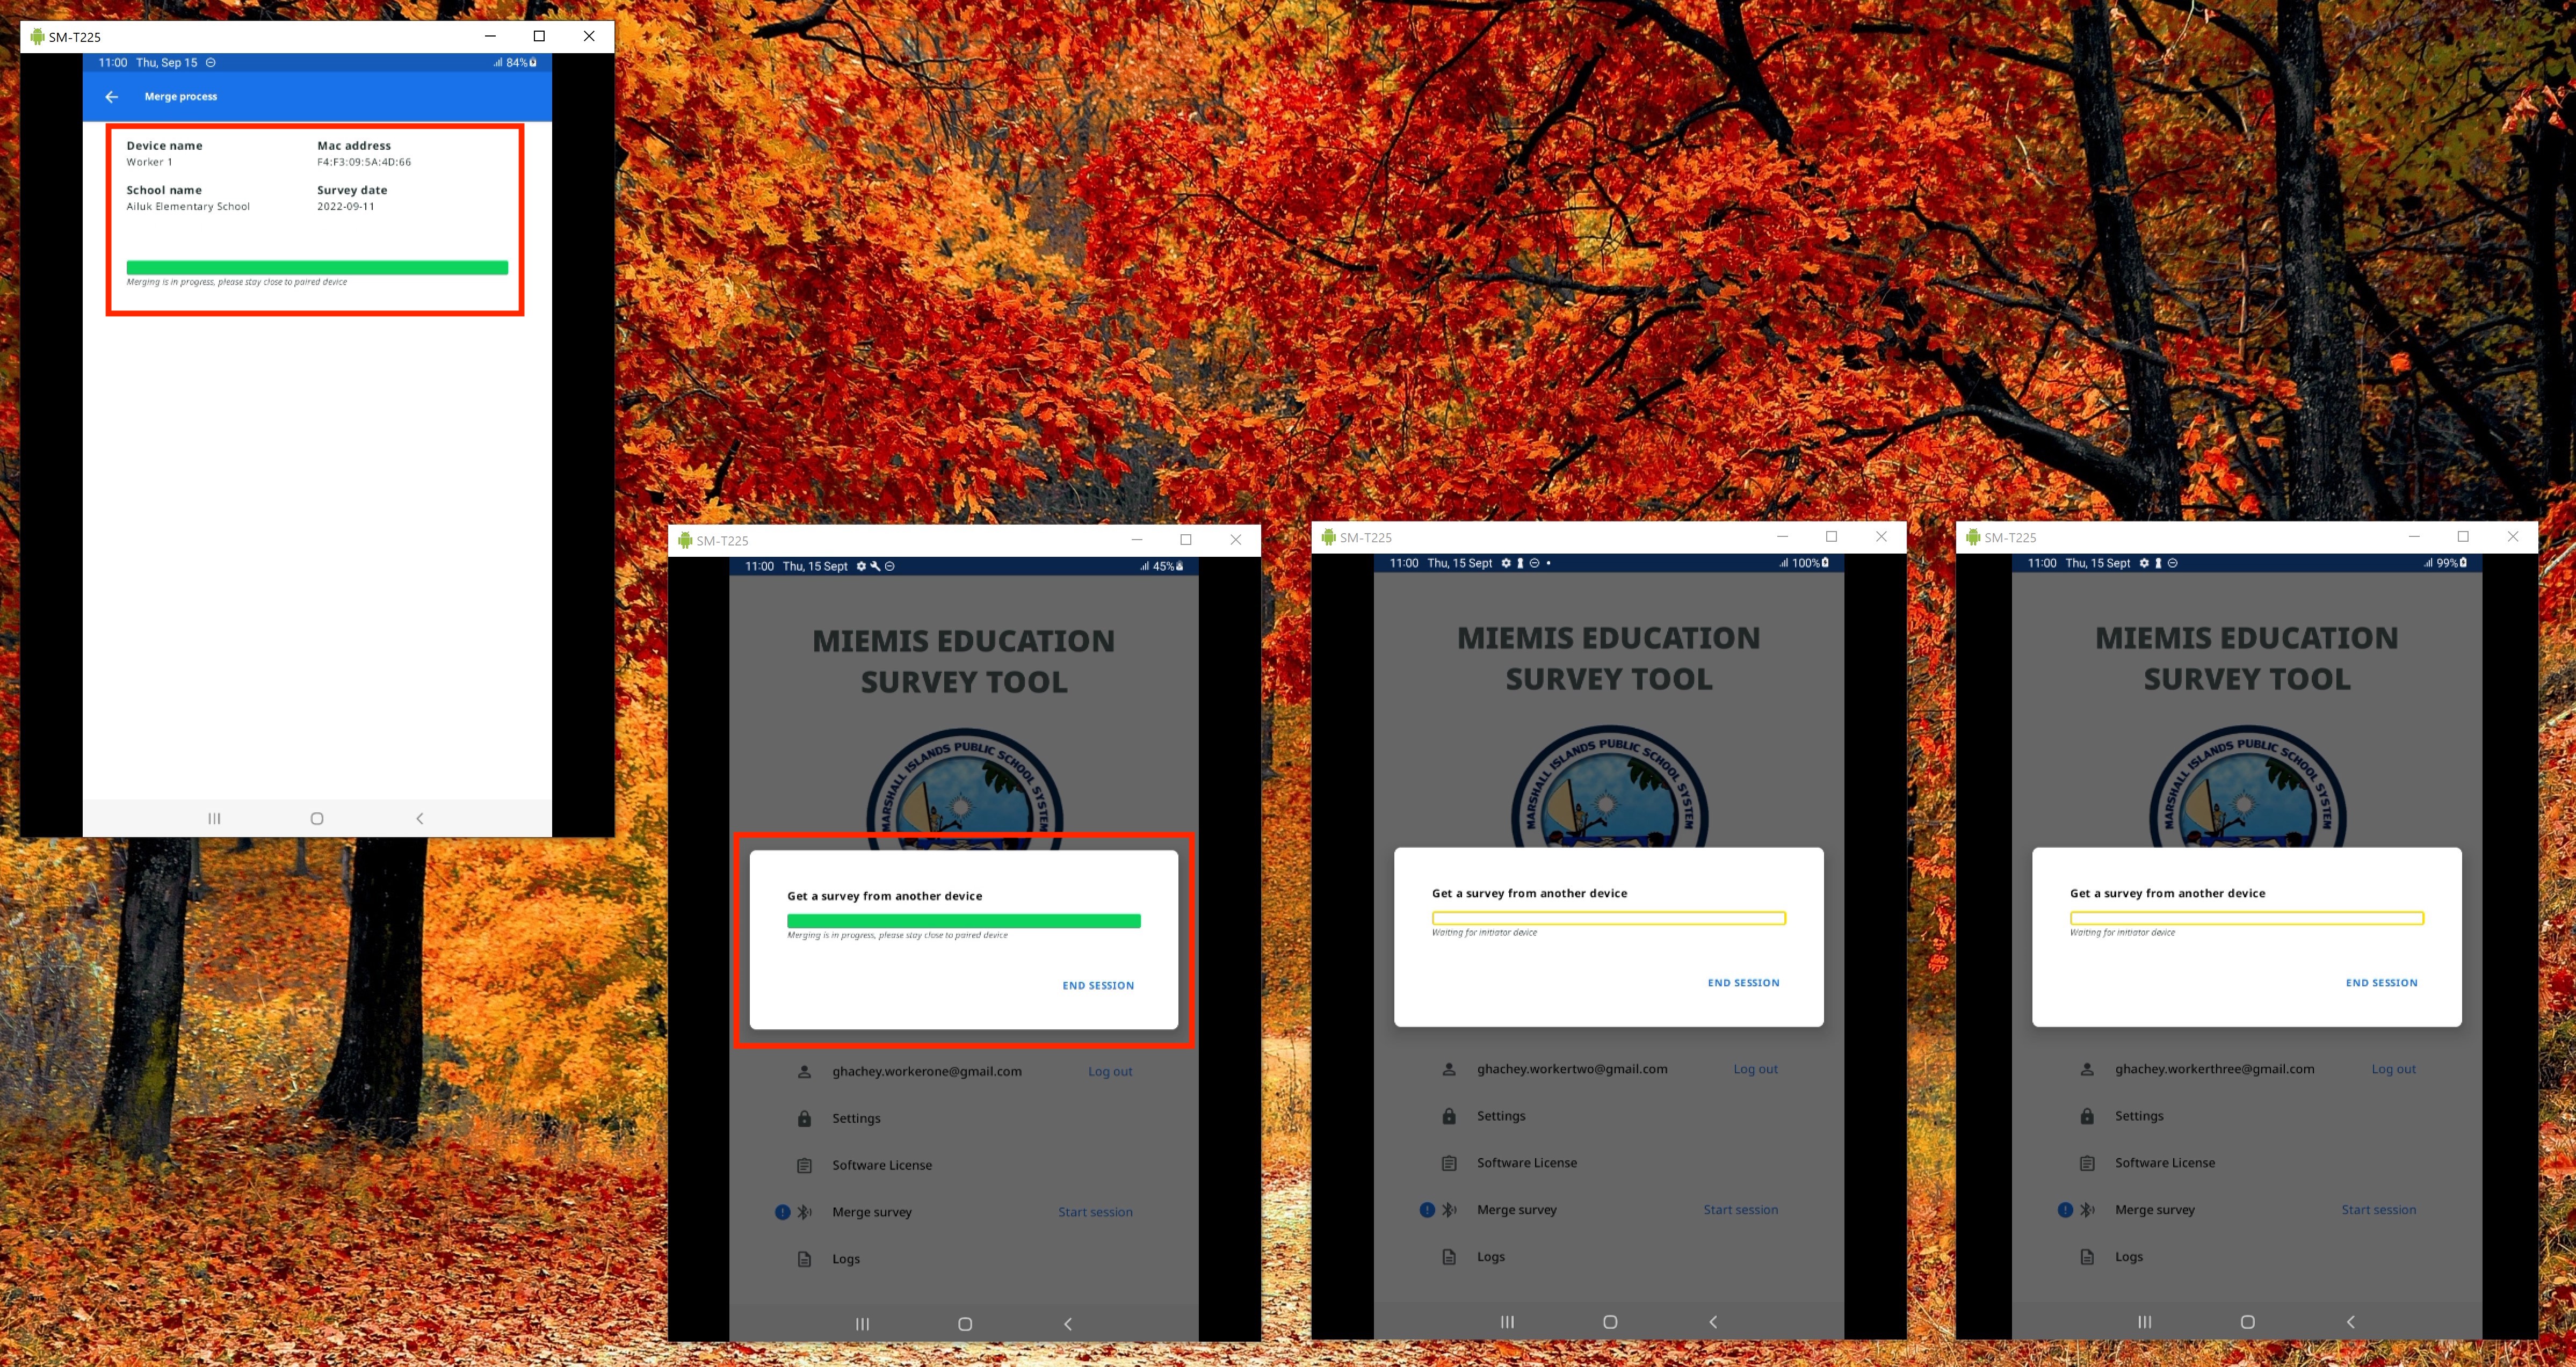
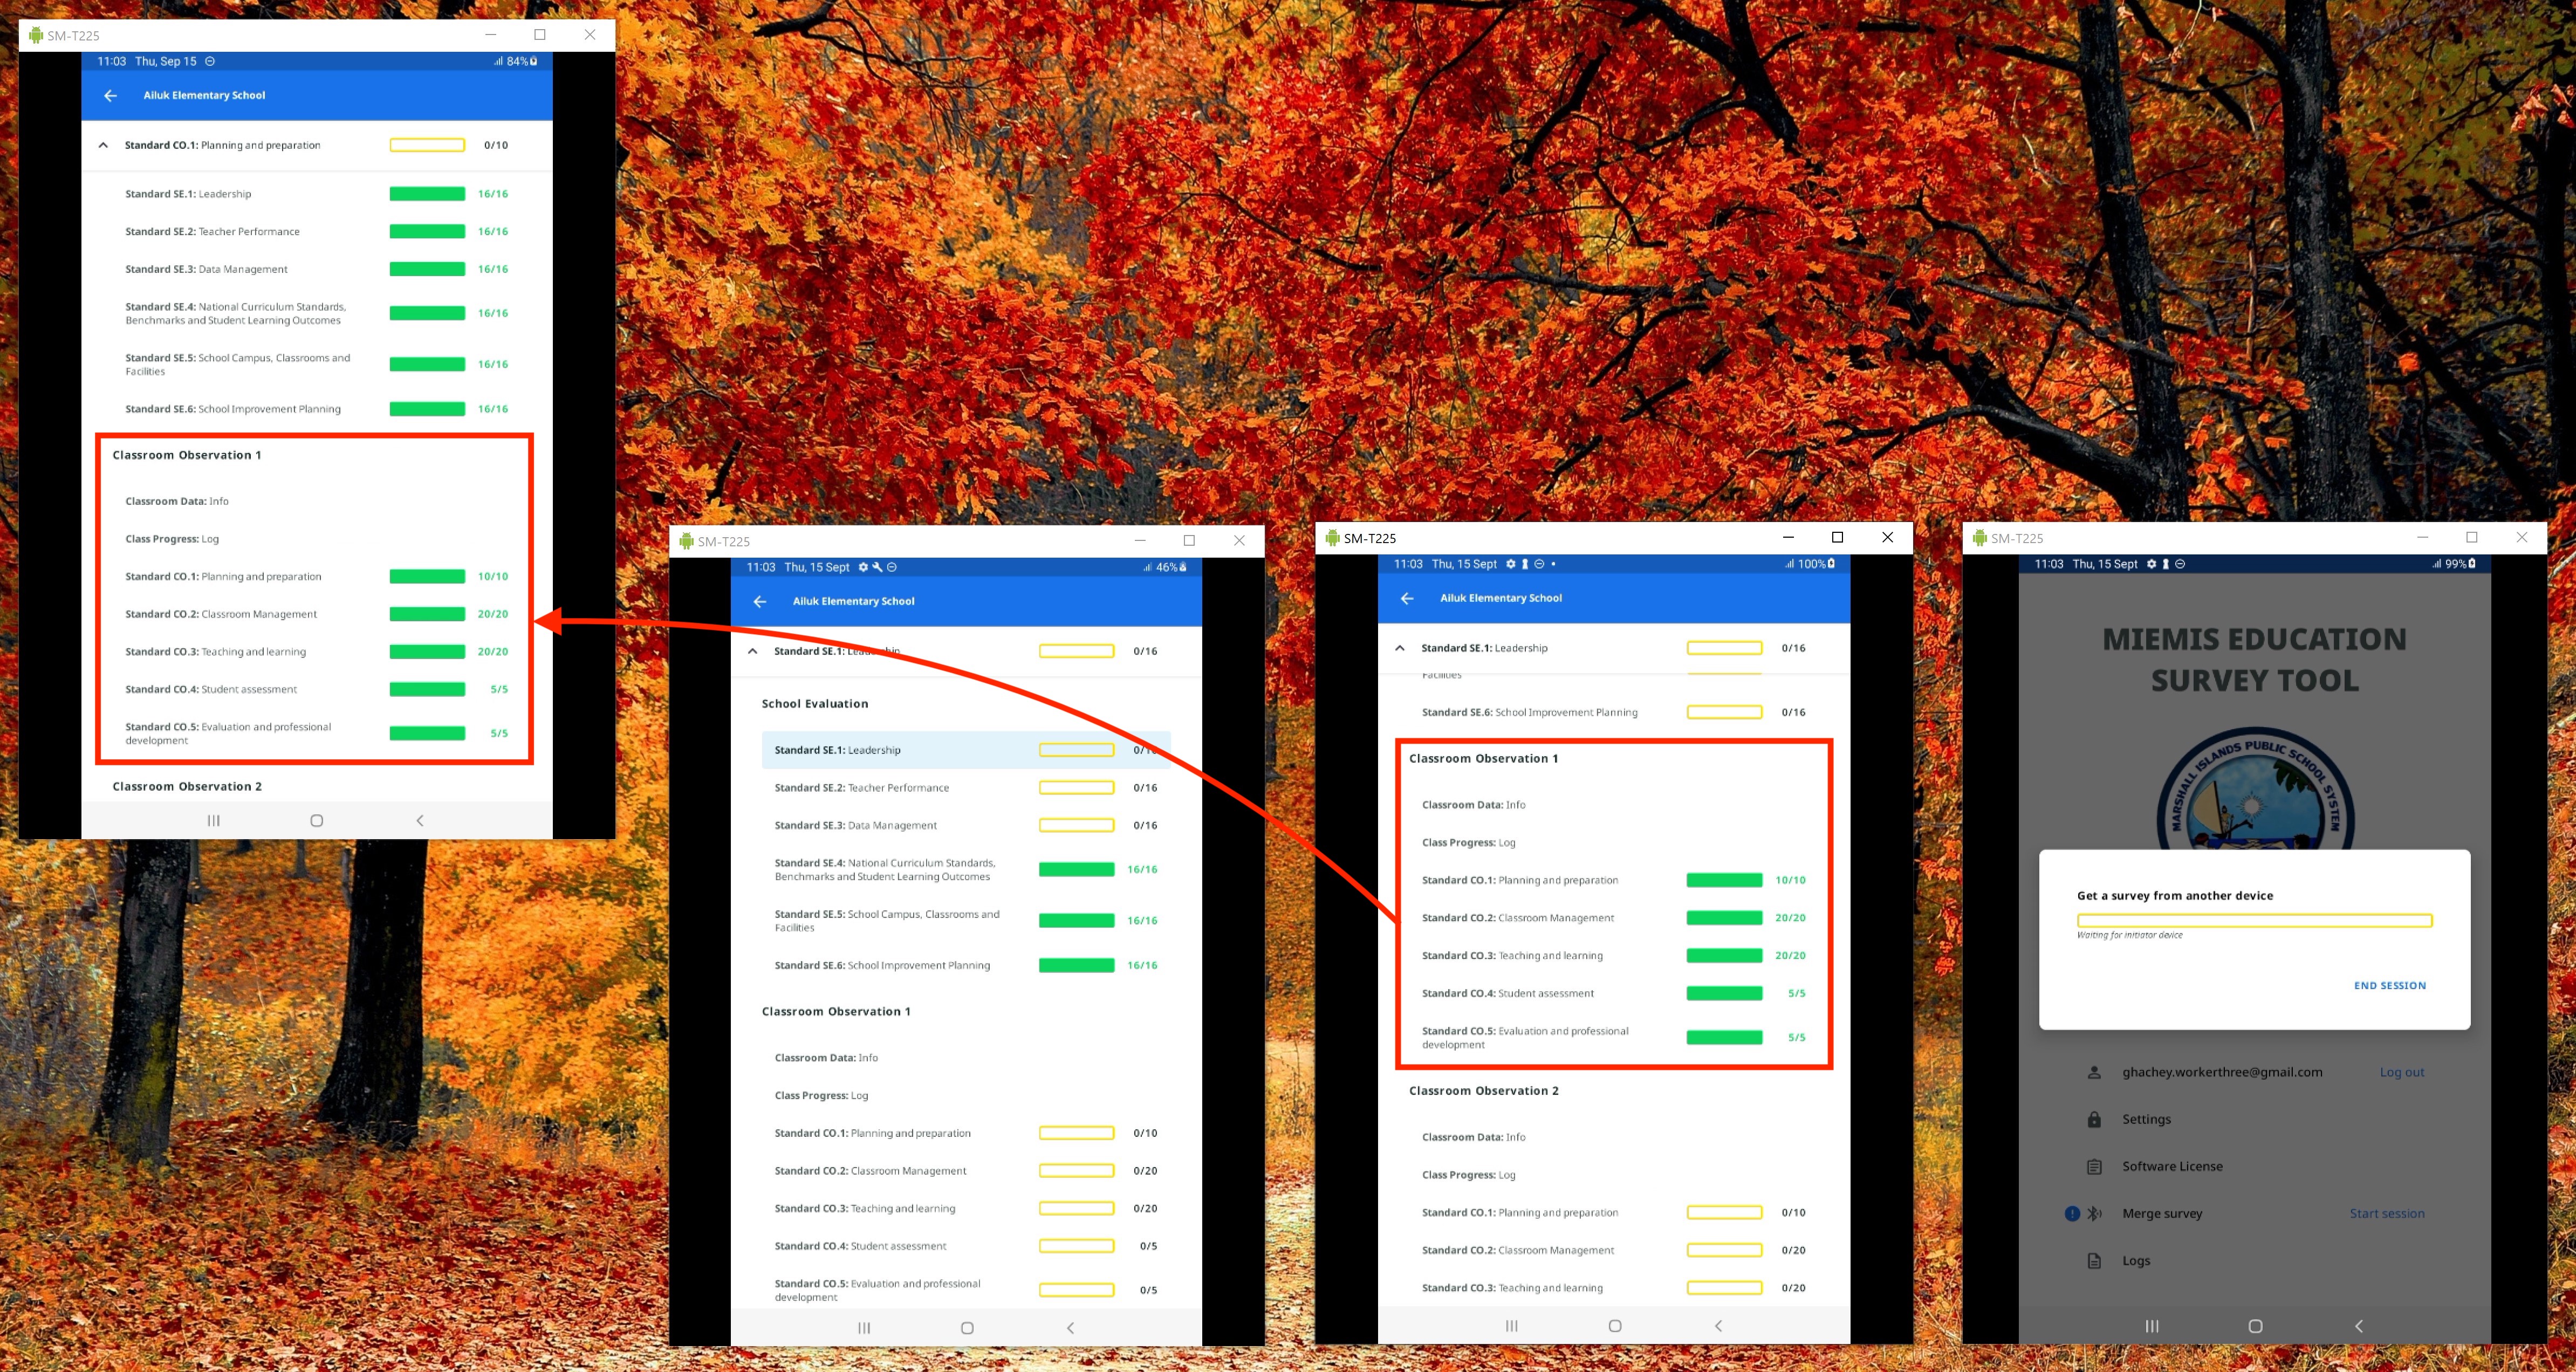
If you then go and open the Team Leader's survey and that of the Worker 1 you will notice the Worker 1's completed sections are now also transferred to the team leader's survey as depicted below.
Repeat the process for Worker 2 into Team Leader's tablet and observe the following.
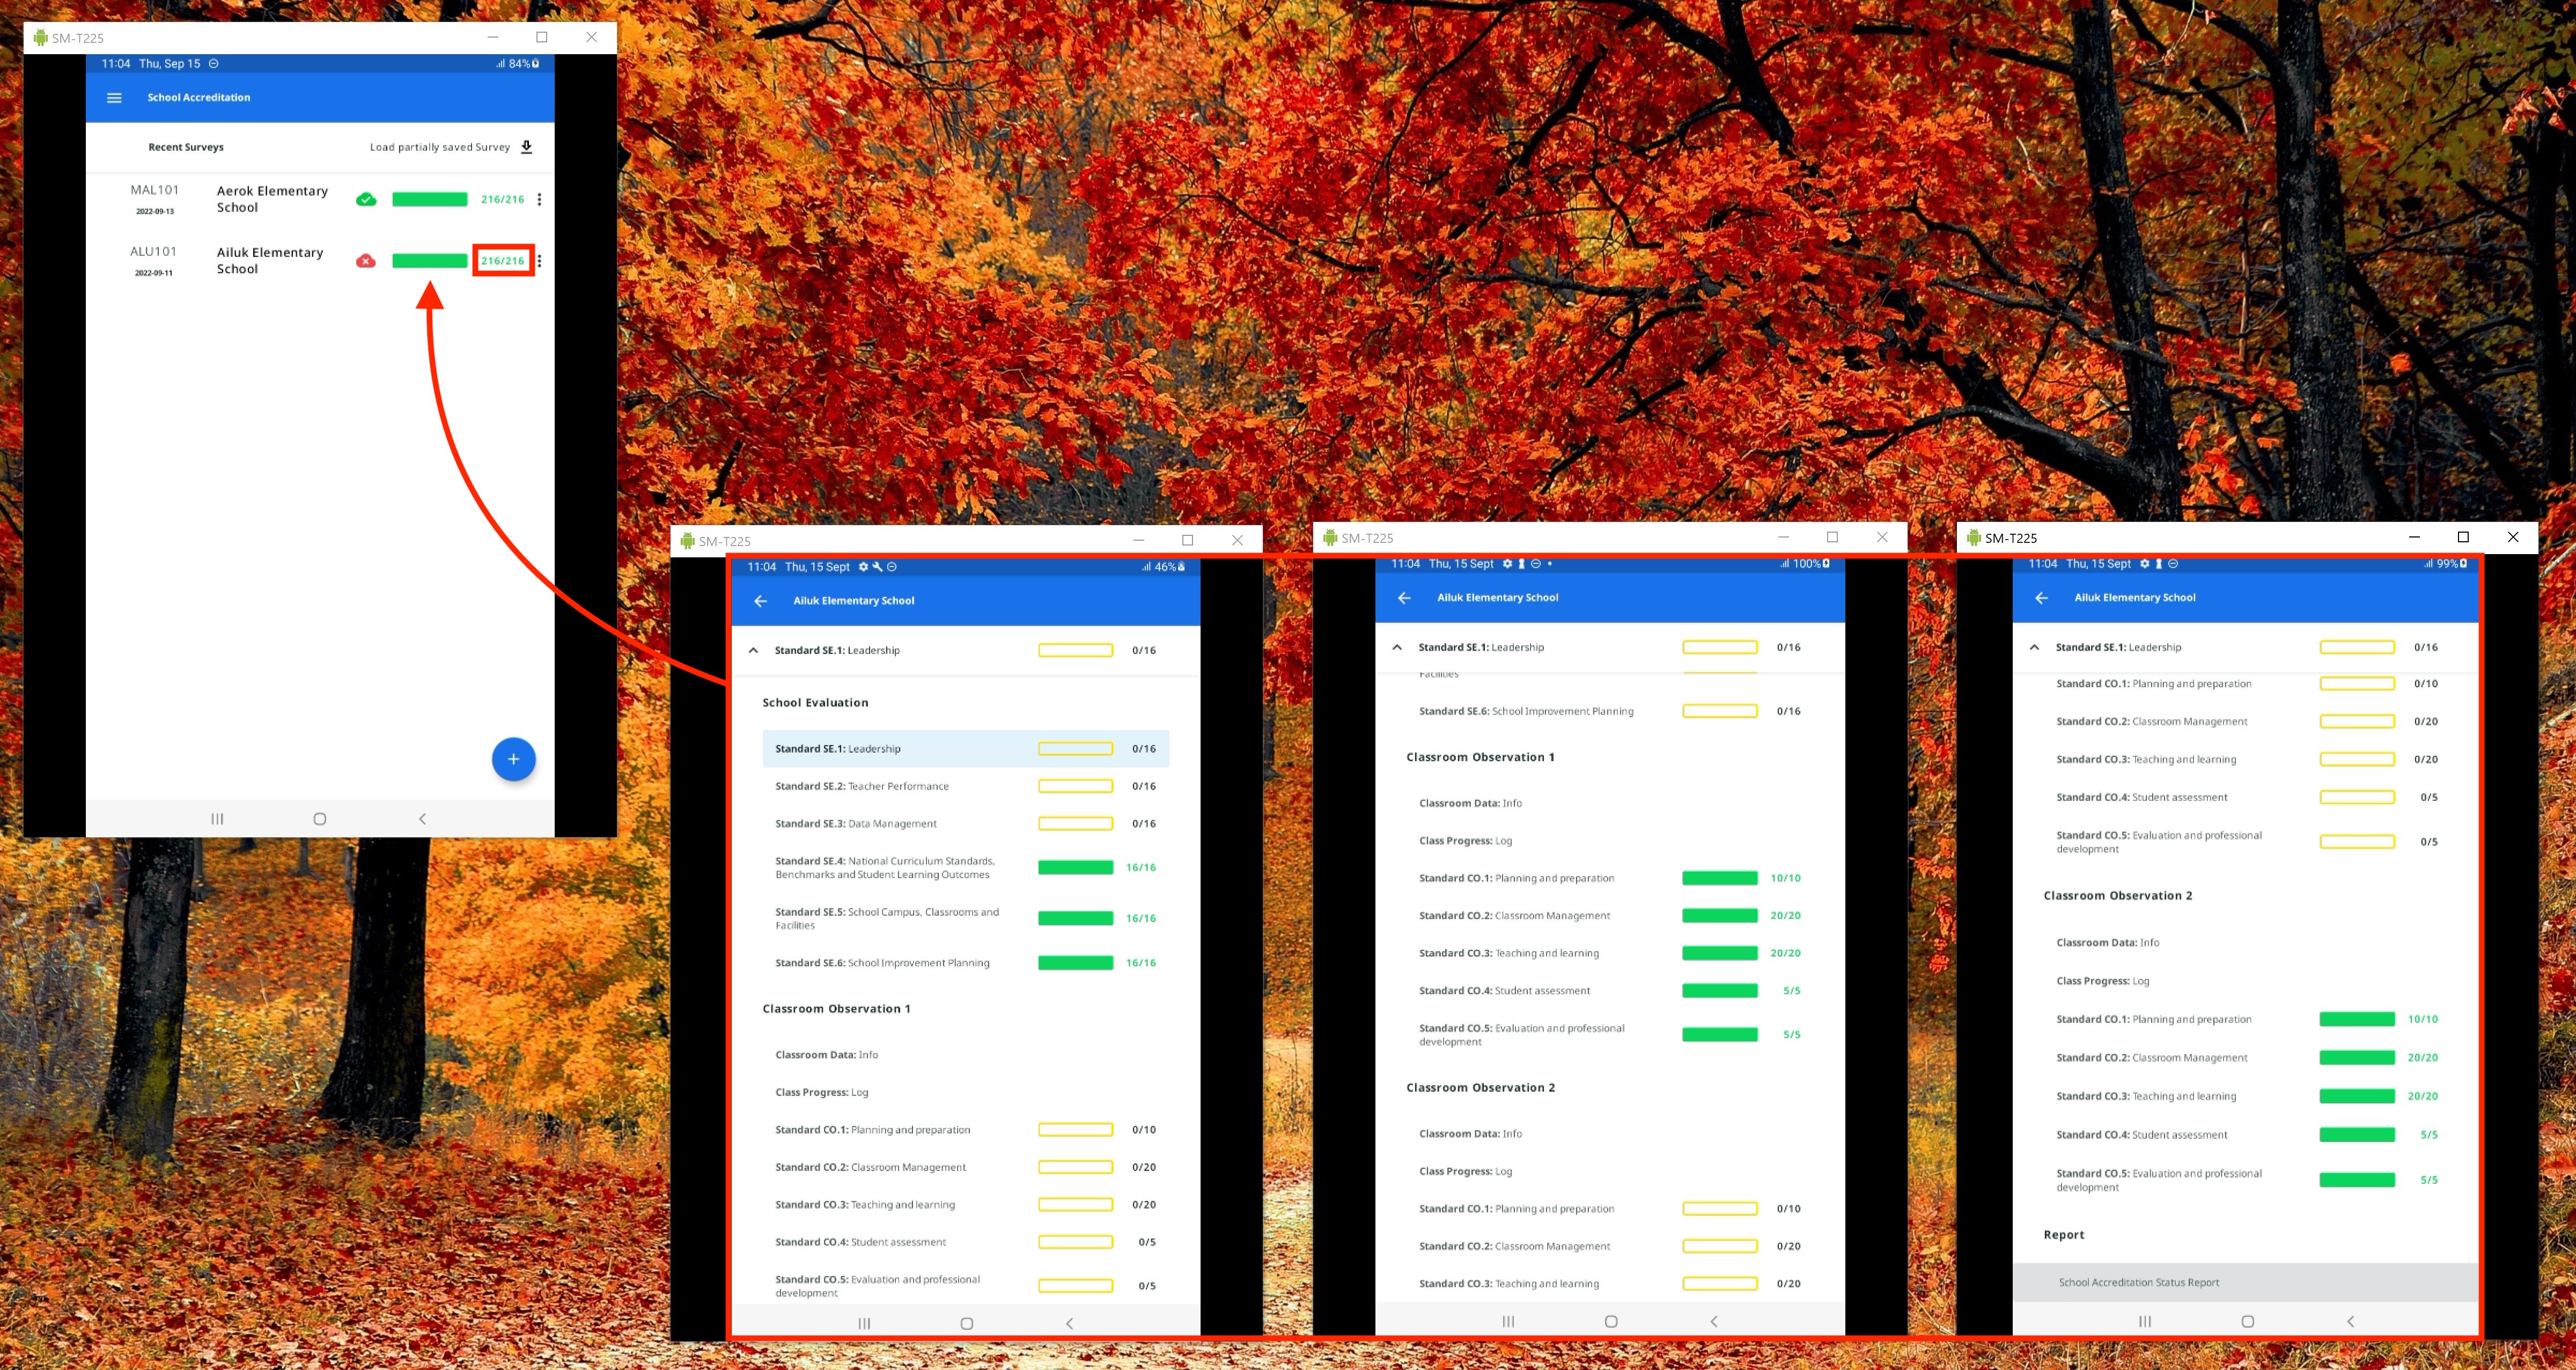
Once all three workers have been merged into the team leader you will see the survey is full (note the progress bar).
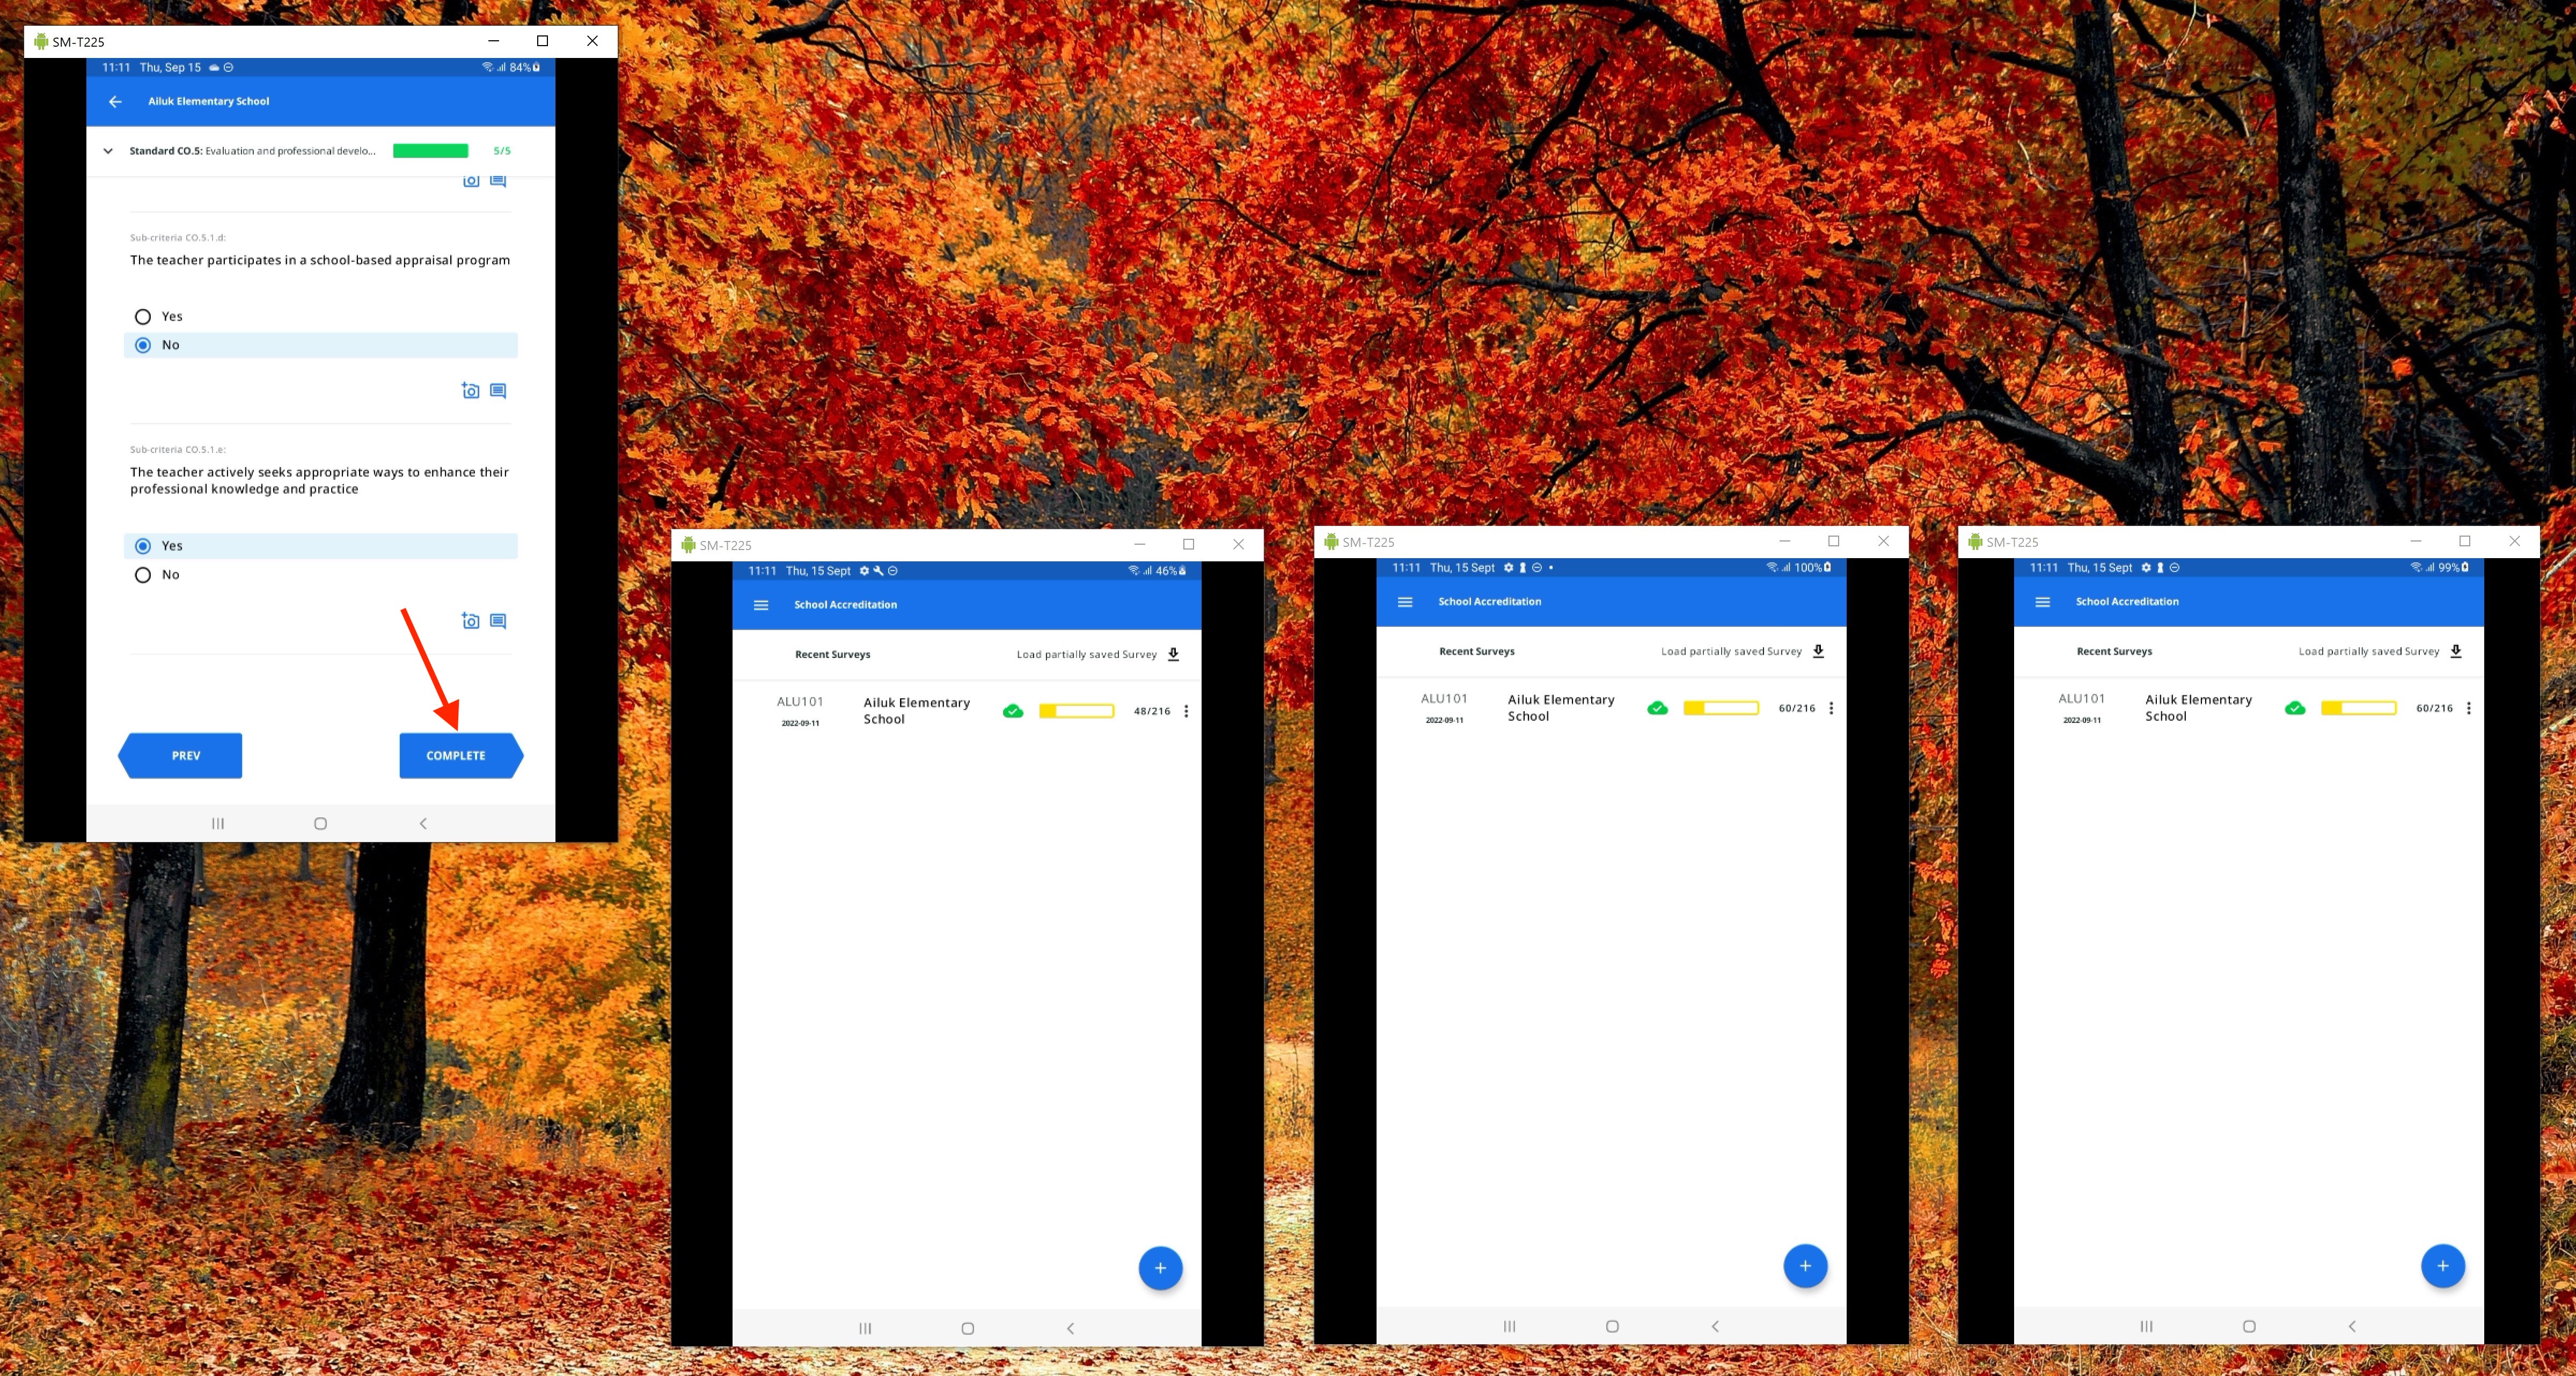
Actually, you still need to go an officially complete it by browsing to the end of the survey on the team leader's tablet and clicking on Complete.
Now, let's say the team has returned from the field and the tablets can be reconnected to the Internet. This is depicted below by enabling the WiFi Internet.
You will then soon notice the syncing will complete and become green as shown below.
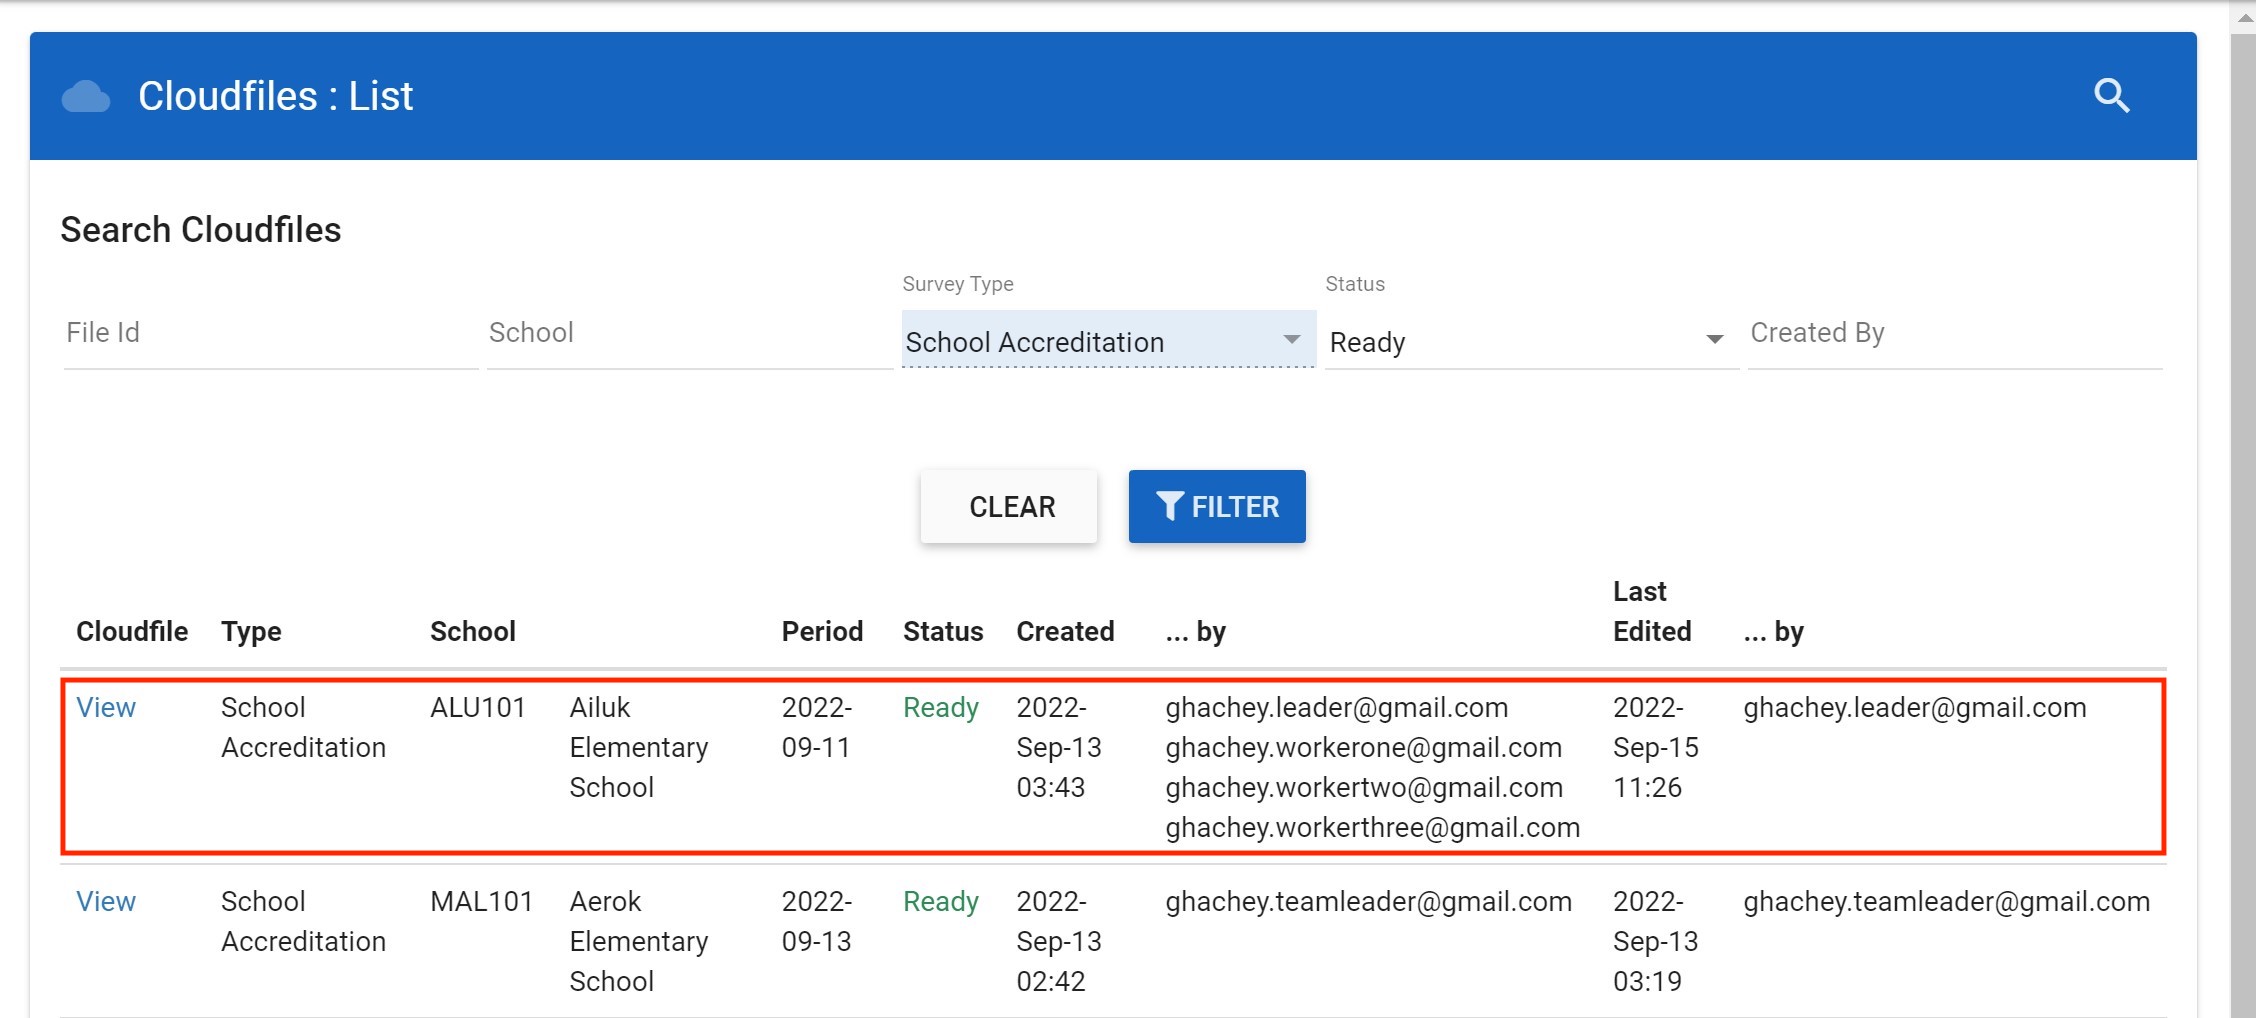
Once they are all synced they are all available within your EMIS web application online as shown below. First we show the three workers with their merged surveys.
Finally, the completed survey (in Ready mode) is the one from the team leader's tablet. This is the one that should be reviewed and finally approved by management.
Note that while this is the cleanest way to use the merging to get to the desired end result of a completed survey it is not the only way support. However, the process outlined here is the cleanest and recommented approach and the only one that is documented.