Table of Contents
PDF eSurvey Systems Administrator Guide
An important part of the deployment is the PDF eSurvey Technologies. This is a little different then the remaining of the deployment as it is not part of the web application but seperate components of the whole Pacific EMIS system.
Getting the eSurveys on the Server
First you will need the actual PDF eSurveys. Those are the PDF used to collect data on the field without a good Internet connection. There are several ways you can get the eSurveys on the server. But one convenient way is to create a bitbucket.org account for the organisation (e.g. in RMI we use the Google email admin@pss.edu.mh for these things). This way you can then install SourceTree by the same company. The advantage of getting the eSurveys this way is that is becomes easy to get newer versions of the surveys by pulling them from the central repository where their changes are managed. If you are new to this sort of technology you could start by reading about version control.
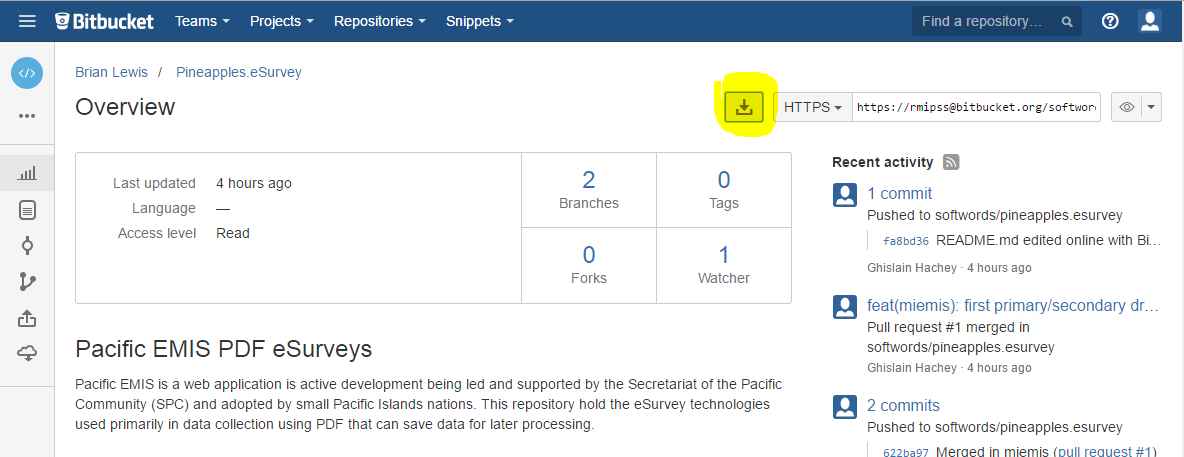
Once you create a bitbucket account you can point your browser to the pineapples.esurvey repository and make sure you are logged in. Then you can “clone” the pineapples.esurvey repository by clicking on the button as shown in the following image and open it in SourceTree.
Then when SourceTree opens you will be prompt with the following where it would be a good idea to edit the location as shown below.
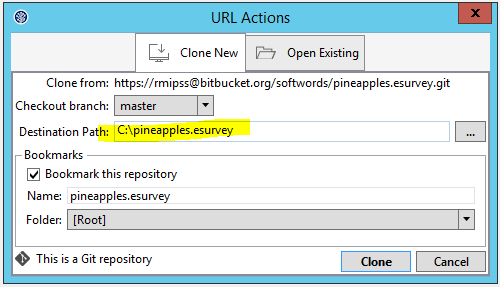
If you followed the steps above all your surveys files should be in C:\pineapples.esurvey\miemis\. You don't really need to keep the SourceTree application open anymore unless you want to pull in latest
survey changes.
PDF eSurvey Technology Manager
Second you need to install the PDF eSurvey Technology Manager. Currently this is a standalone desktop application that must be installed on a machine to “manage” eSurveys, in other words, it aims at doing the following:
- Read existing school surveys from a database (production or a test database)
- Pre-populate surveys with some data before sending them to schools
- Upload completed surveys into the database (again, production or a test database)
The installation should be done one time on the machines of the data entry officers. The first step is to download the PDF eSurvey Manager (
- P:\SIEMIS\eSurveys\intray
- P:\SIEMIS\eSurveys\outtray
- P:\SIEMIS\eSurveys\pre-processing
- P:\SIEMIS\eSurveys\template
Double click to install it, you should see the following screenshot.
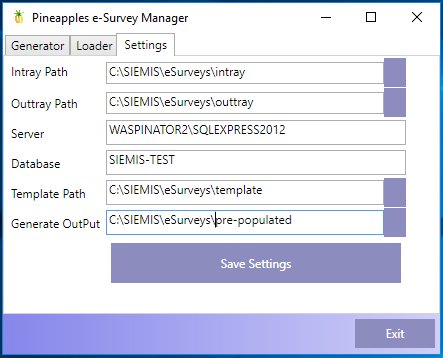
Start with the configuration as explained below.
- Intray Path: is where completed PDF eSurveys should be dumped
- Outtray Path: is where the tool puts the PDF eSurveys once that have been successfully processed and entered in the database
- Server: is the instance name of the SQL Server
- Database: database is the name of the database
- Template Path: should whole an untouched copy of the PDF eSurveys (e.g. Examples)
- Generate OutPut: is where the PDF eSurveys are prepopulated with some data before being sent to schools for completion
With the settings saved you should see something like the following when starting the tool. This is a list of the current surveys by school already in the database and shows under the Generator tab.
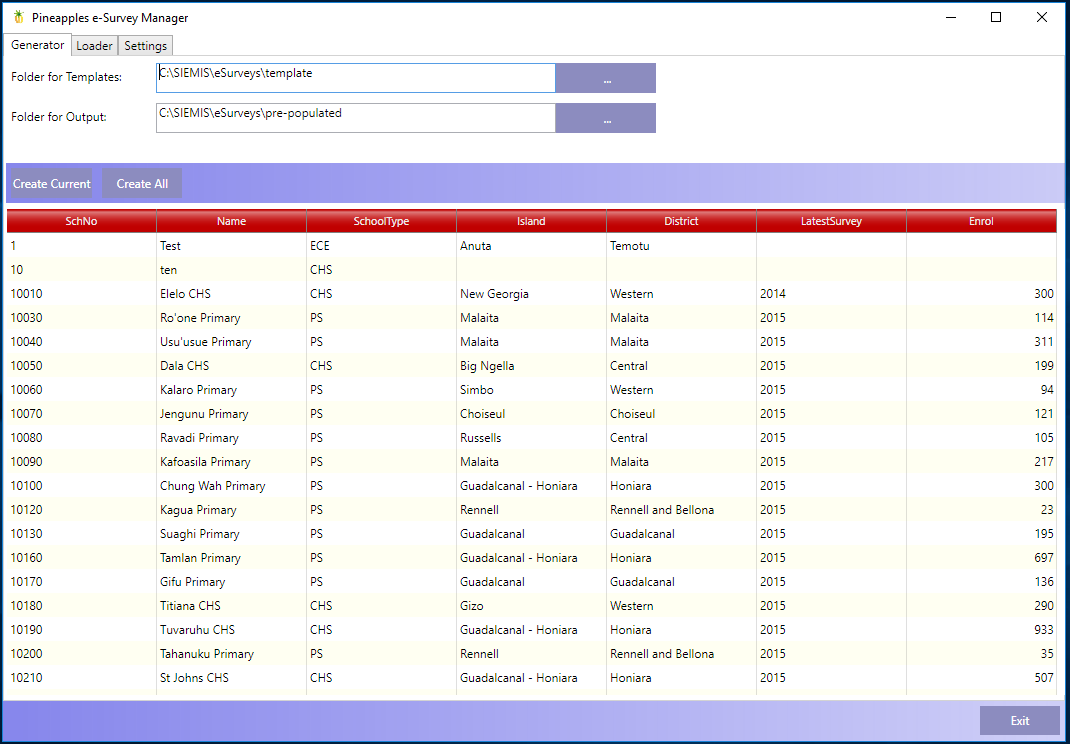
Now is a good time to browse the other tab called Loader. The Settings tab is the same as the one on startup.
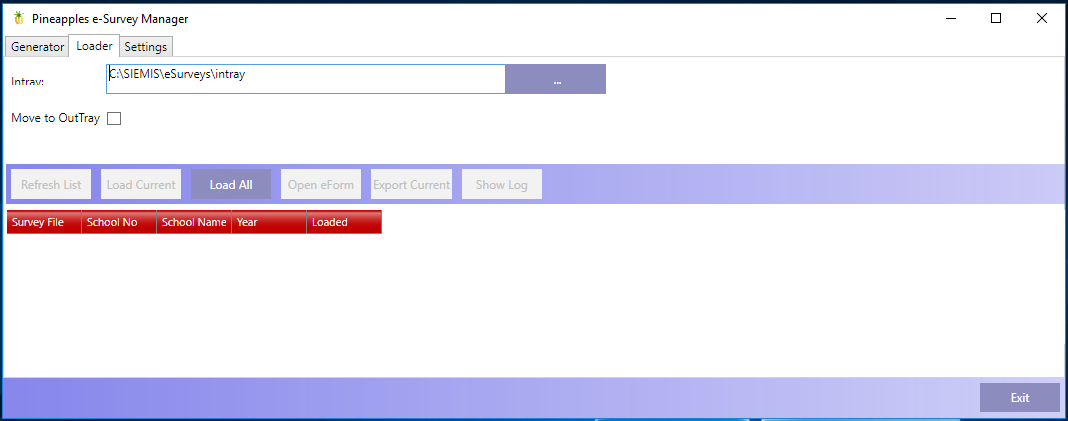
How to use this tool is documented in the User Guide.