Table of Contents
Pacific EMIS Education Survey Tool Android App Systems Administrator Guide
Setting up the Tablet
The tablet can be setup generally in two different ways:
- Using a Google G Suite email account if you have the service with Google. This is a more advanced corporate setup that enables centralized control of the tablets. This is normally the preferred method but it a bit more involved and your Google G Suite subscriptions may or may not support Device Policy.
- Using a dedicated system email account. For example, you could create a Gmail account just for this called myorgname.staffname@gmail.com. This is simpler setup but the tablets are not centrally managed and secured. Each user would need normal “personal” Gmail account to keep an audit trail.
Then for any school inspector that will be conducting surveys with the app you create a new user with their work or personal email (depending on your setup above). A tablet can generally have more then one user but you would need to install the app for each user also. Ideally, a single work tablet is assigned to a single staff who is responsible for it.
To start with a clean state you should do a Factory Reset of the Android tablet before you create your owner user with admin email.
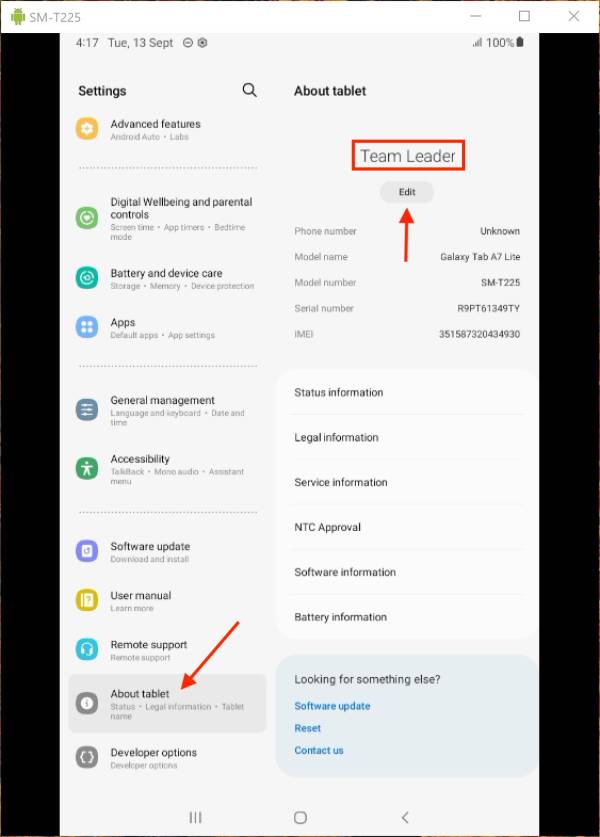
Setting a Tablet Name
While not required this can become useful by more clearly identifying the tablet. Especially useful when using the advanced merging offline feature of the app. It is recommended to configure the name of the tablet with the name of the inspector that will be using it. For example, if it is used by Mr. Team Leader with an email address like team.leader [at] gmail [dot] com.
Google G Suite Email Account Setup
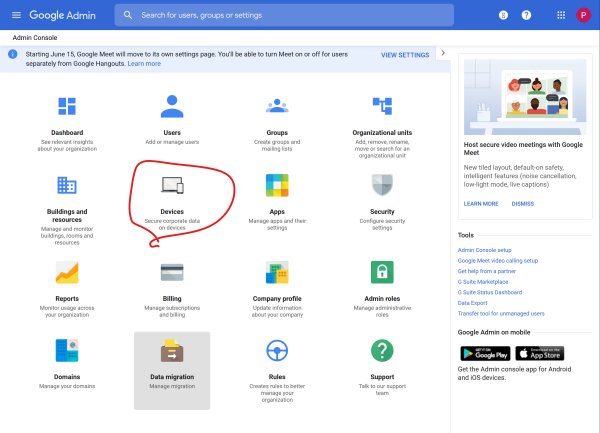
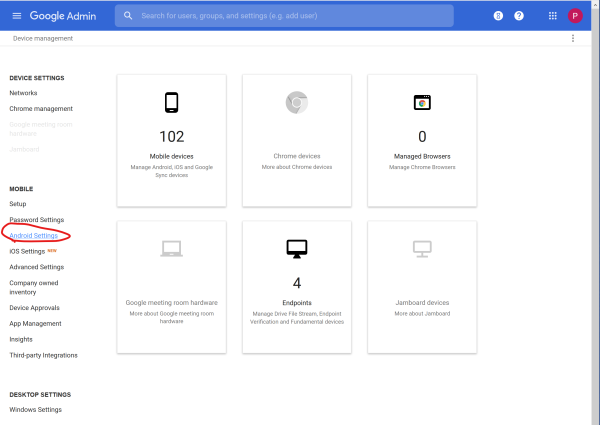
If you are using Google G Suite the first thing to do is allow installation from unknown apps has a policy. You do this like follows.
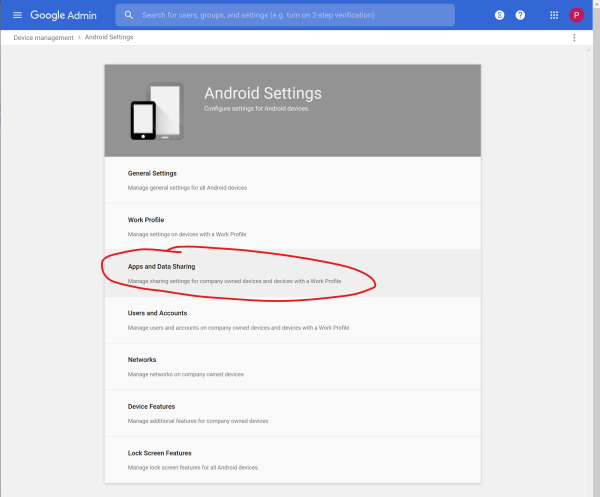
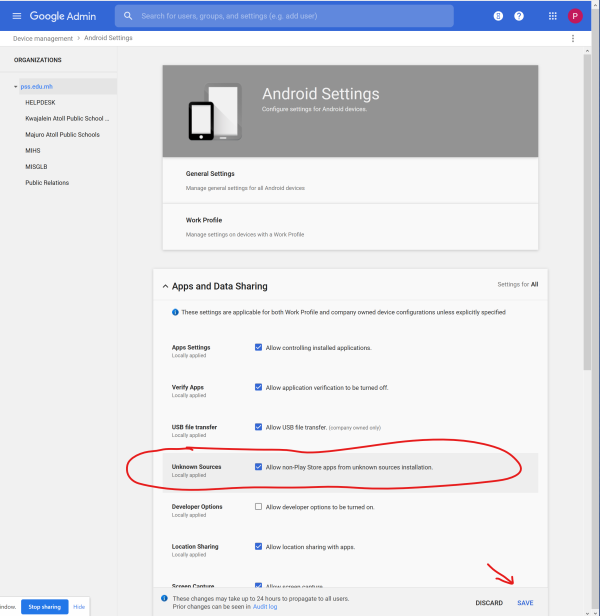
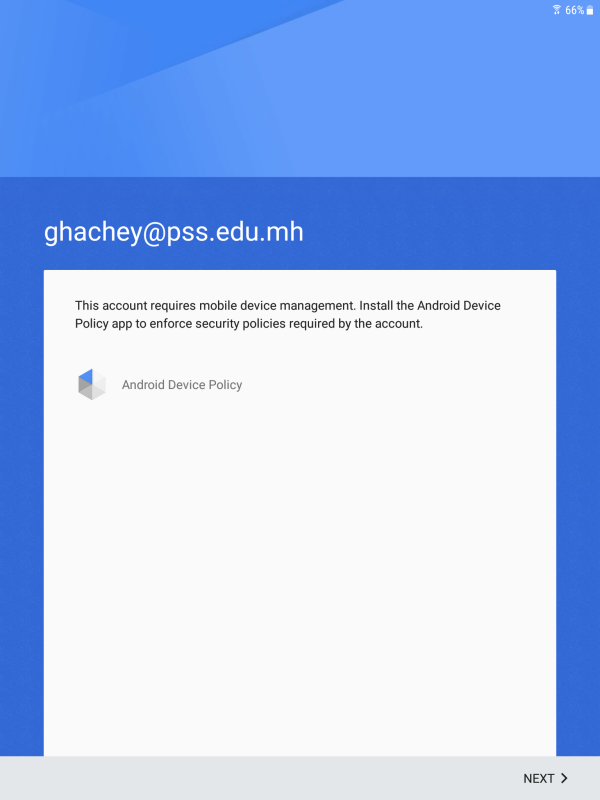
Then you create your staff user on the tablet just as you would create a normal user. But if correctly using your Google G Suite user accounts you should see the following at some point in the initial setup. This means you on a the right track. Simply follow the steps to complete the work tablet for this staff.
Then request a Pacific EMIS member to share the Education Survey App into your staff's Google Drive. You are ready to install the app for that user.
Google Normal Email Account
If you are using a standard Google account the setup will be as usual with an Android device. Simply create a user for your new staff and install that app.
Installing the app for a new inspector
Let's say you have a new inspector called John Doe that will be tasked with conducting surveys. You have already created the user on the tablet as per the previous section. The app will be shared with the new user by a member of the Pacific EMIS team. You can access it in your Google Drive as shown below.
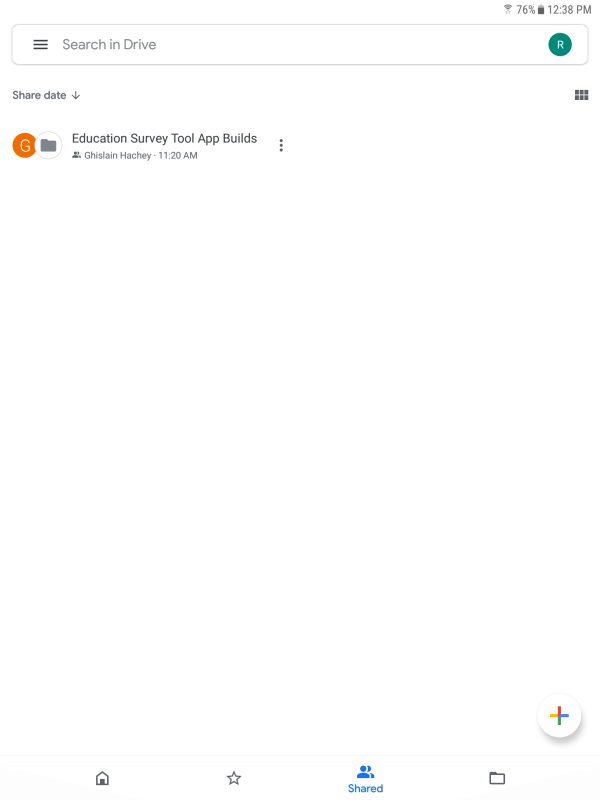
You need to locate the most recent release or the one you are told to install. Typically, it will be the one as shown below and not in the release archive folders.
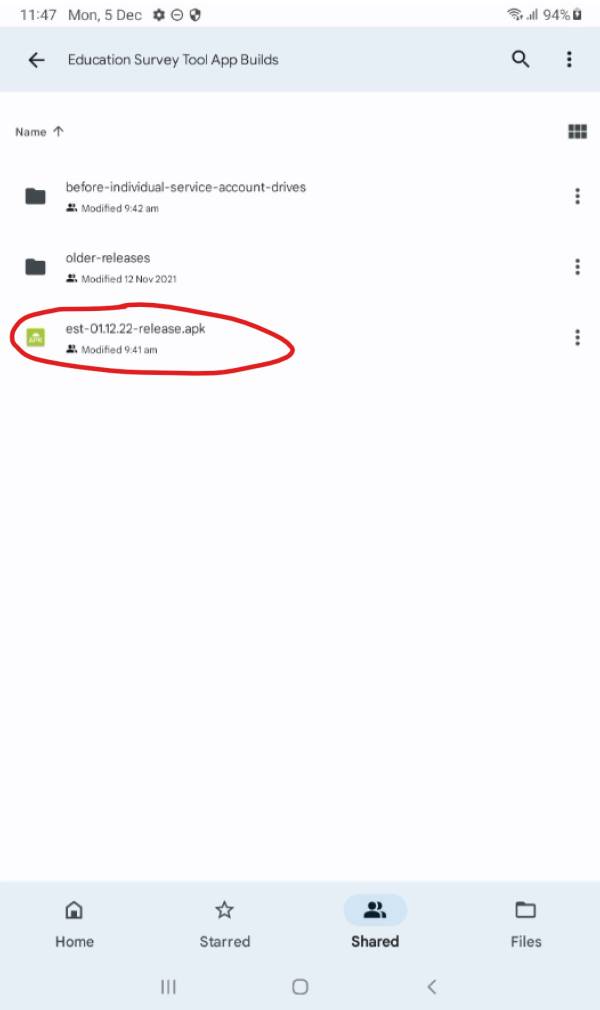
Click on the apk file to install it.
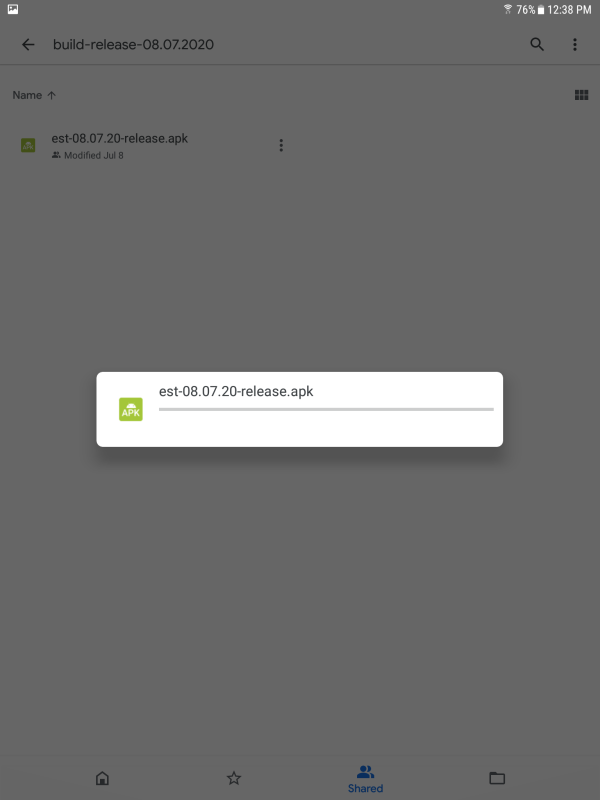
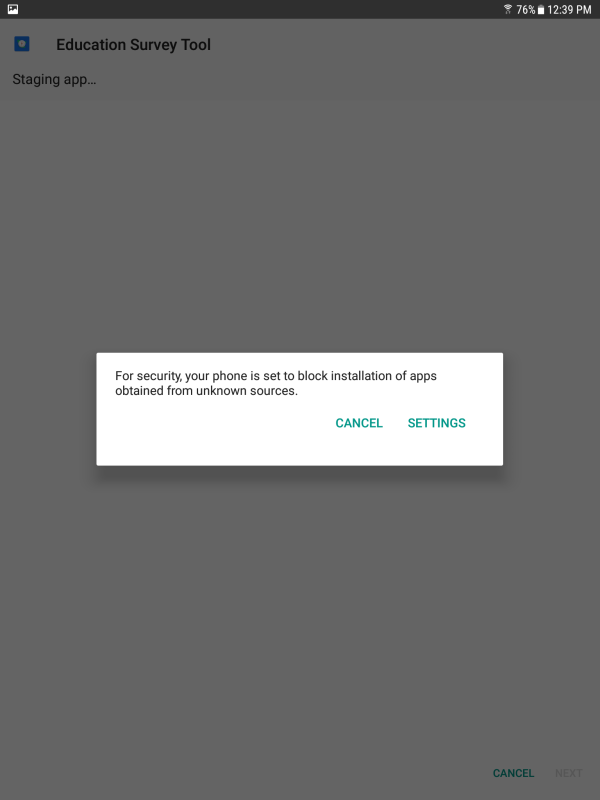
You will be prompt to accept installation from unknown sources.
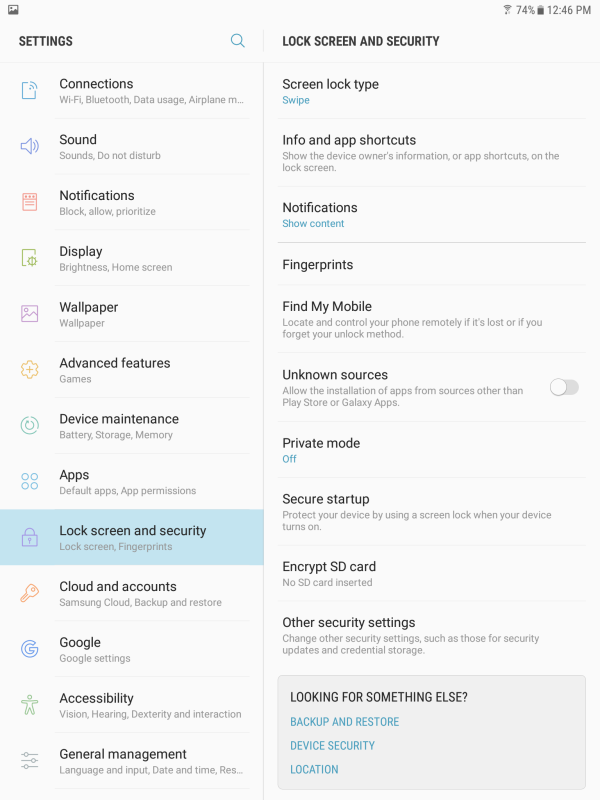
You enable install from unknown source setting.
Then you can proceed with the app installation as shown in following three photos.
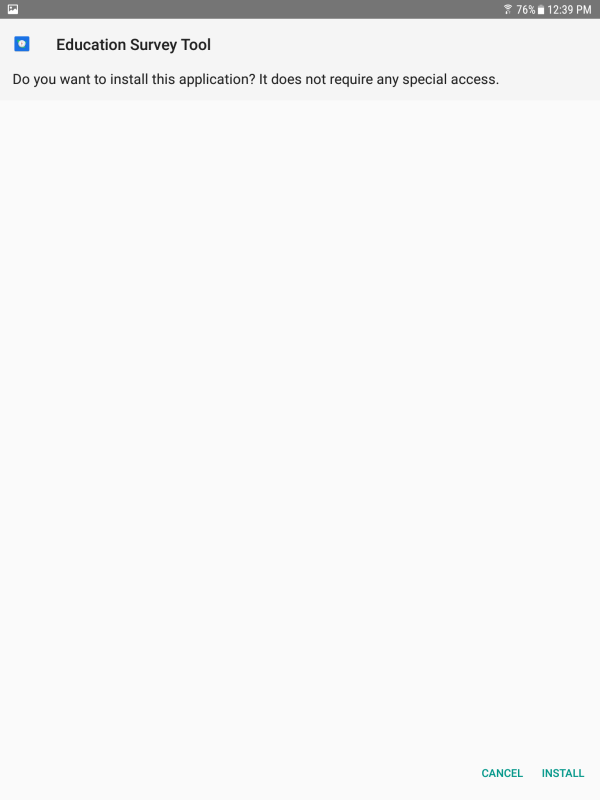
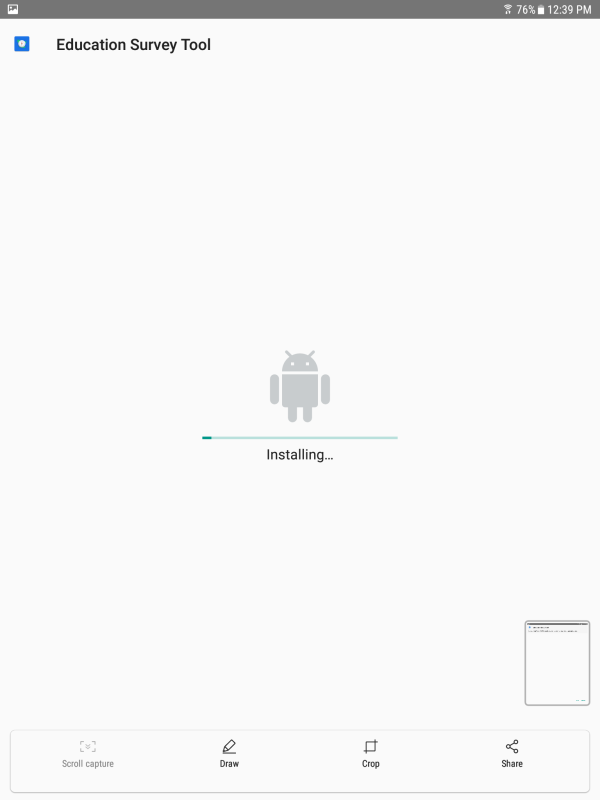
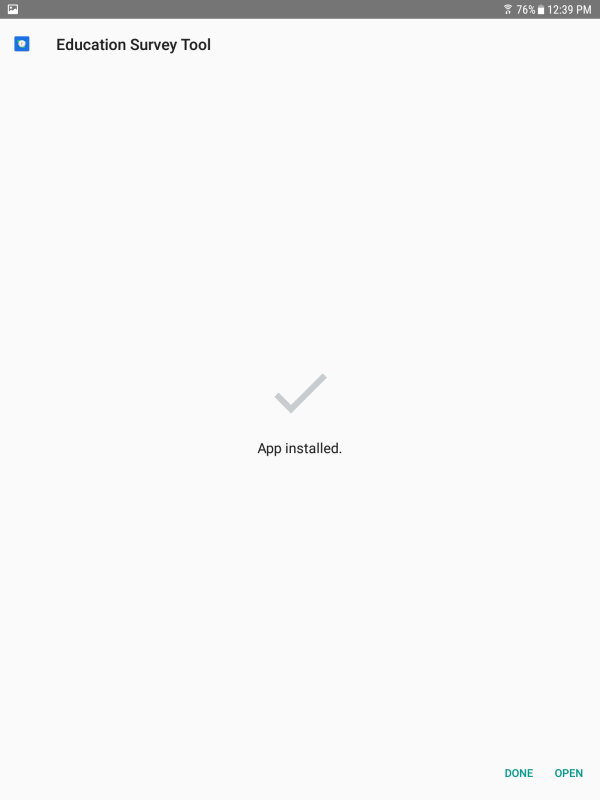
Start the Pacific EMIS Education Survey Tool app and give it all permissions requested.
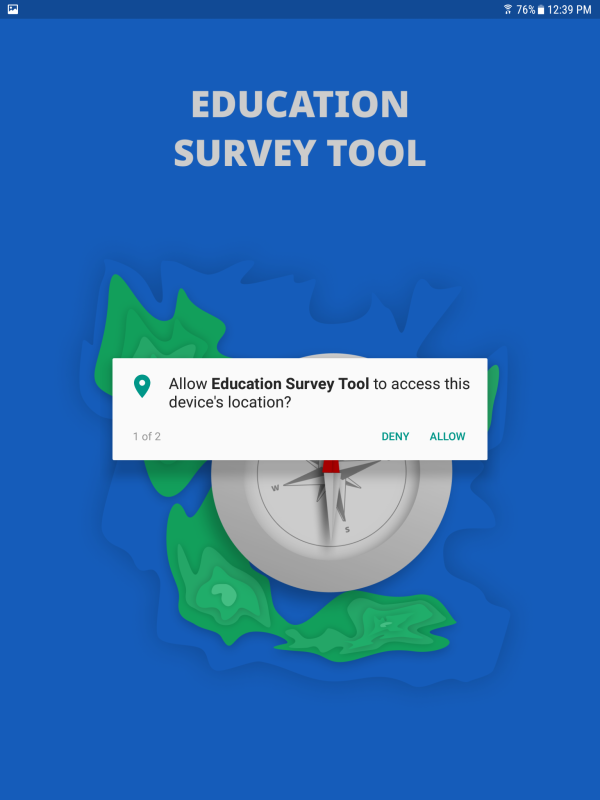
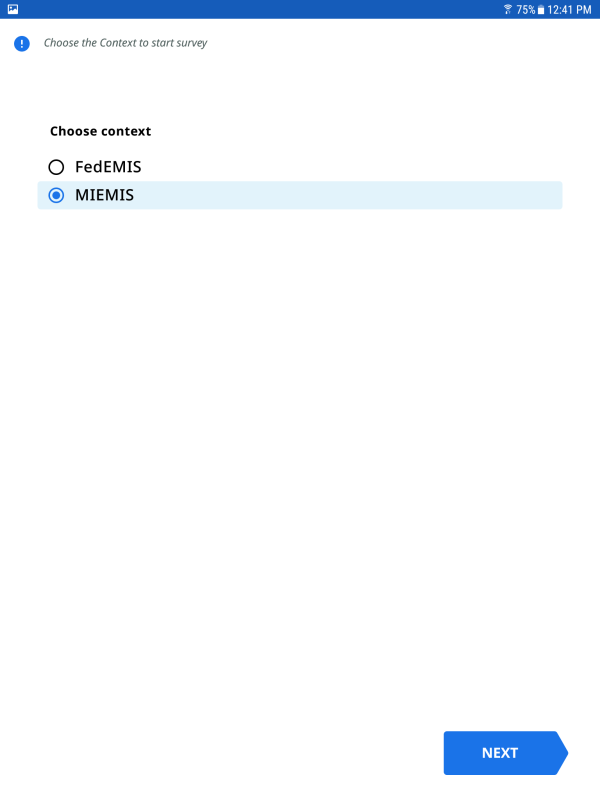
Select the context (name of your EMIS) and proceed.
Click on the link to login with Google account. This will link the new staff email with all the work done in the app and provide an audit trail of all data collected.
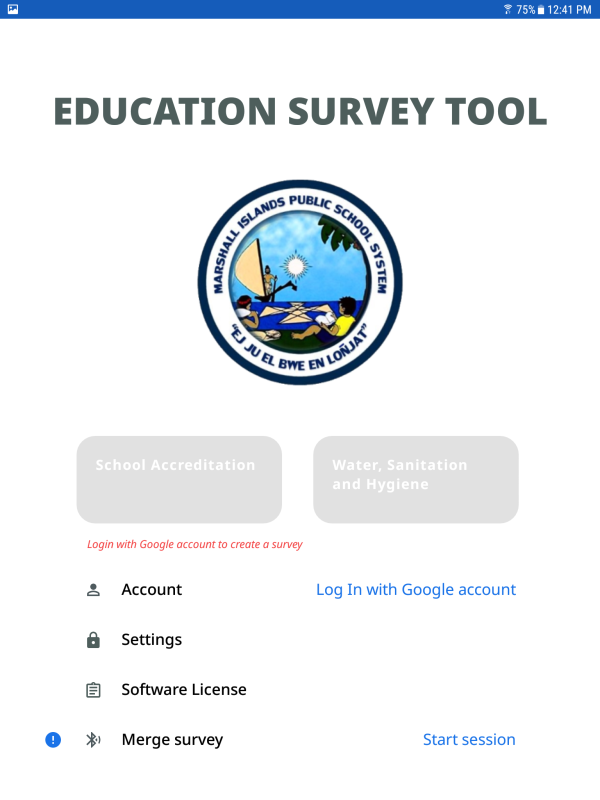
The installation and basic setup is complete
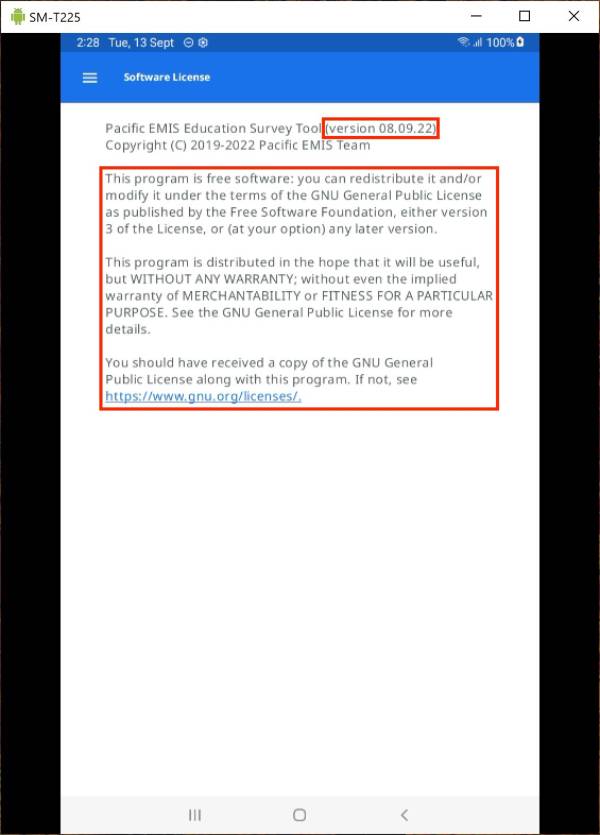
Verifying Software Version and License
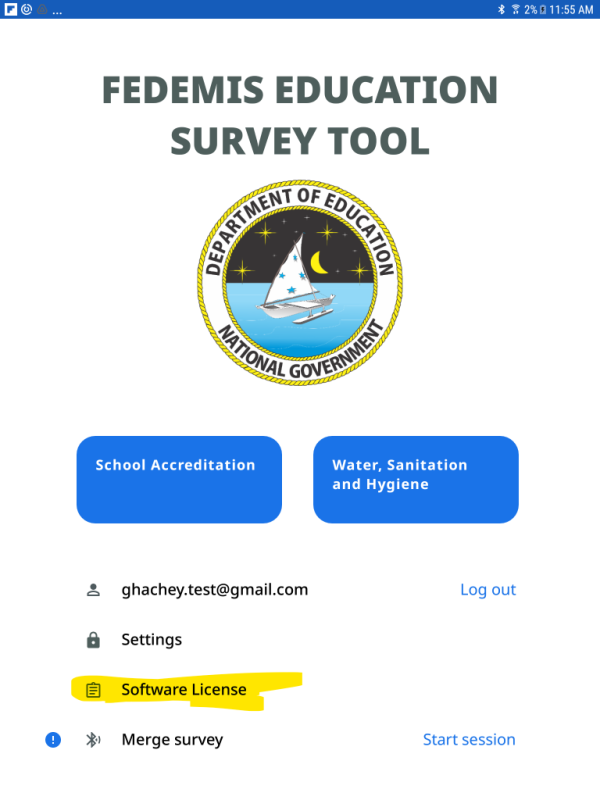
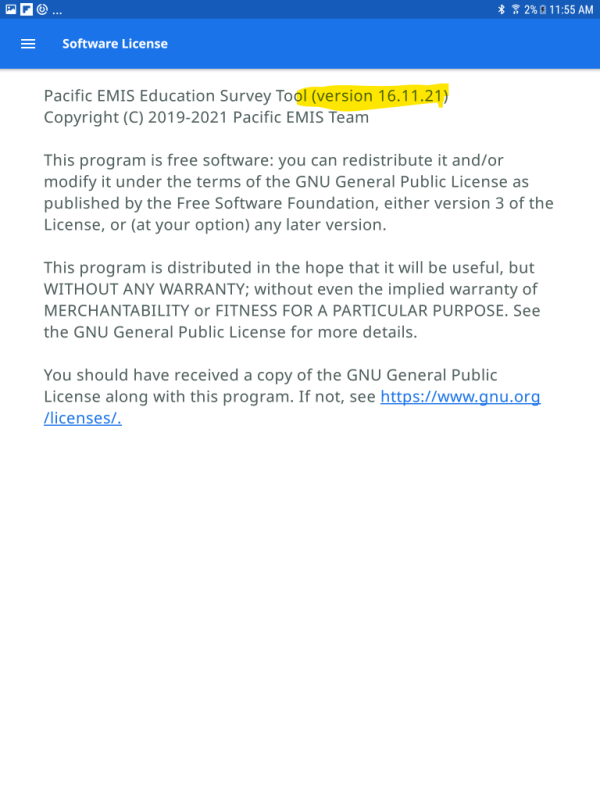
From the home page click on Software License and you should get the page below.
Configuration
There are two ways to configure the app:
- Locally by clicking on the settings in the home page. You will need the Master password.
- Centralized configuration online using Firebase.
Local Settings
Local settings configure a single tablet and app, the one you are in. You go into settings from the home page by clicking on Settings.
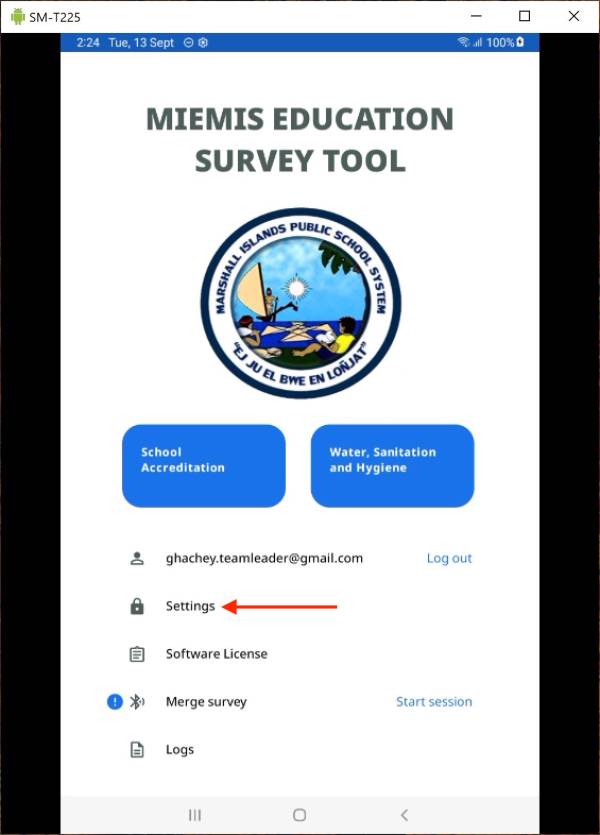
You will be prompt for the master password then Confirm.
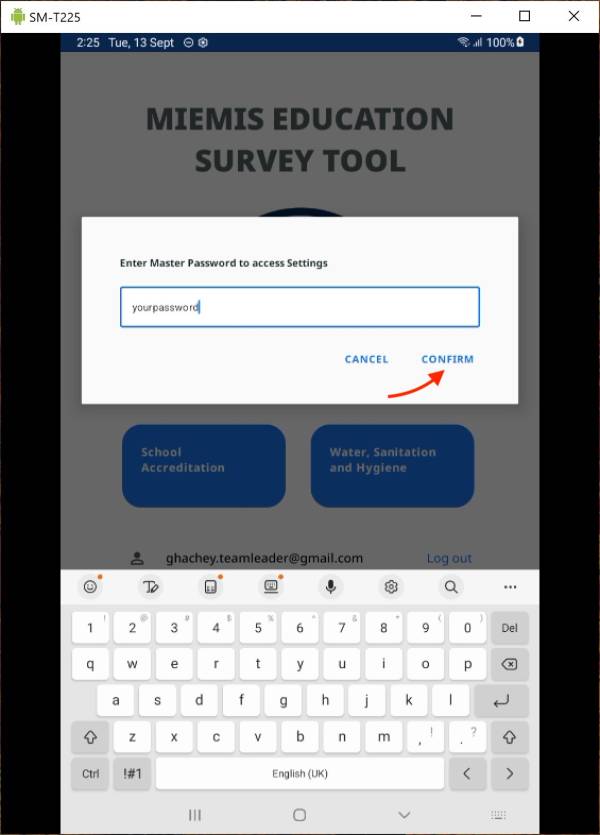
There are many settings most of which will have been set automatically through the remote centralized settings. However, you typically use the local settings to change a tablet's Operating mode: to make an individual app go into Production.
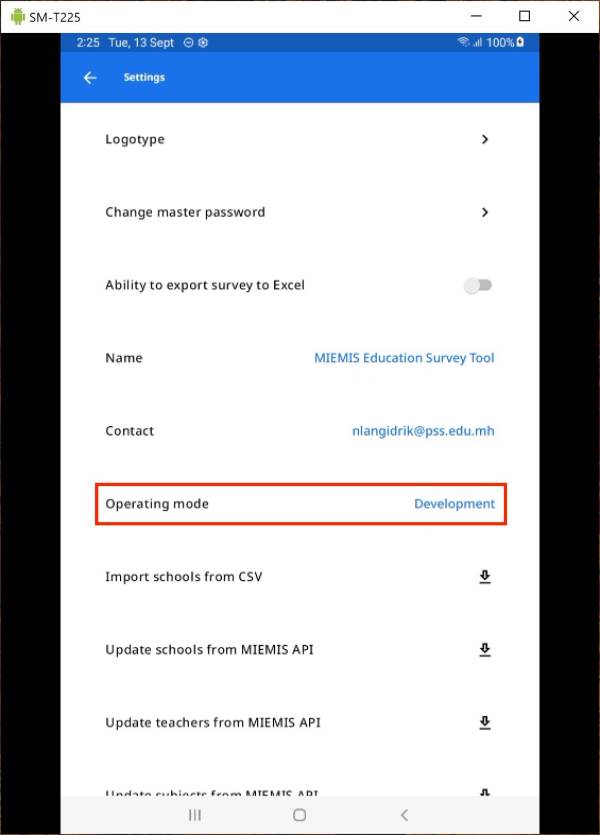
With this setting you can flip from Development (testing/training/etc.) to Production (real use on-the-ground).
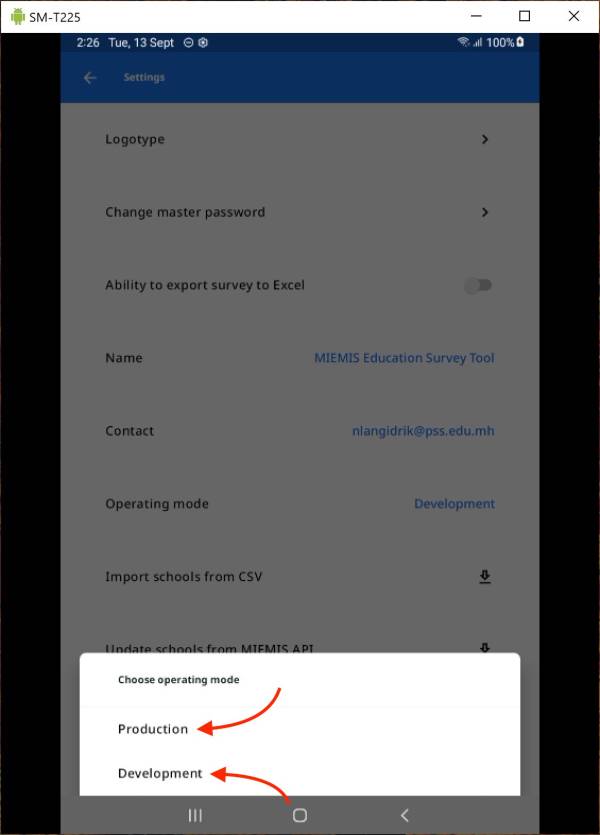
This means all the surveys created on the tablet after you put it into Production will be made available into the Production EMIS of your country. When the tablet is in Development mode all the created surveys will be available in the Pacific EMIS on the software developers workstations for testing (which you may be given access also if needed.
Other important features you can find in the settings are the Update data shown below. You only need to do this on the tablet at the installation once. It downloads from the Pacific EMIS database the list of schools, teachers and subjects for use in dropdowns fields in surveys to improve data quality. You can also click on those if you know you data has changed (e.g. new teachers).
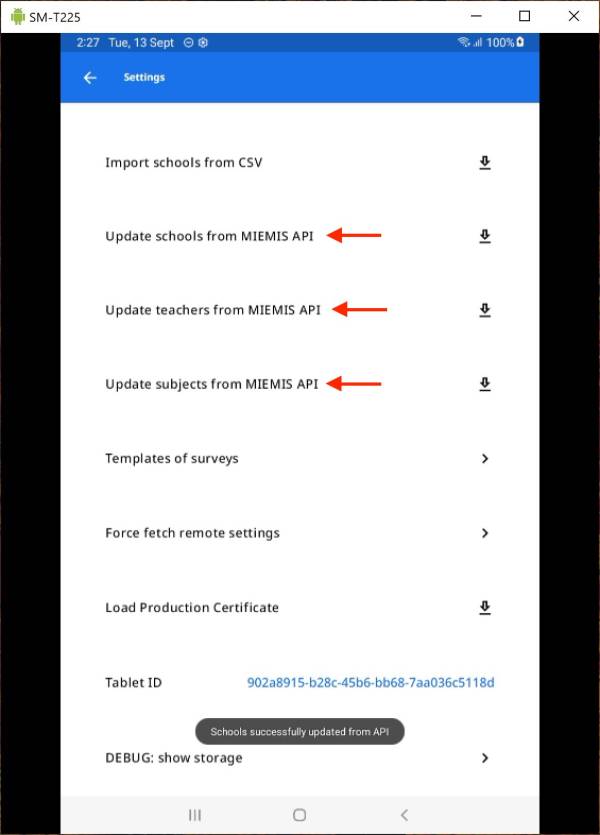
Other settings are described below. They are typically set centrally and remotely but it can be overridden locally on individual tablets:
- Logotype: is the logo on the home page of the app.
- Change master password: password used for operations not normally done by normal users.
- Name: title on the home page
- Contact: email of the data manager
- Operating mode: important and most commonly configured locally on tablets (see above)
- Import schools from CSV: a legacy settings to load schools into the tablet (superseded by the Update schools from EMIS API below)
- Update schools from EMIS API: loads all the schools into the tablet with a programmatic call to the EMIS backend
- Update teachers from EMIS API: loads all the teachers into the tablet with a programmatic call to the EMIS backend
- Update subjects from EMIS API: loads all the subjects into the tablet with a programmatic call to the EMIS backend
- Templates of surveys: view the structure of the currently loaded surveys
- Load Production Certificate: a cryptographic key used to securely communicate with the Pacific EMIS cloud account for syncing data. Should not be change for proper operation of the system.
- Tablet ID: a unique identifier of the tablet the app is running on. A read only setting.
- DEBUG: show storage: view the cloud account files useful mostly for administrators and developers.
Centralized Configuration
Most settings are better configured centrally has it will be much easier: all your tablets will sync and get the latest configuration. For example, if you want to change the contact person you change it centrally and it gets synced to all tablets. This is done using Firebase, a Google service. Anyone that was given the permission can access it at https://console.firebase.google.com/u/2/
For a very brief overview of how to manage the configuration in Firebase refer to Firebase Configuration
Details of the configuration can be found at Pacific EMIS Education Survey Tool Android App Configuration
Troubleshooting
Verifying Version Installed
When seeing errors it is important to know how to get the version of the app that is installed. This is how you do it.
Re-installing app may trigger error
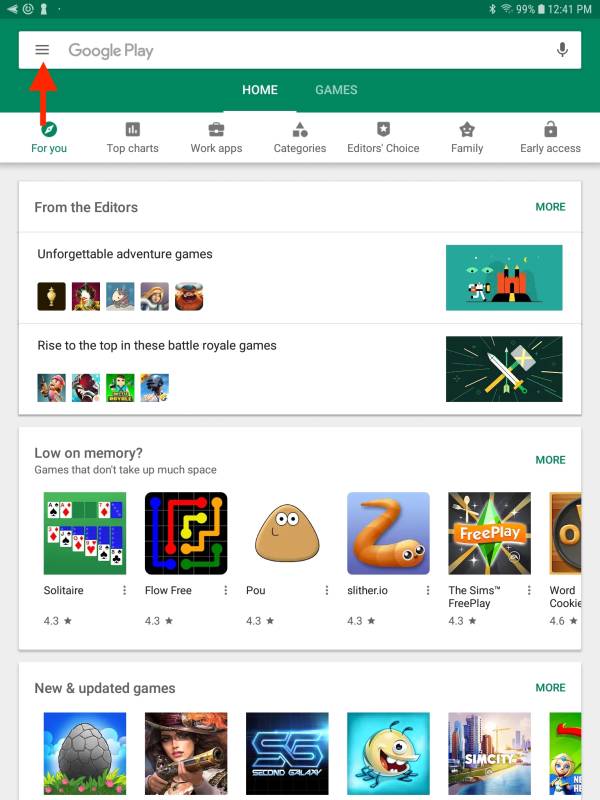
On latest Android you may get an error if you uninstall the app and try to re-install it. This is because of an additional protection in Google Playstore. Here is how to remove error.
First go into the Google Playstore and click on the menu as shown below.
Then click on play protect as shown below.
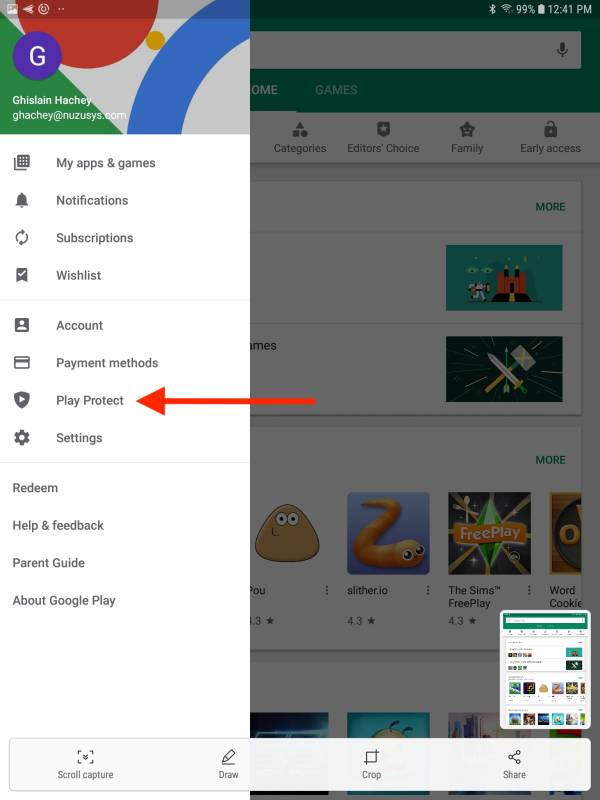
Then click on the settings button top right as shown below.
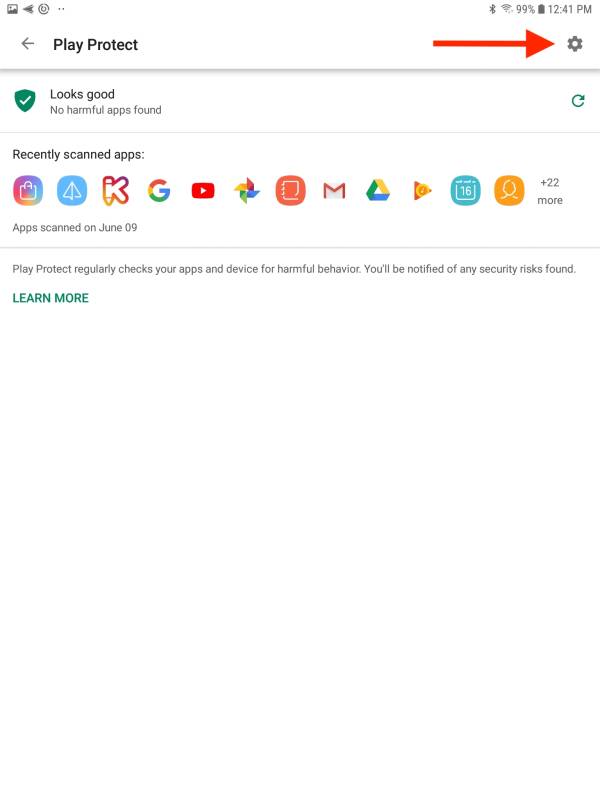
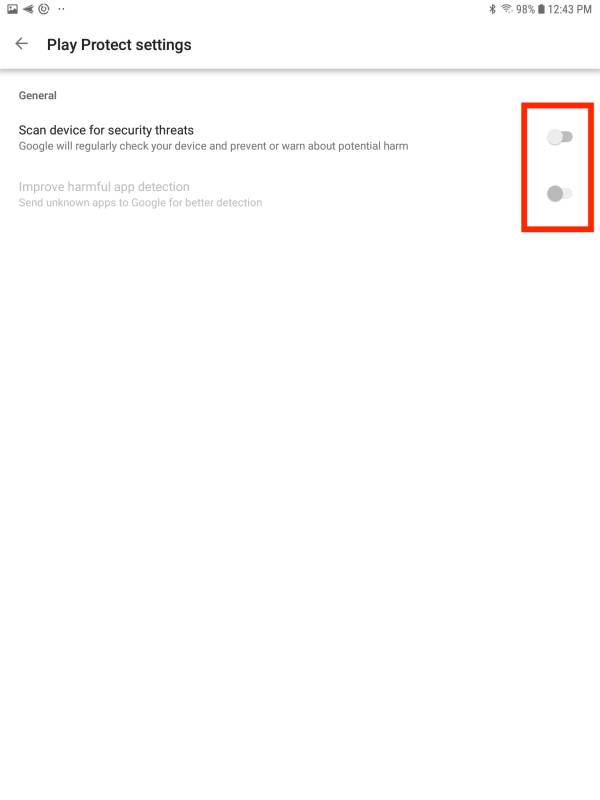
Then turn off the scan as shown below.
